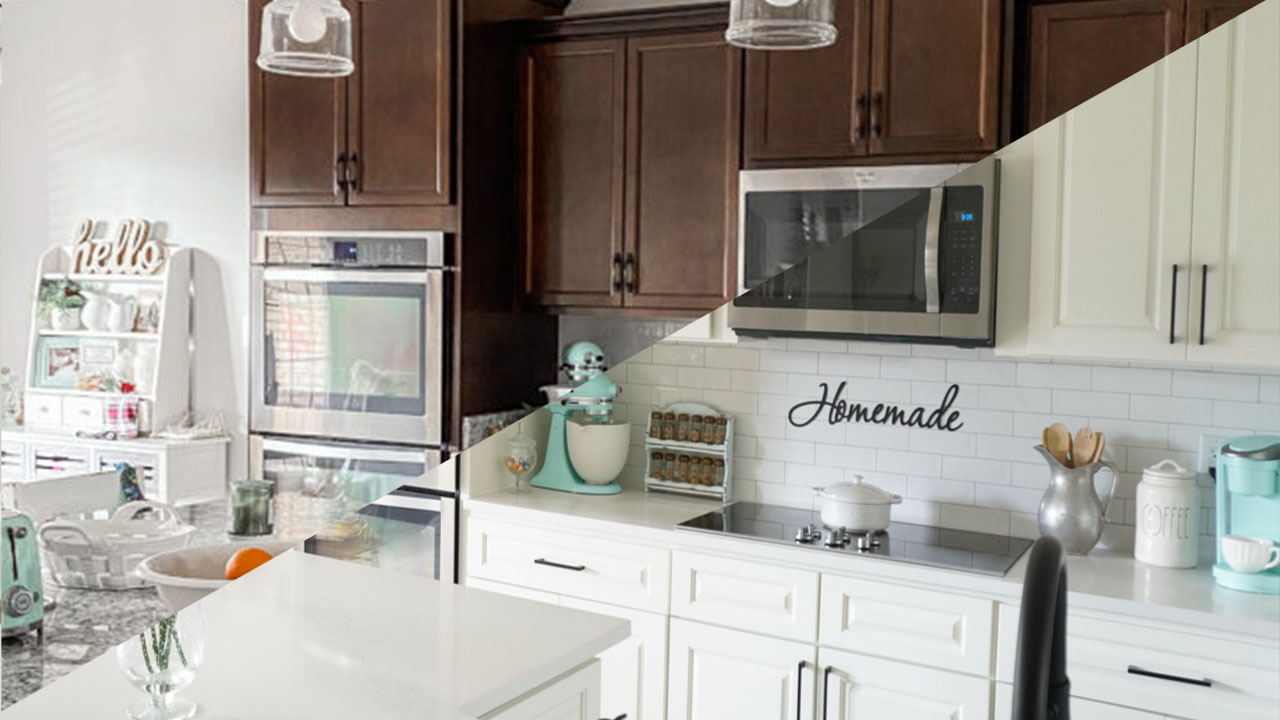
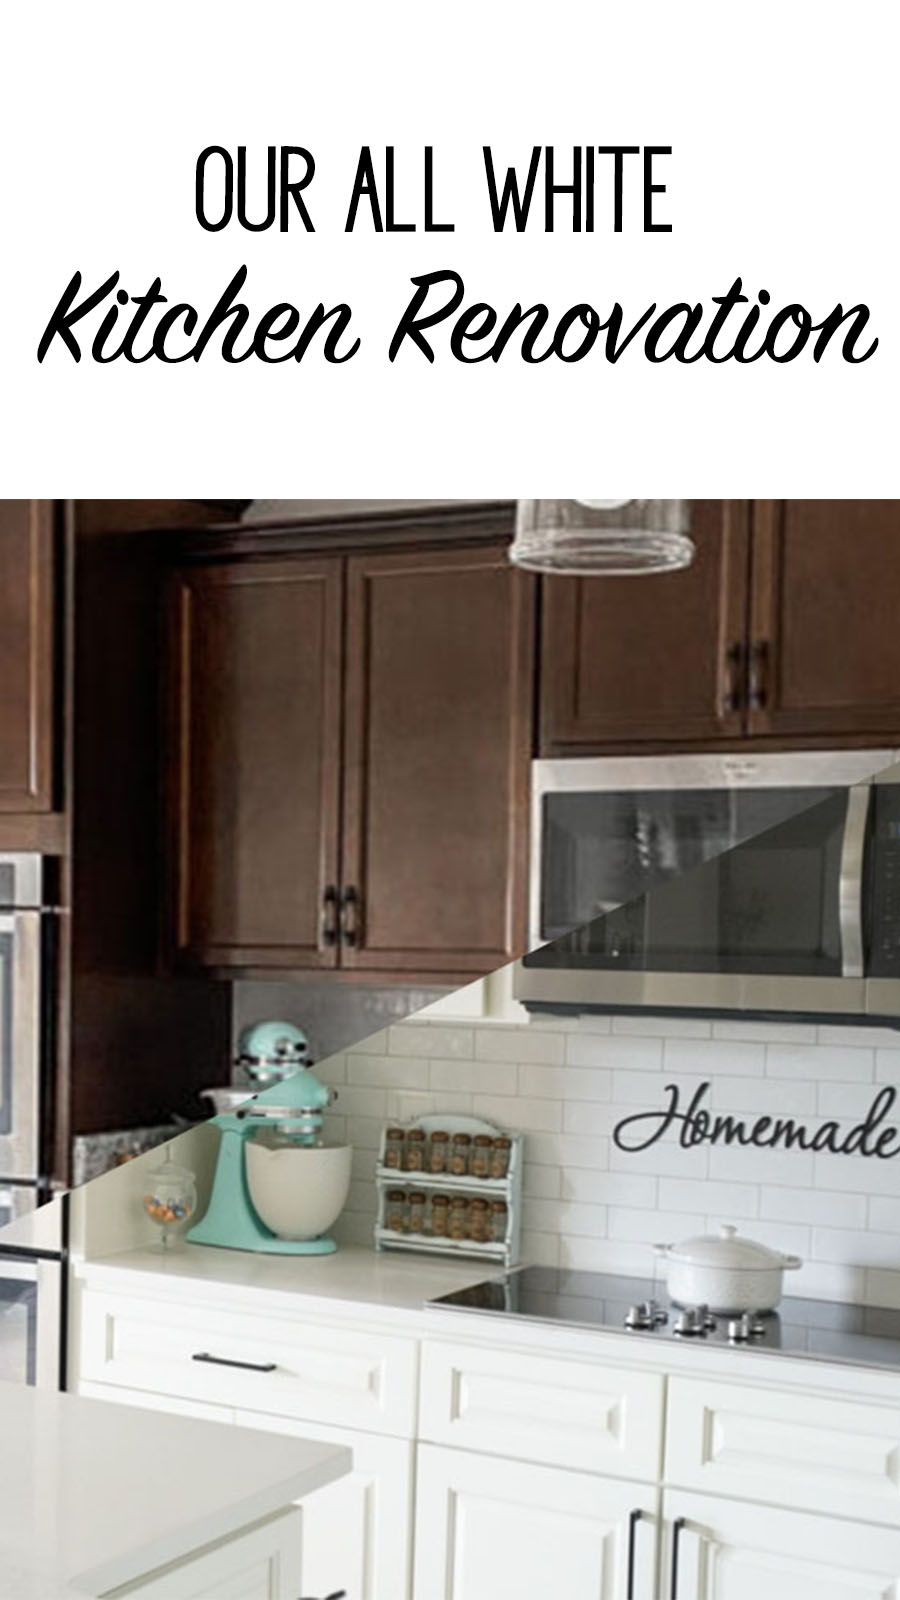
Hi friends! Welcome back to my Blog! Oh my goodness this Blogpost has been a long time coming. This was our very first renovation, and it was a pretty big one. I am so excited to share Our All White Kitchen Renovation with you!
I am going to take you guys from the very beginning of the process until the finished product, so hang in there until the end, because it is totally worth it for the Before & After!
The Before
Let’s start with how our Kitchen looked prior to the renovation. I had gotten quite a few questions from followers on Instagram when we started this process because our home is actually fairly new, and I did in fact choose all of the materials we put into our home when it was built. HOWEVER. When we built our home we were at the top of our budget, and unfortunately, we were unable to afford more than a couple of small upgrades. The Kitchen was not one of those.
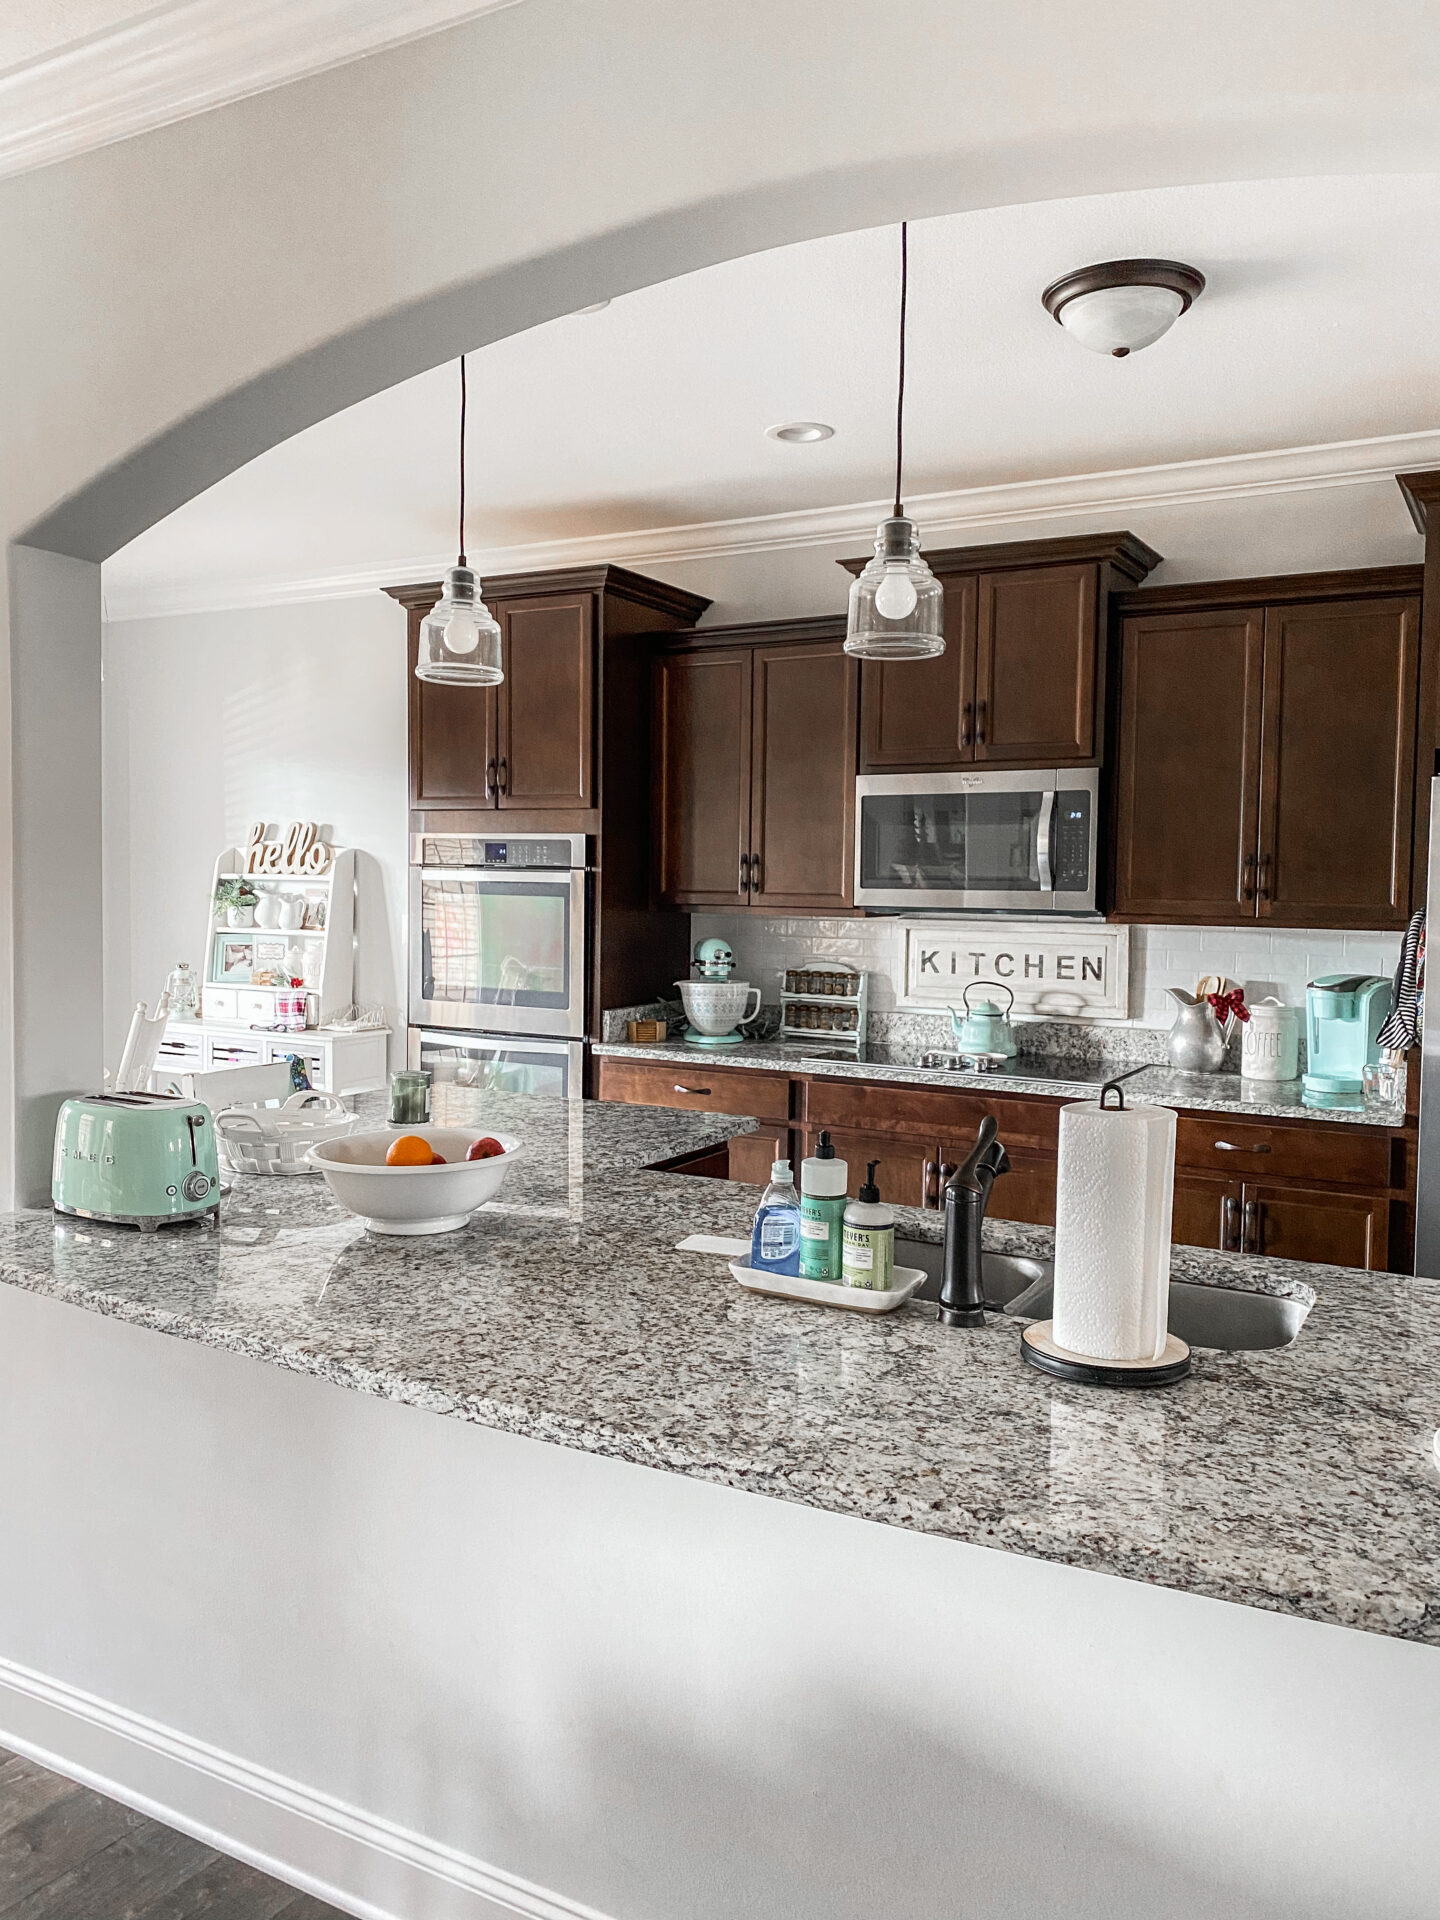
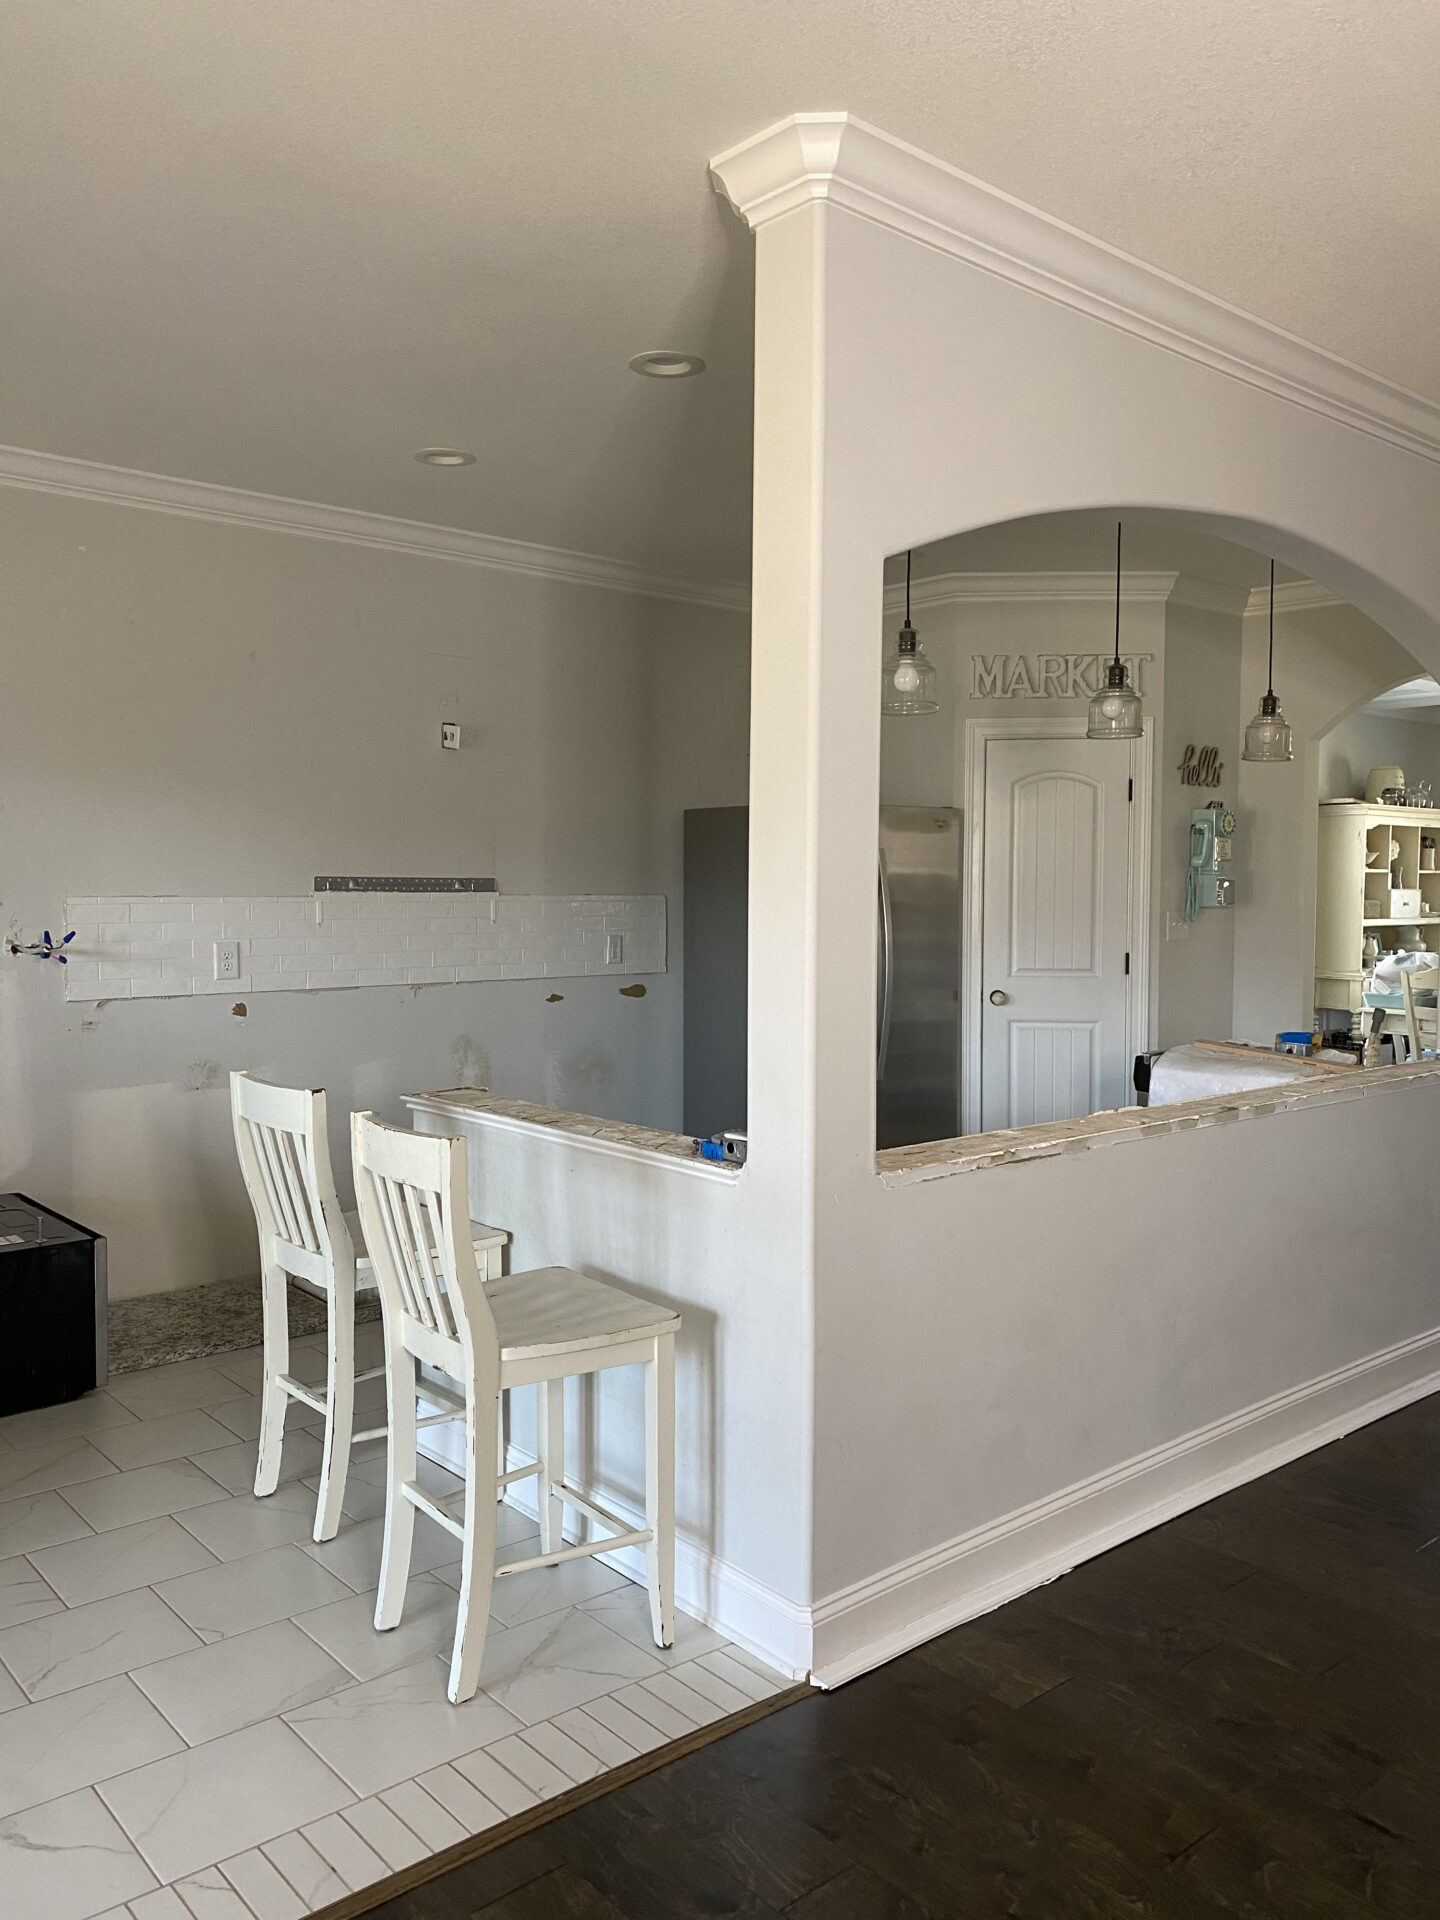
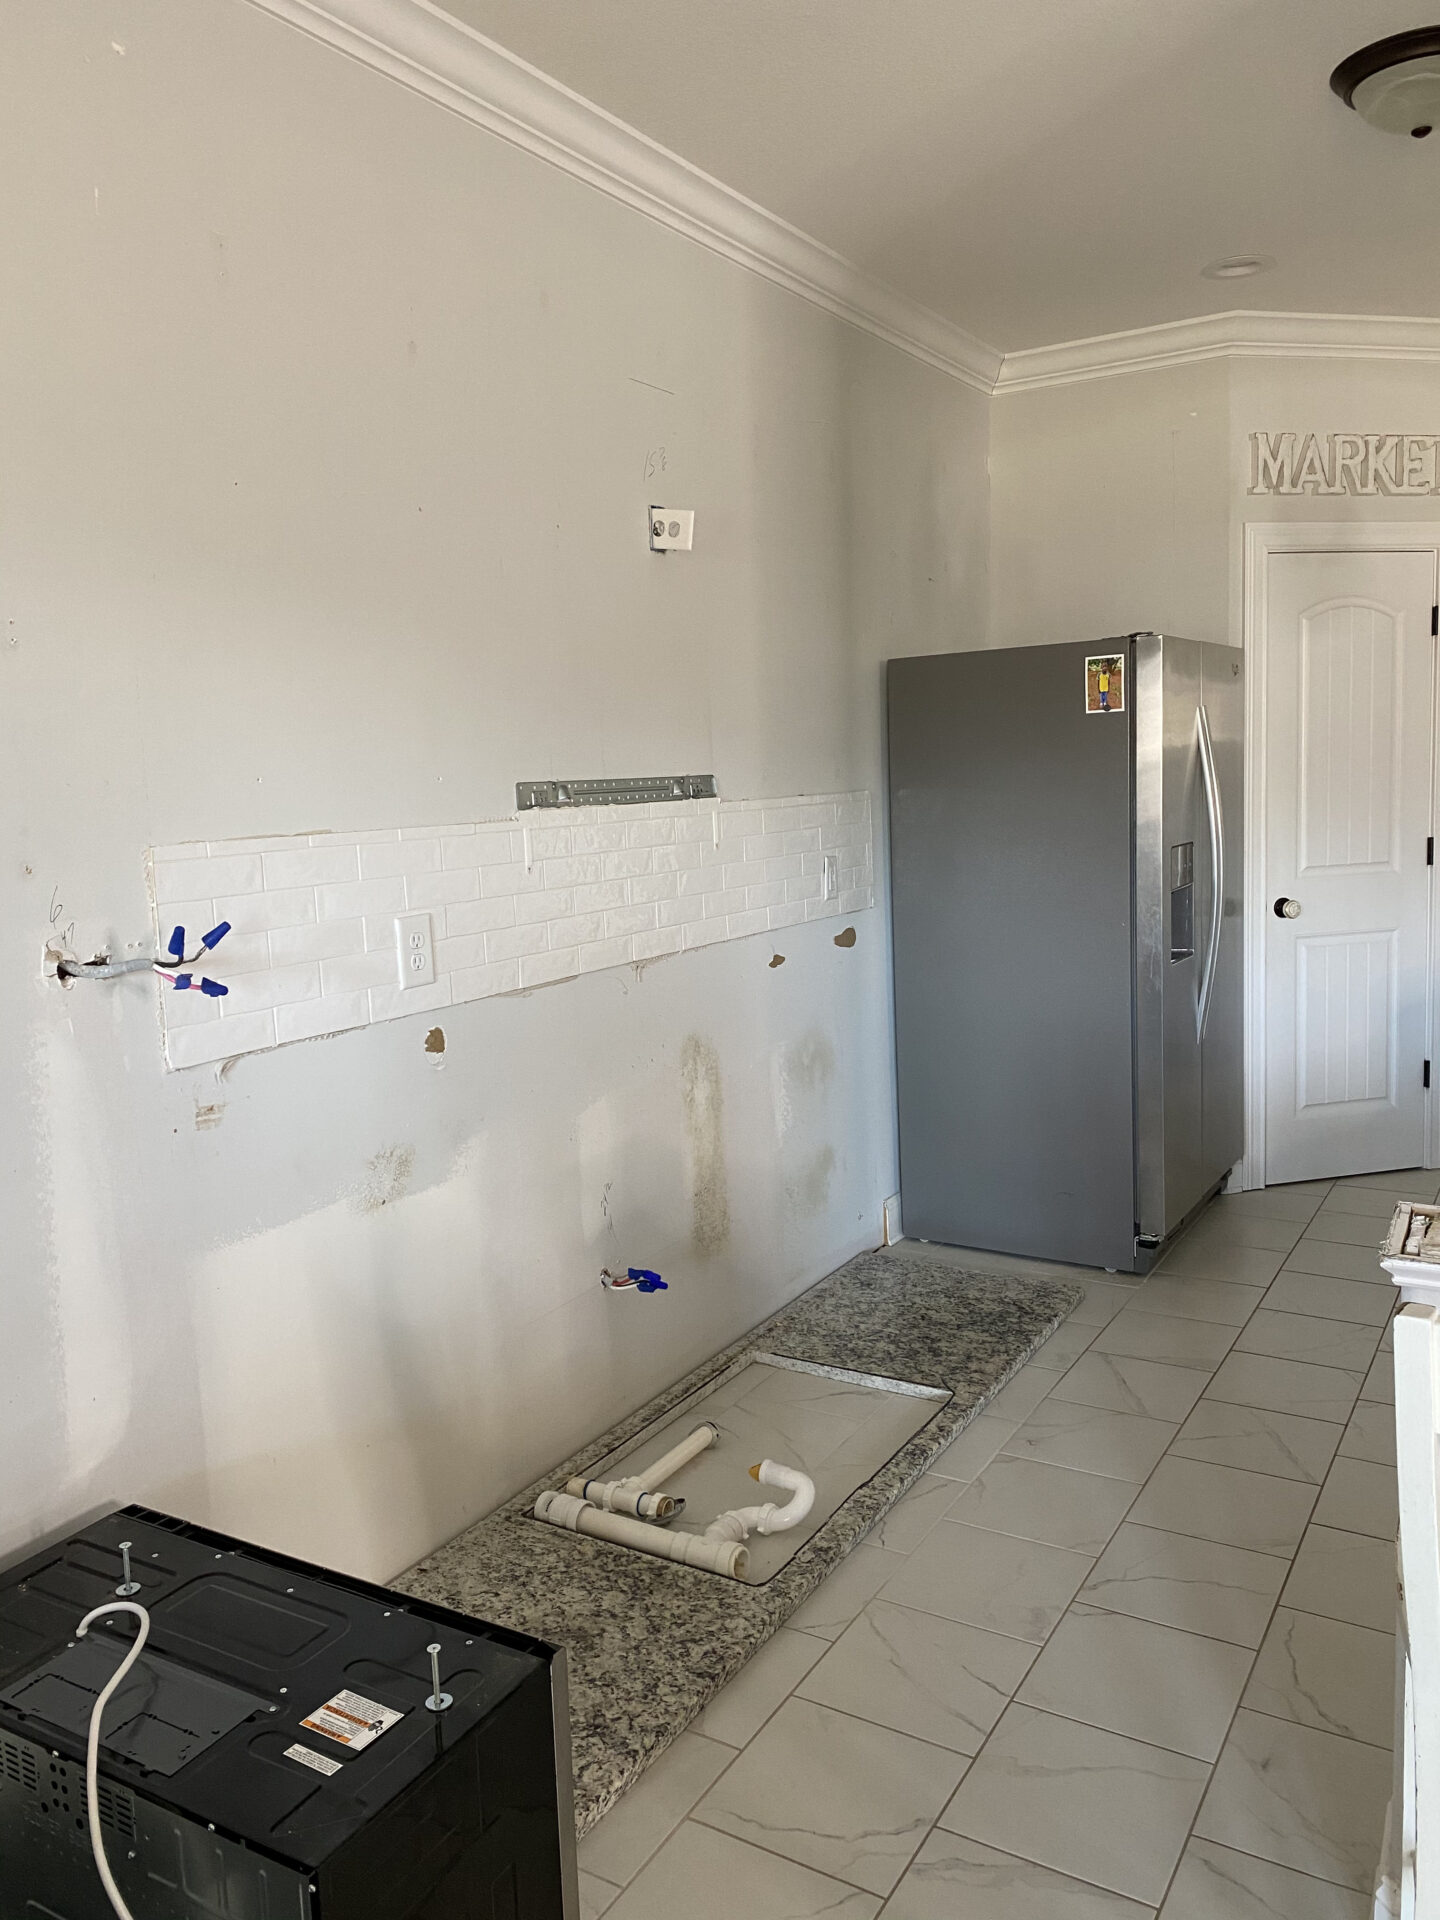
To be honest, this Kitchen was really not bad at all, and I loved the layout of it. The problem was how dark the cabinets and the countertops were. If you looked at the rest of my home, the whole kitchen seemed out of place because of the dark cabinets. There are no windows in my kitchen, so the space really felt like a cave! The photo above has been brightened up so you can see the details, but the photos below are untouched so you can get a feel for just how dark this space was.
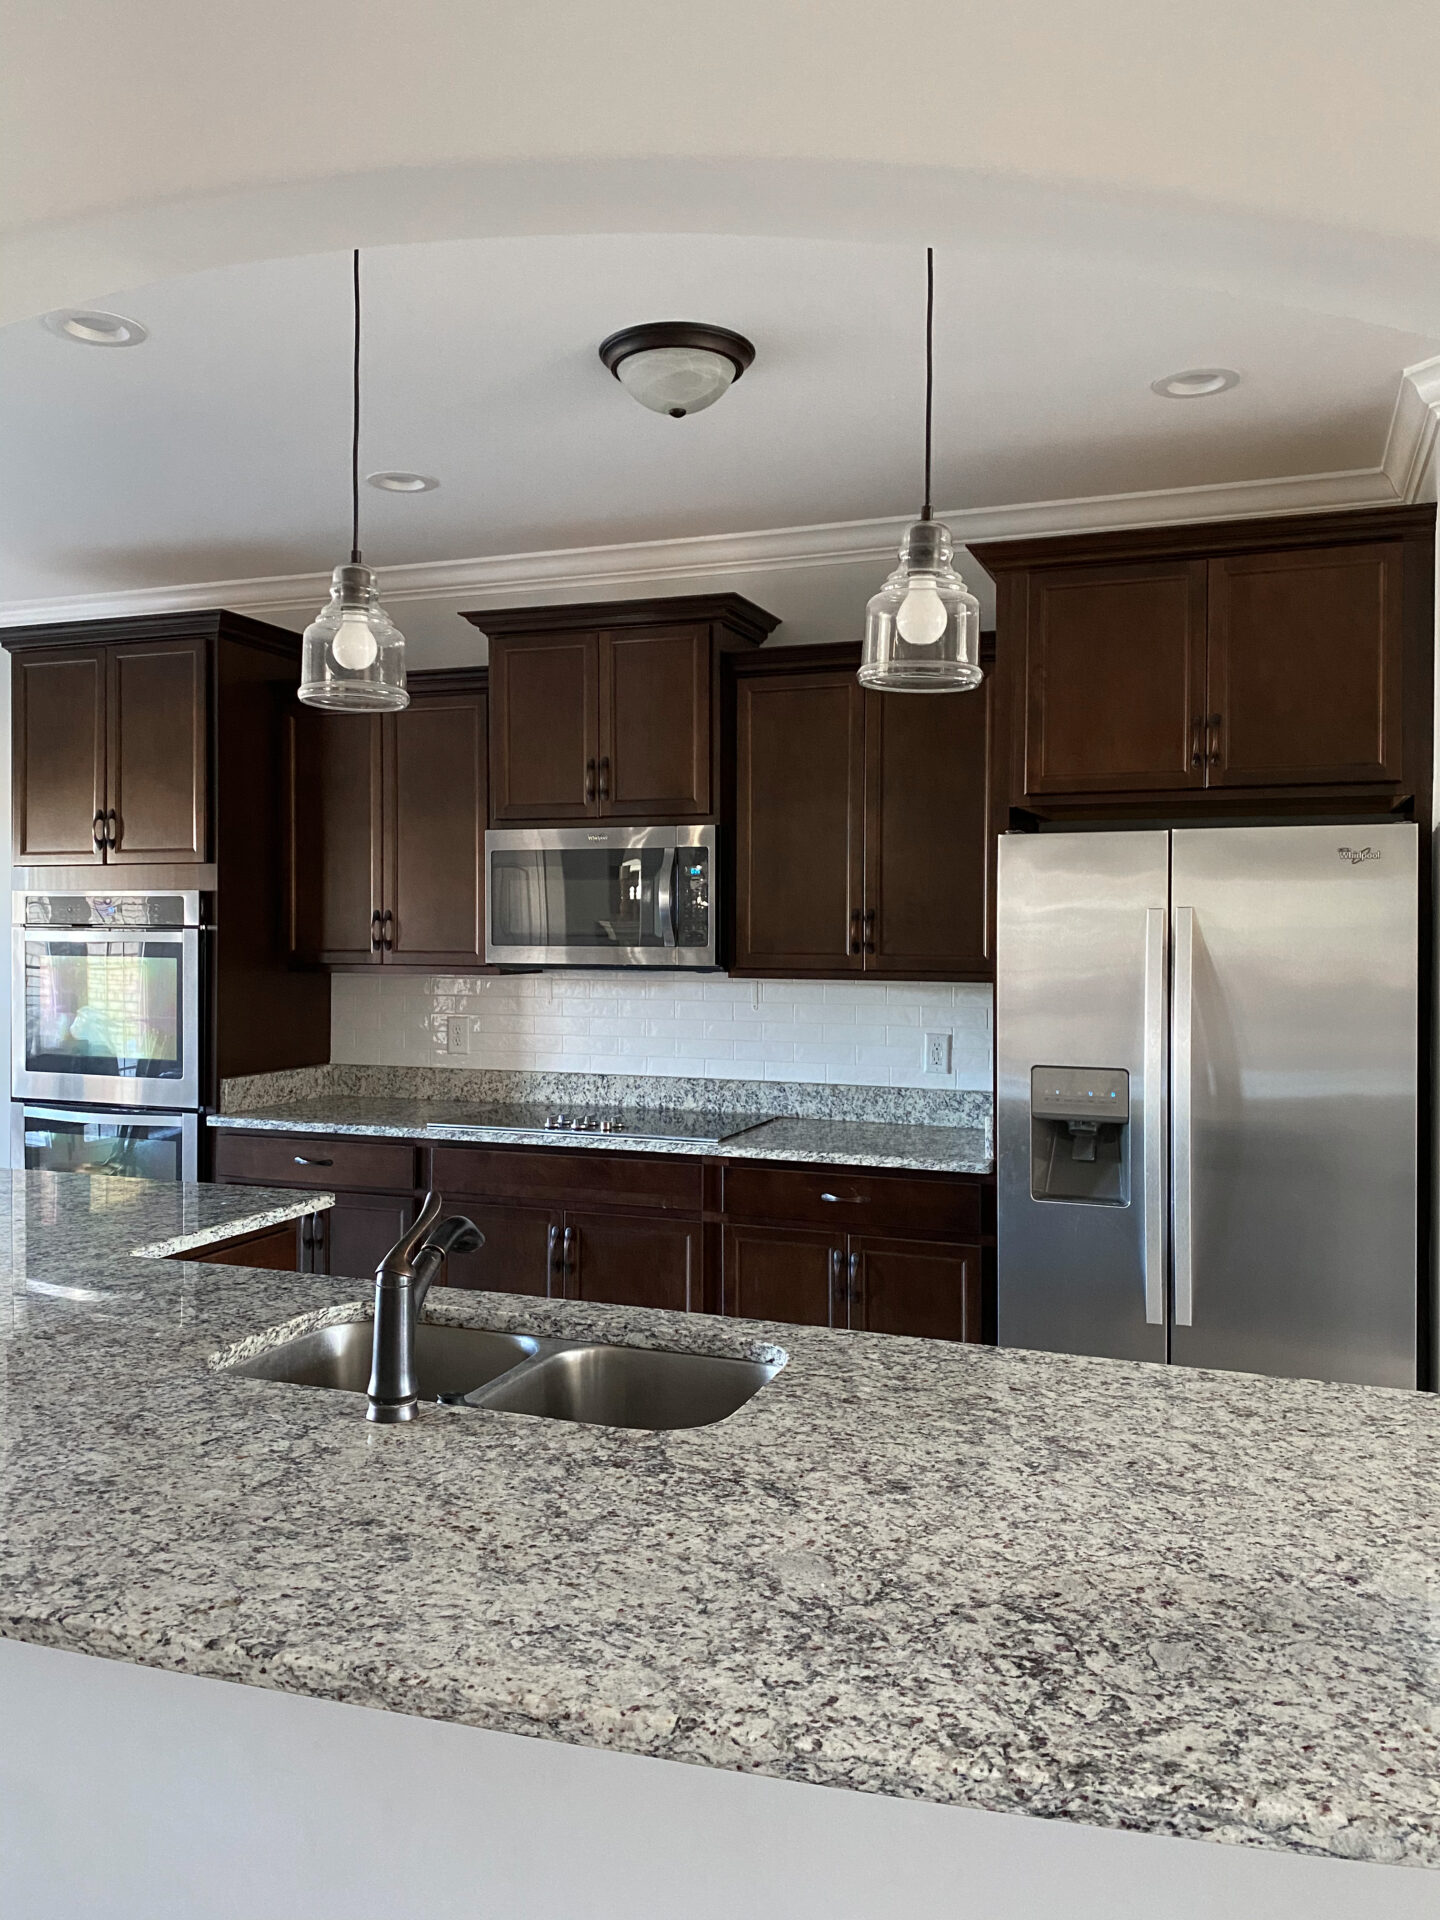
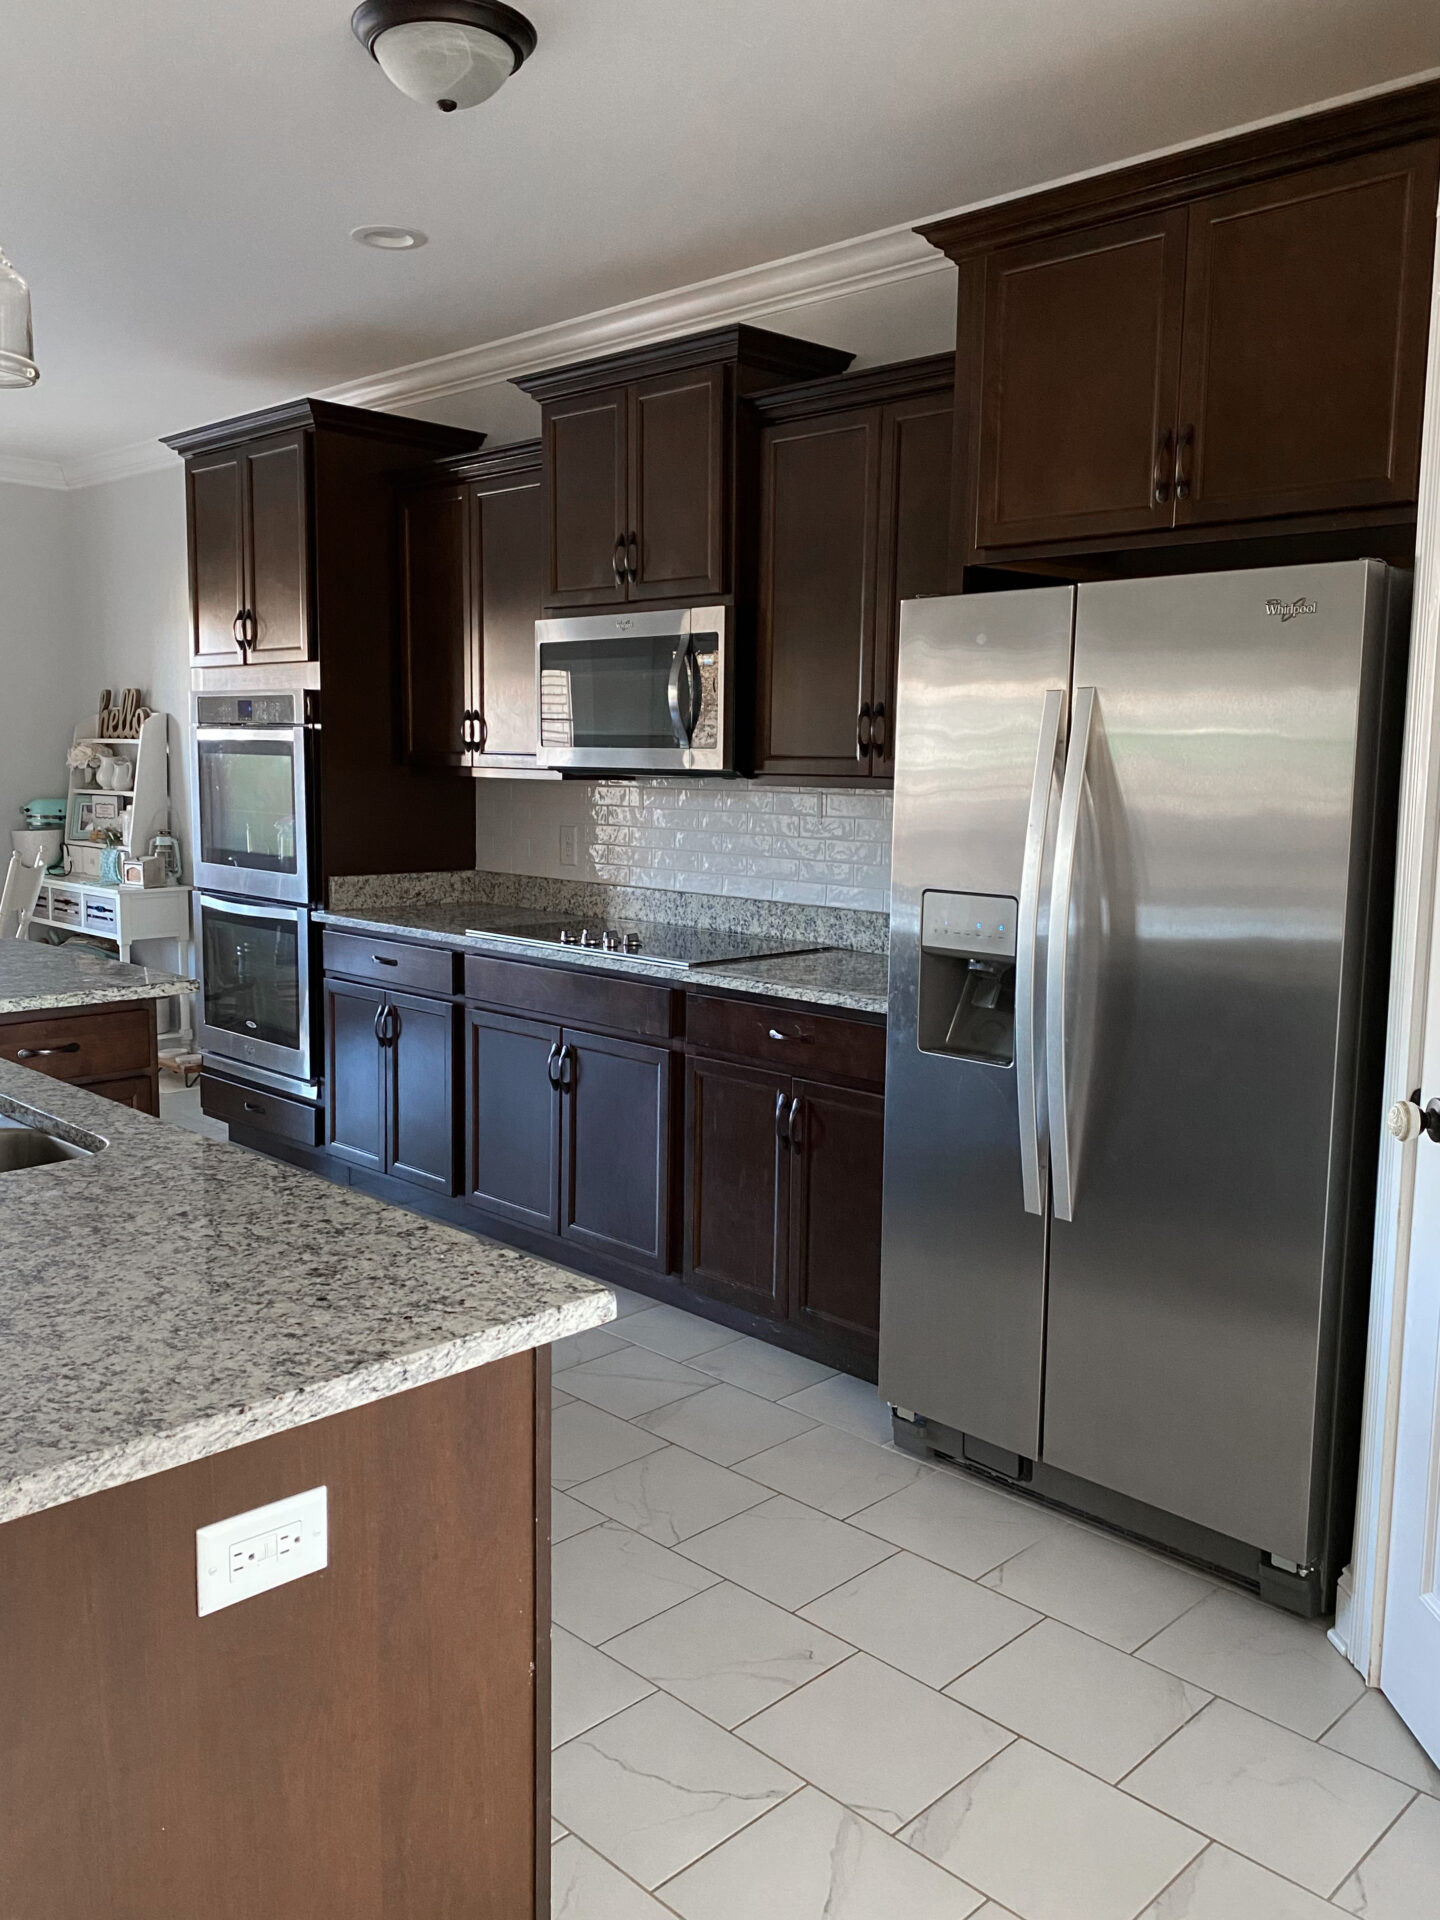
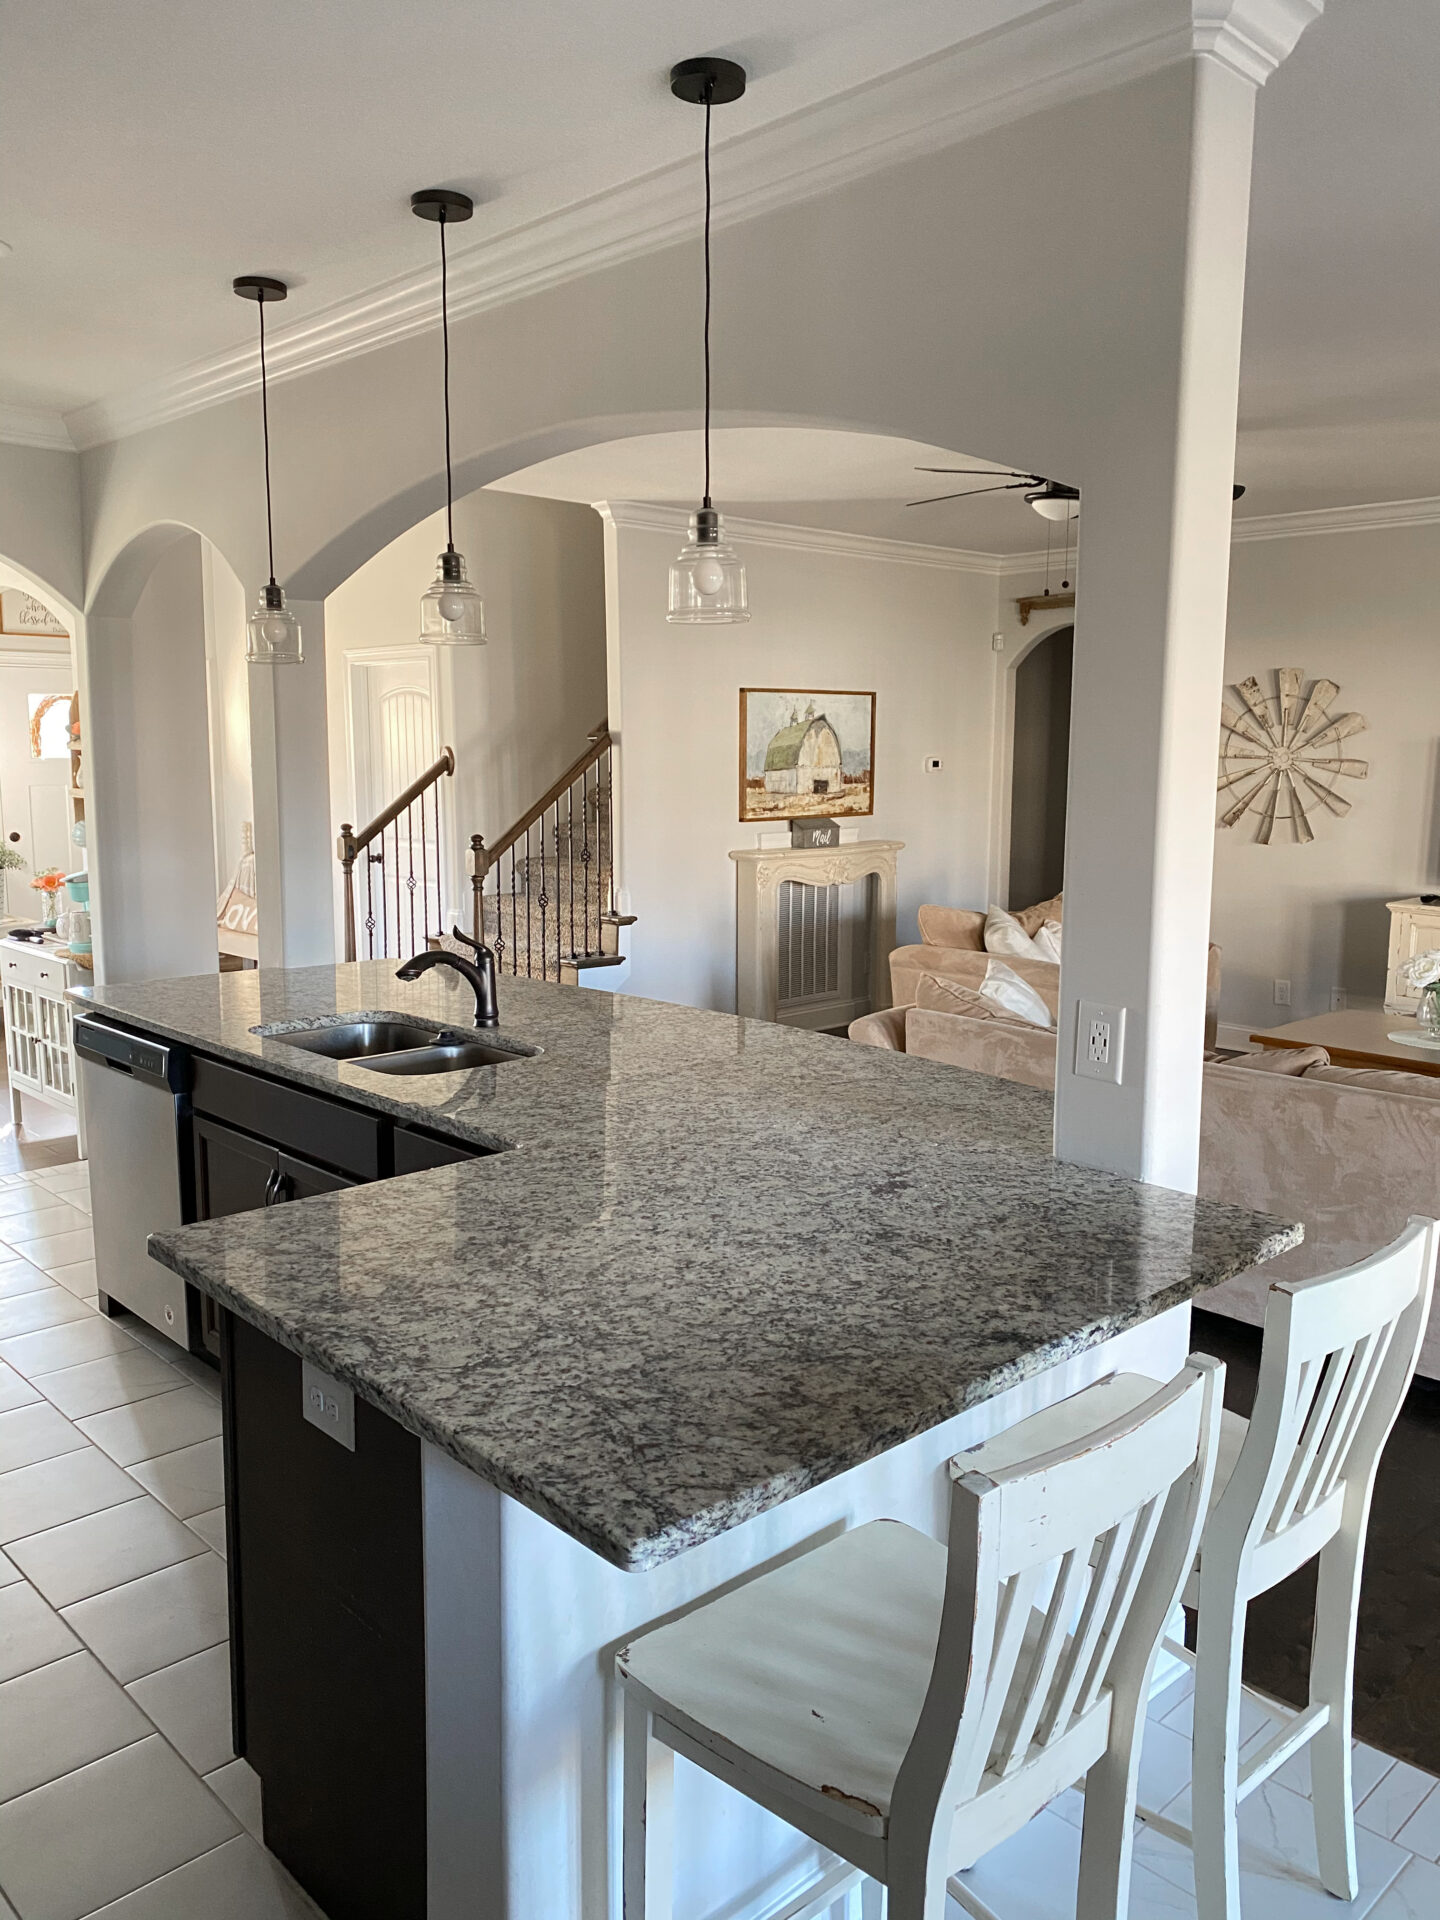
The cabinets were a very dark brown and made of pressed board. The countertops were granite, but a builders-grade granite that came standard for new builds. At the time I chose these two materials, I really chose the best of what was available within our budget, but it still wasn’t what I had envisioned for our home. You could say, I had this kitchen with a renovation in mind since before the materials were put in lol!
After 4 years of living in our home, we finally decided to take the plunge and do a remodel! Keep reading to see Our All White Kitchen Renovation!
Choosing a Contractor
The first step in any remodel is finding a solid company, with a good work ethic, to trust your renovation with. We chose to trust our renovation with Wilkes Cabinets & More LLC out of Clarksville, Tennessee. They are a newer company, but after seeing their work and color palettes we decided they were the company we wanted to work with. They specialize in both Custom and Pre-manufactured Cabinets. Wilkes Cabinets & More is also a Veteran Owned company, which is one of the reasons we chose to work with them! If you are new here, you may not know that we are a Military family, so choosing to work with a Veteran Owned business brings us a lot of joy.
Originally I wanted to do a light taupey-gray color for our cabinets, but the cabinets Wilkes Cabinets & More offered in the style I liked did not have that color. I ended up choosing the color Soft Ivory. Now that the renovation is completed, I am so happy we chose to go with this color!
Choosing a Layout
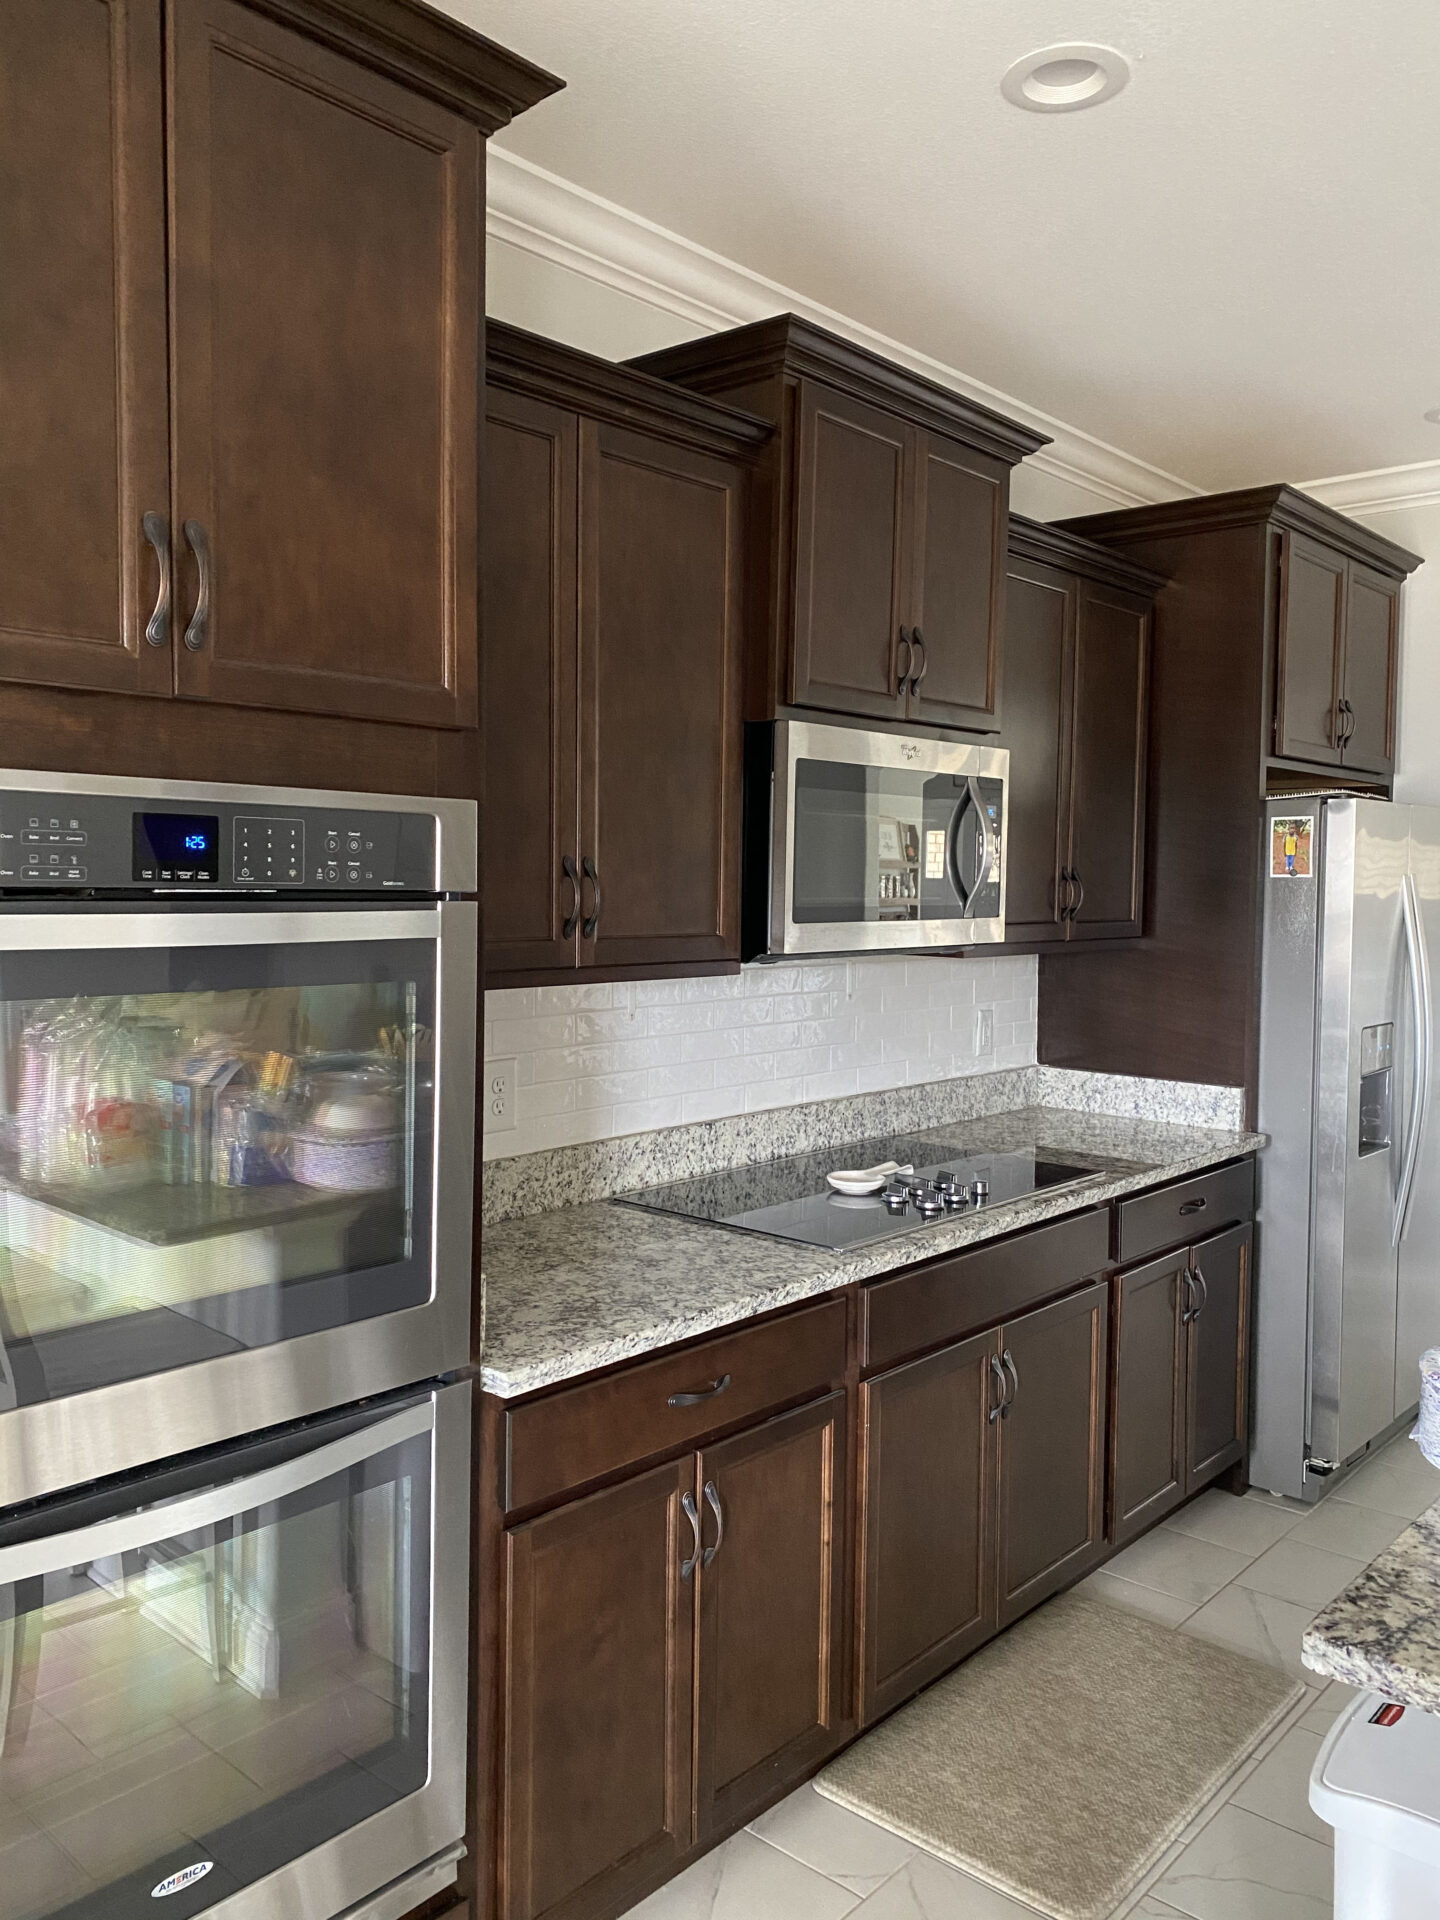
I had so many ideas on my wishlist for this kitchen! I wanted to keep the layout the same, but with a few small changes. The staggered tops of these cabinets drove me nuts, so they had to go. I really wanted all of the cabinets to be the same height. My cat, believe it or not, was cause for one of the other changes. She used to jump on top of the refrigerator and climb the cabinets! I was afraid of leaving the side panel on the fridge that narrow with White cabinets because I really wanted to keep our cat off of them. So my idea was to extend the side panel to fully encase the refrigerator and bring out the above cabinet. Besides those two big things, the layout did not change.
Choosing Materials
One of my must have items for our new kitchen, was a Farmhouse Sink. I have always been a huge fan of Farmhouse Sinks, even before they became popular! I wanted a new faucet for our Kitchen since I was never able to choose ours when we built the home, as well as new hardware for all of the cabinets. And one of my biggest must-haves was a Quartz Countertop!
I’ll be sharing links and images below for each of the items we chose for this renovation in case anyone would like to order the same ones.
The Cabinets
Yarmouth Raised Panel Cabinets in the color Soft Ivory. The color is a very slight off-white, which adds a bit of warmth to your space. Please keep in mind this is not my photo! Our All White Kitchen Renovation looks totally different, but these are the same cabinets we purchased in the same color. One of my favorite things about these cabinets is that they are SOLID wood! They also have soft-close drawers and doors on all cabinets.

Countertops
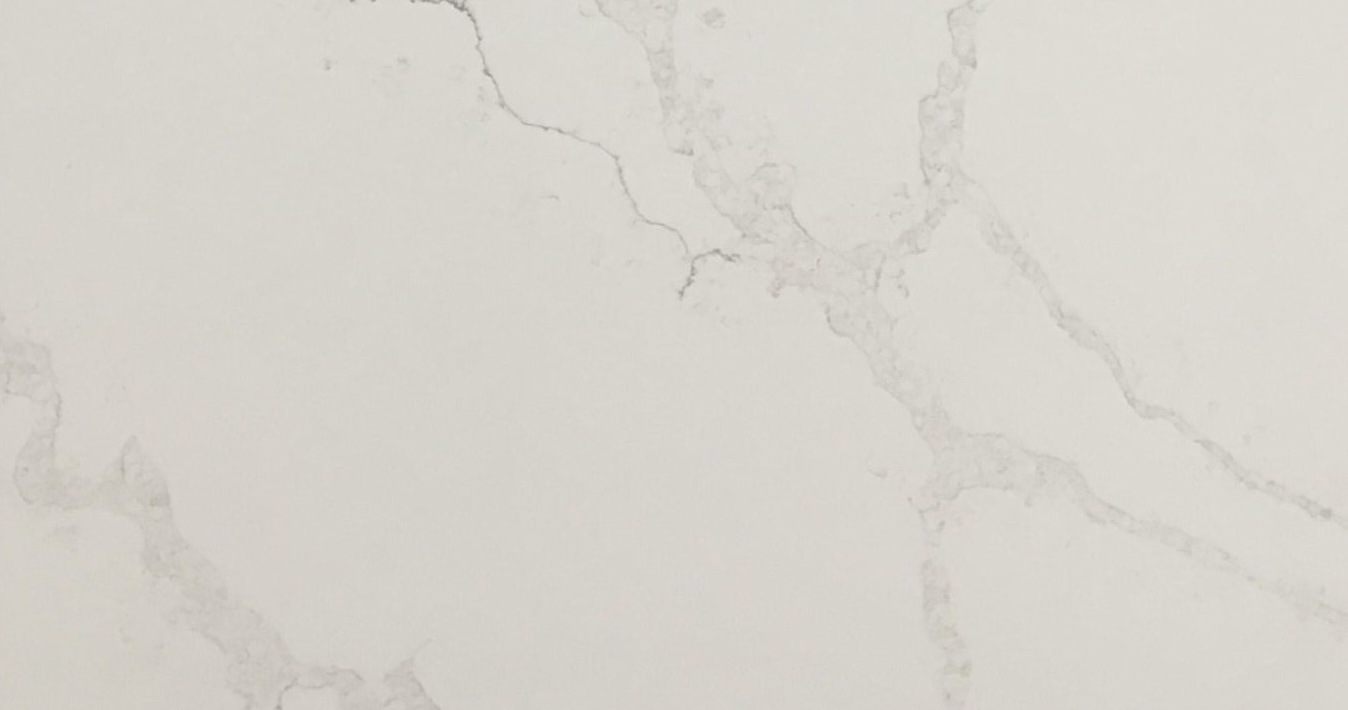
The countertops were so hard to choose! We really wanted Quartz countertops this time around because of how easy they are to clean, as well as the great selection of marble-like choices they offer. I kept flip-flopping between the Silestone Calacatta Gold Quartz and the Caesarstone Nuvo Quartz. I ultimately went with the Caesarstone Calacatta Nuvo Quartz and I love it so much! It’s absolutely gorgeous in person.
The Sink
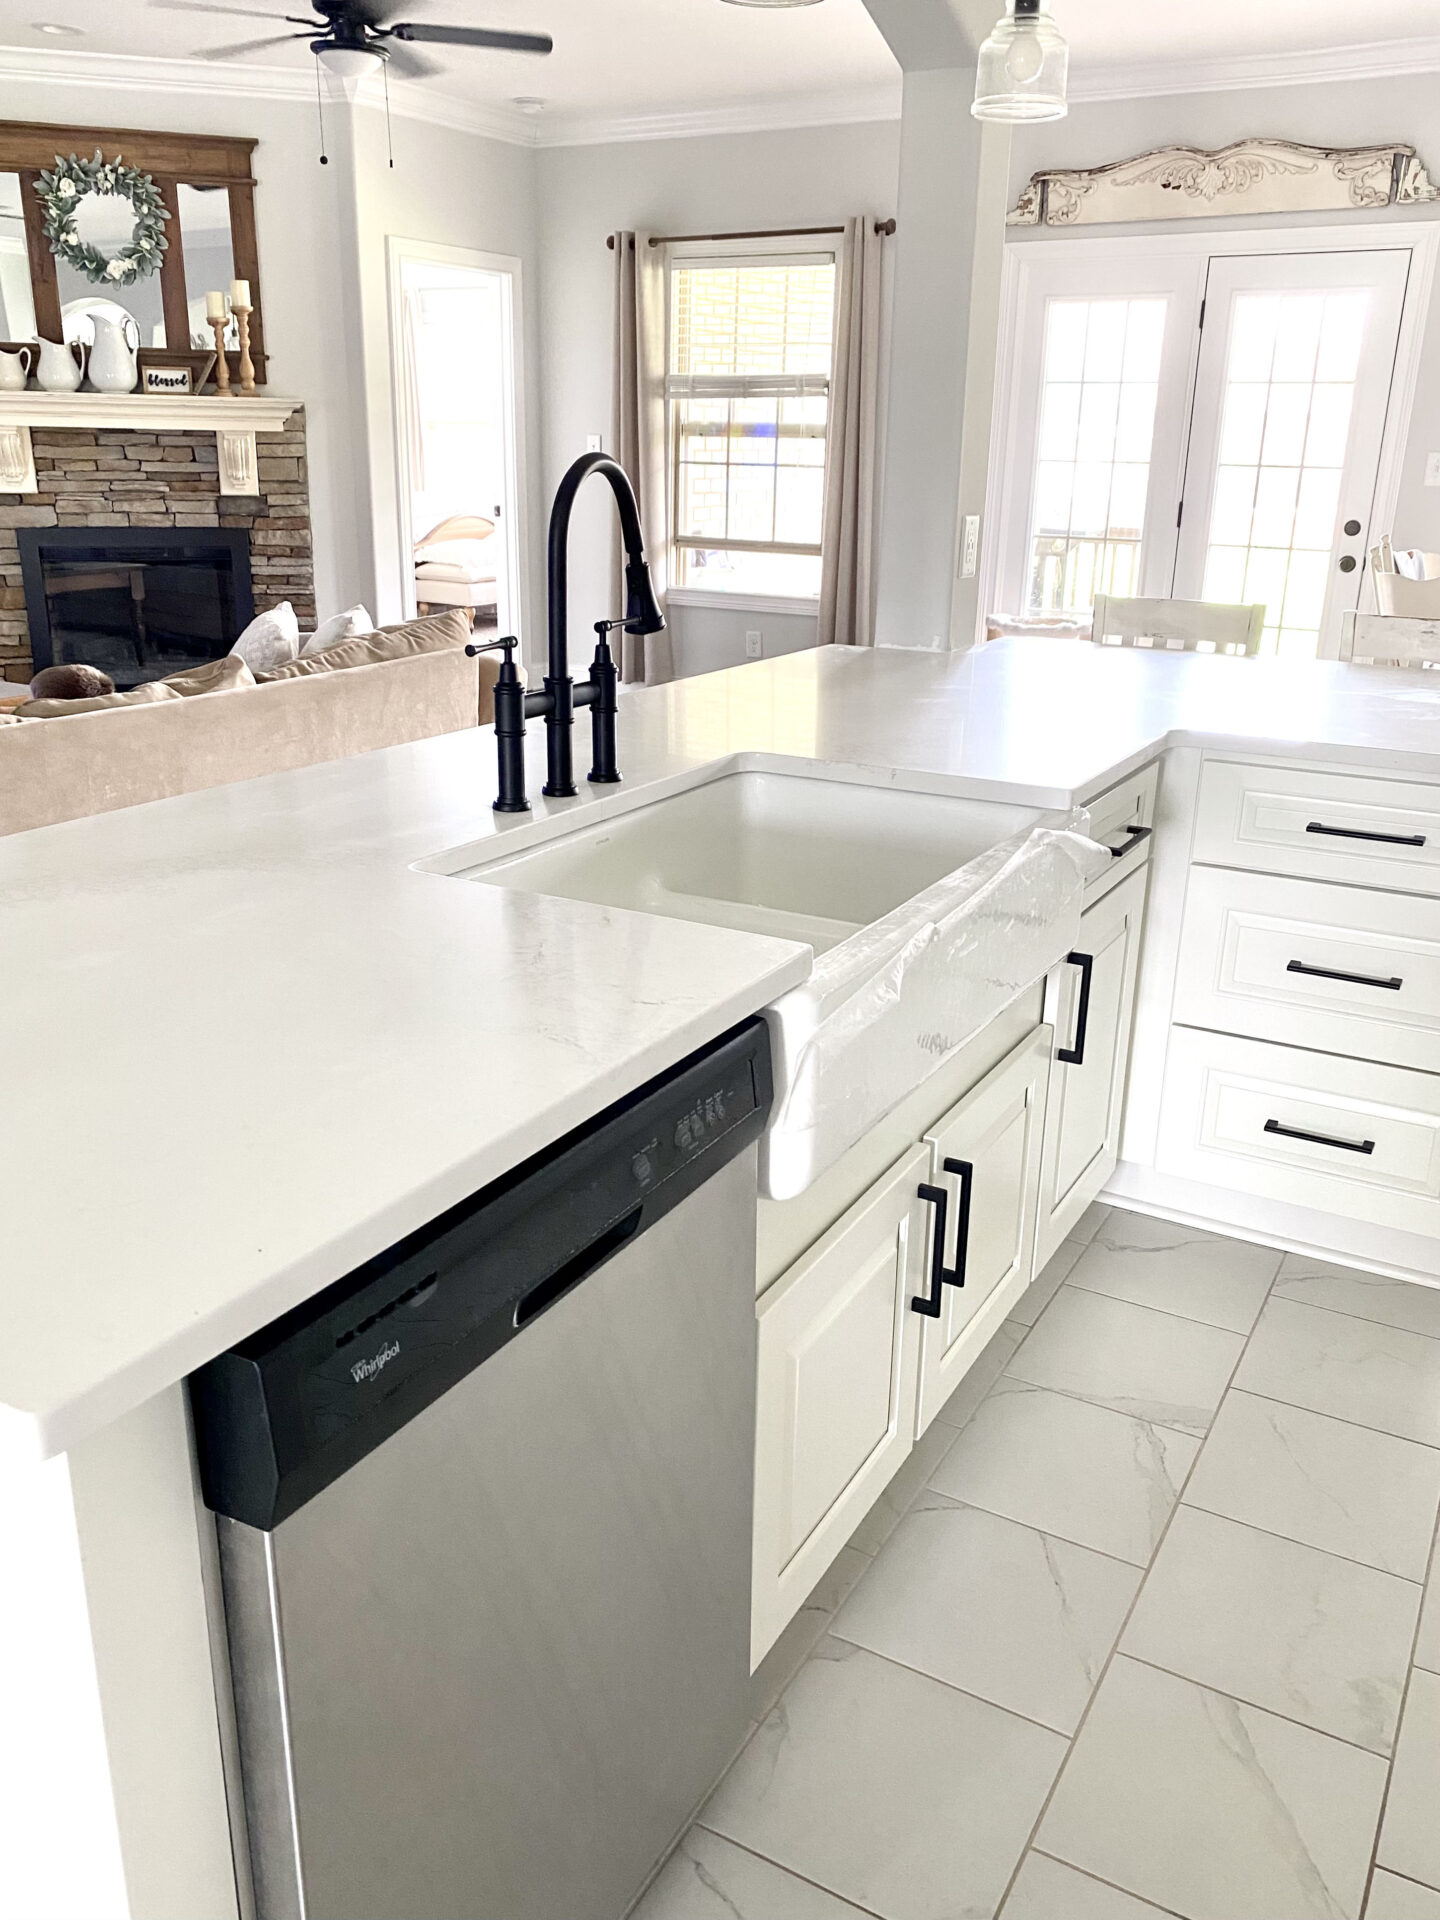
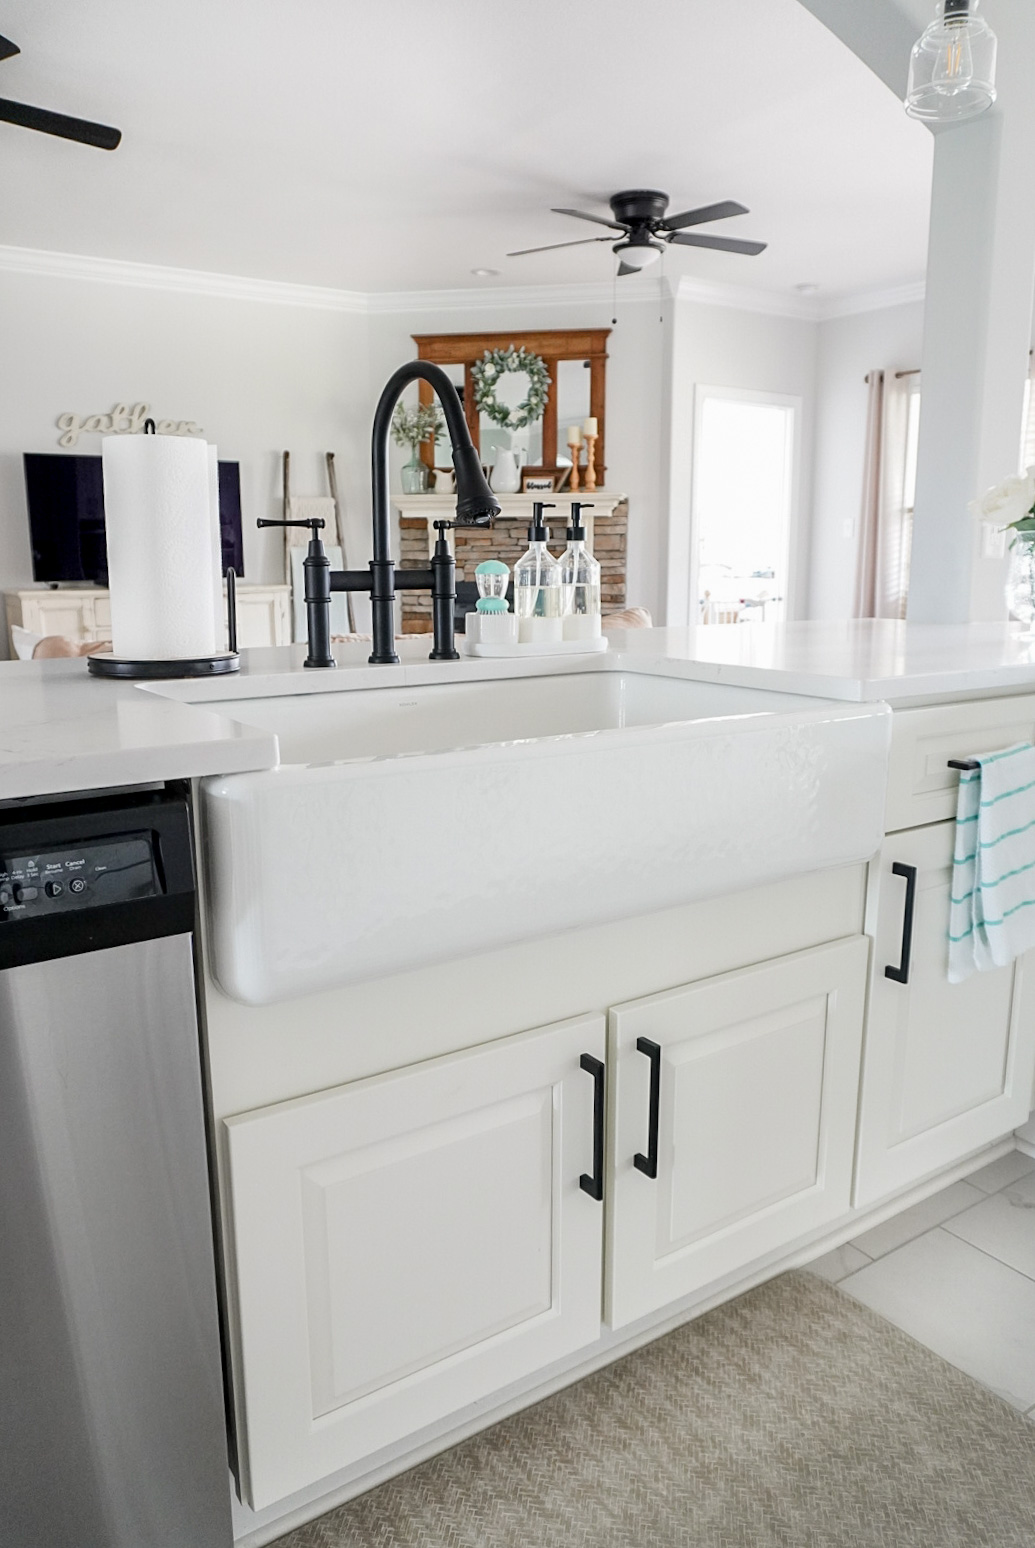
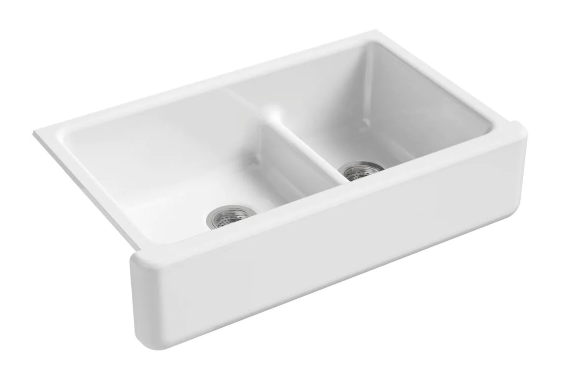
The sink we chose is the Kohler Whitehaven Farmhouse Undermount Apron Front Cast Iron 36 inch Double Bowl Sink. I have LOVED having a double basin sink! And this sink is totally breathtaking in person.
The Faucet
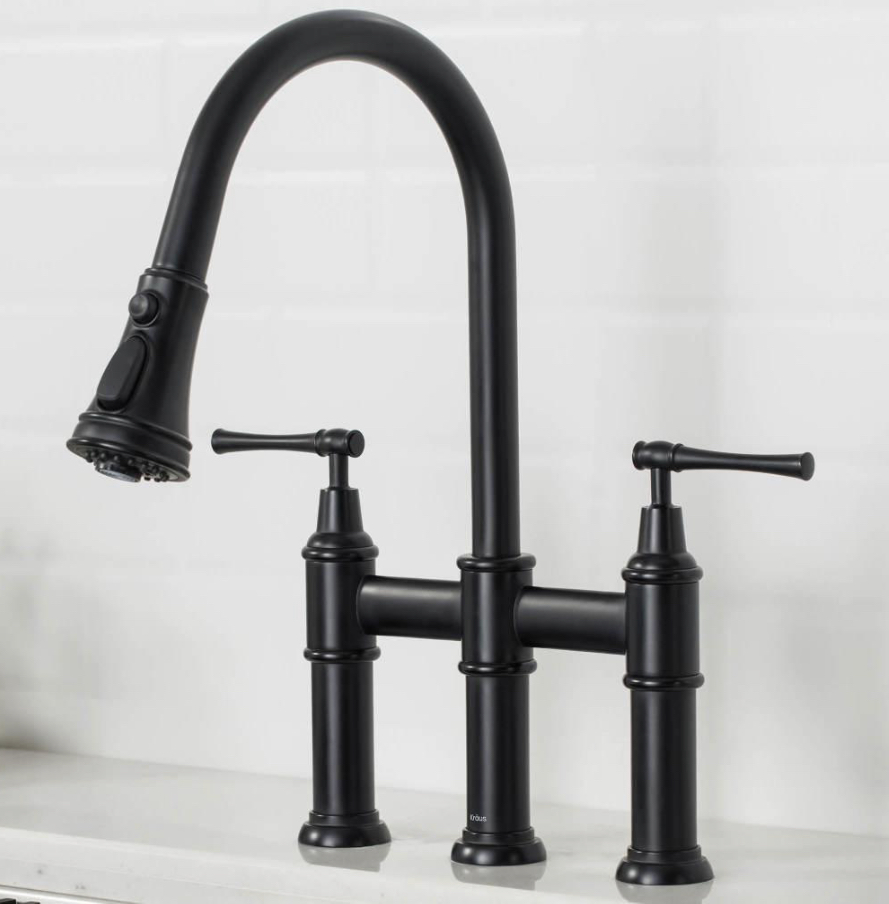
I chose a gorgeous Bridge Faucet from Kraüs and I am obsessed with it! This is the Kraüs Allyn Transitional 2-Handle Bridge Kitchen Faucet with Pull-Down Sprayhead in Matte Black.
The Hardware
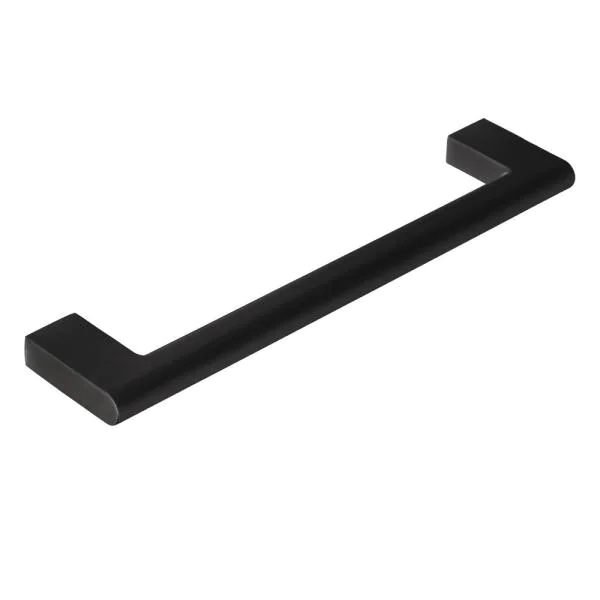
The hardware we chose was a difficult decision for sure! Choosing hardware online is especially difficult because you can’t feel the quality or the weight of it. I can honestly tell you that the hardware we chose is amazing. High quality, nice weight, looks high-end! I love it. We chose is the Sumner Street Home Hardware Vail 6 inch Matte Black Bar Drawer Pulls from Lowes.
Reno Day
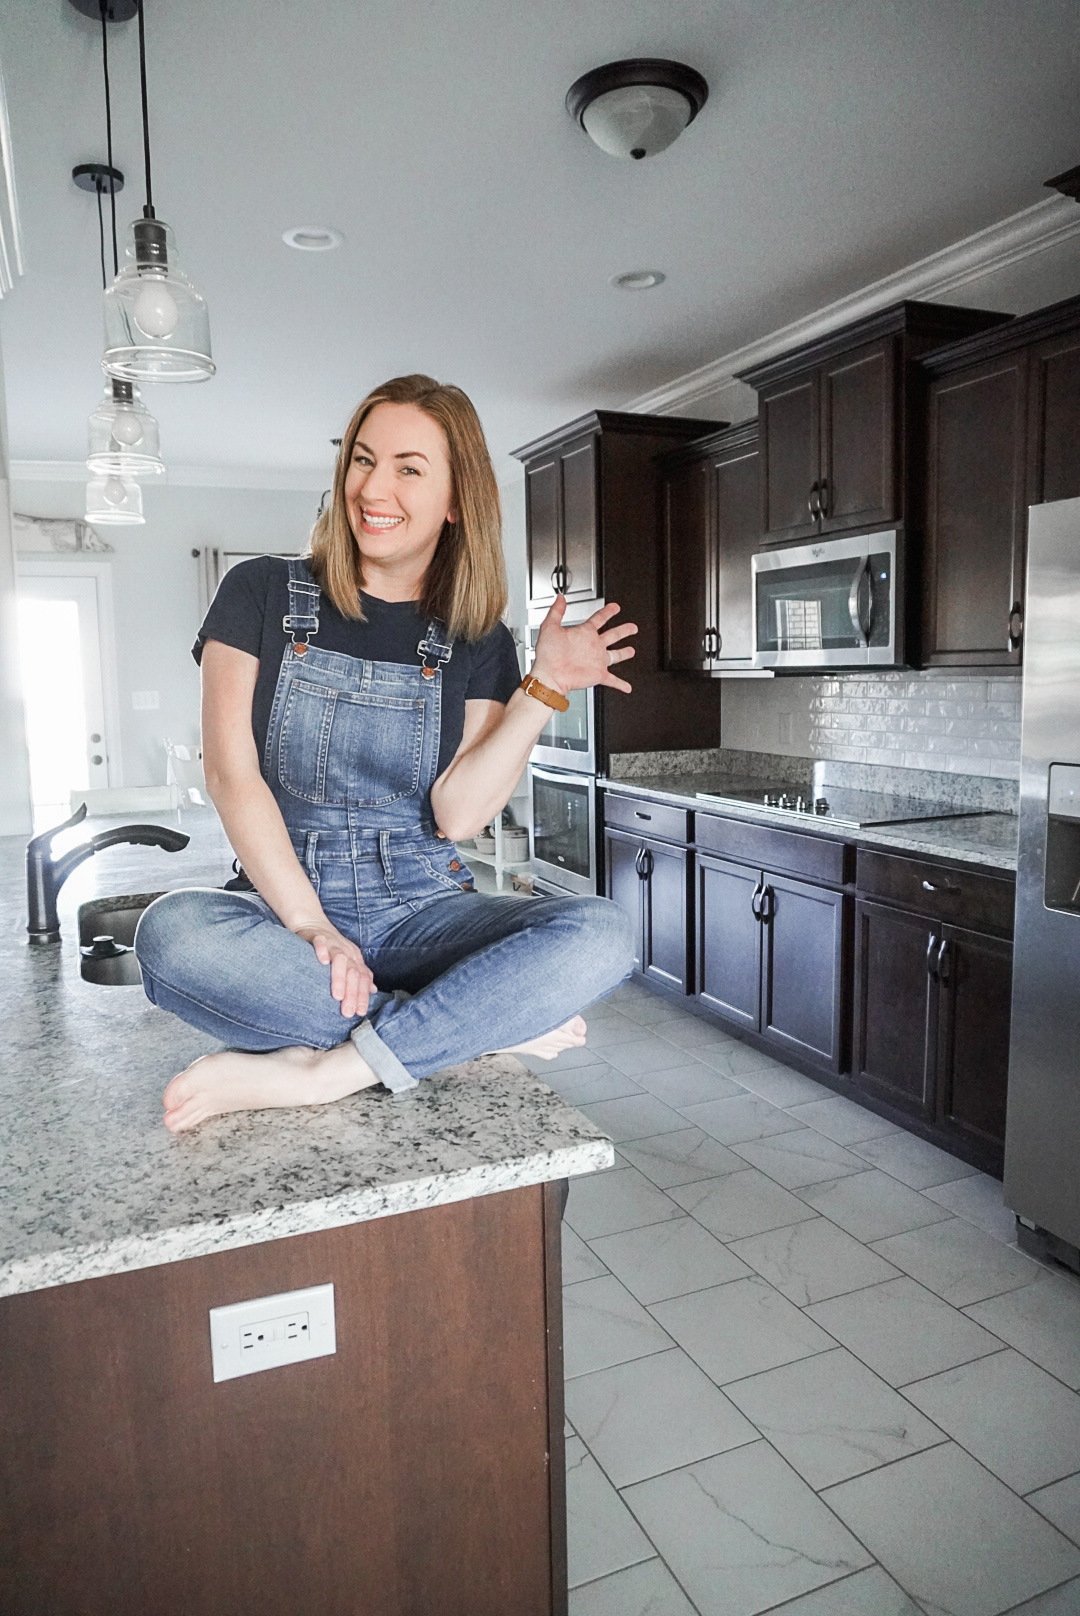
Reno Day is finally here! After months of planning and waiting, the day these dark cabinets are getting hauled away is here! Our contractor, Wilkes Cabinets & More LLC arrived promptly on time early that morning and tried their best to remove the old cabinets and countertops in one piece. The old cabinets were to be donated and repurposed in another space, which I was so happy to be a part of!
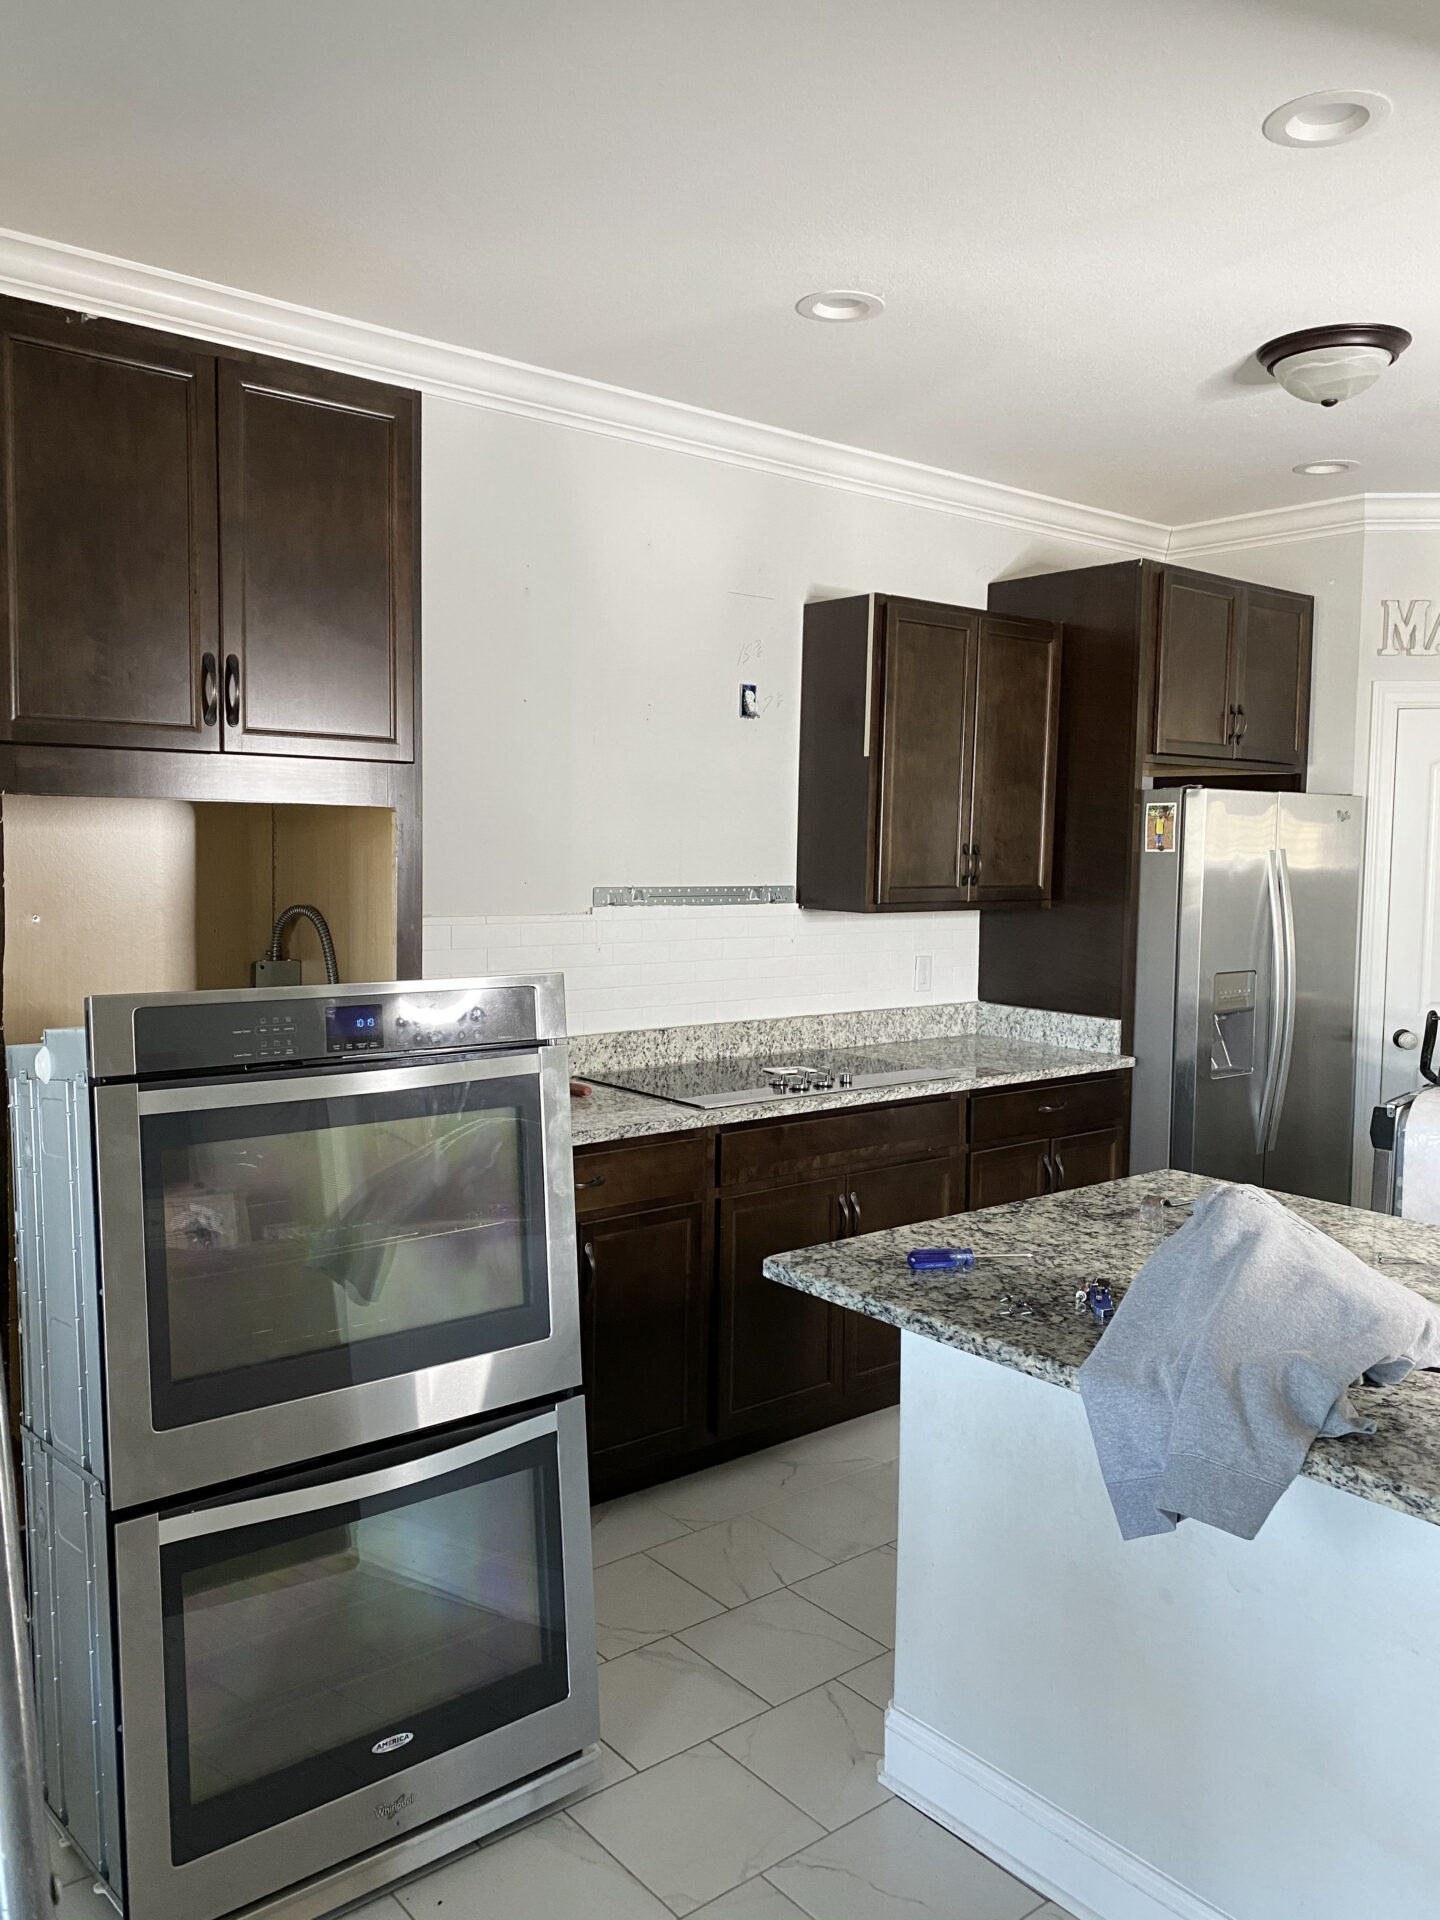
I can’t tell you how happy it made me to see all of these dark cabinets slowly get removed! As it all came down, the whole kitchen got brighter and lighter! It was awesome.
The photos below are taken in natural light with no editing so you can see how much brighter the Kitchen is now that the dark cabinets and countertops are gone! Wilkes Cabinets & More LLC was very professional during the removal of the cabinets and countertops. They took great care in making sure all of our appliances were undamaged and the walls and backsplash remained intact.
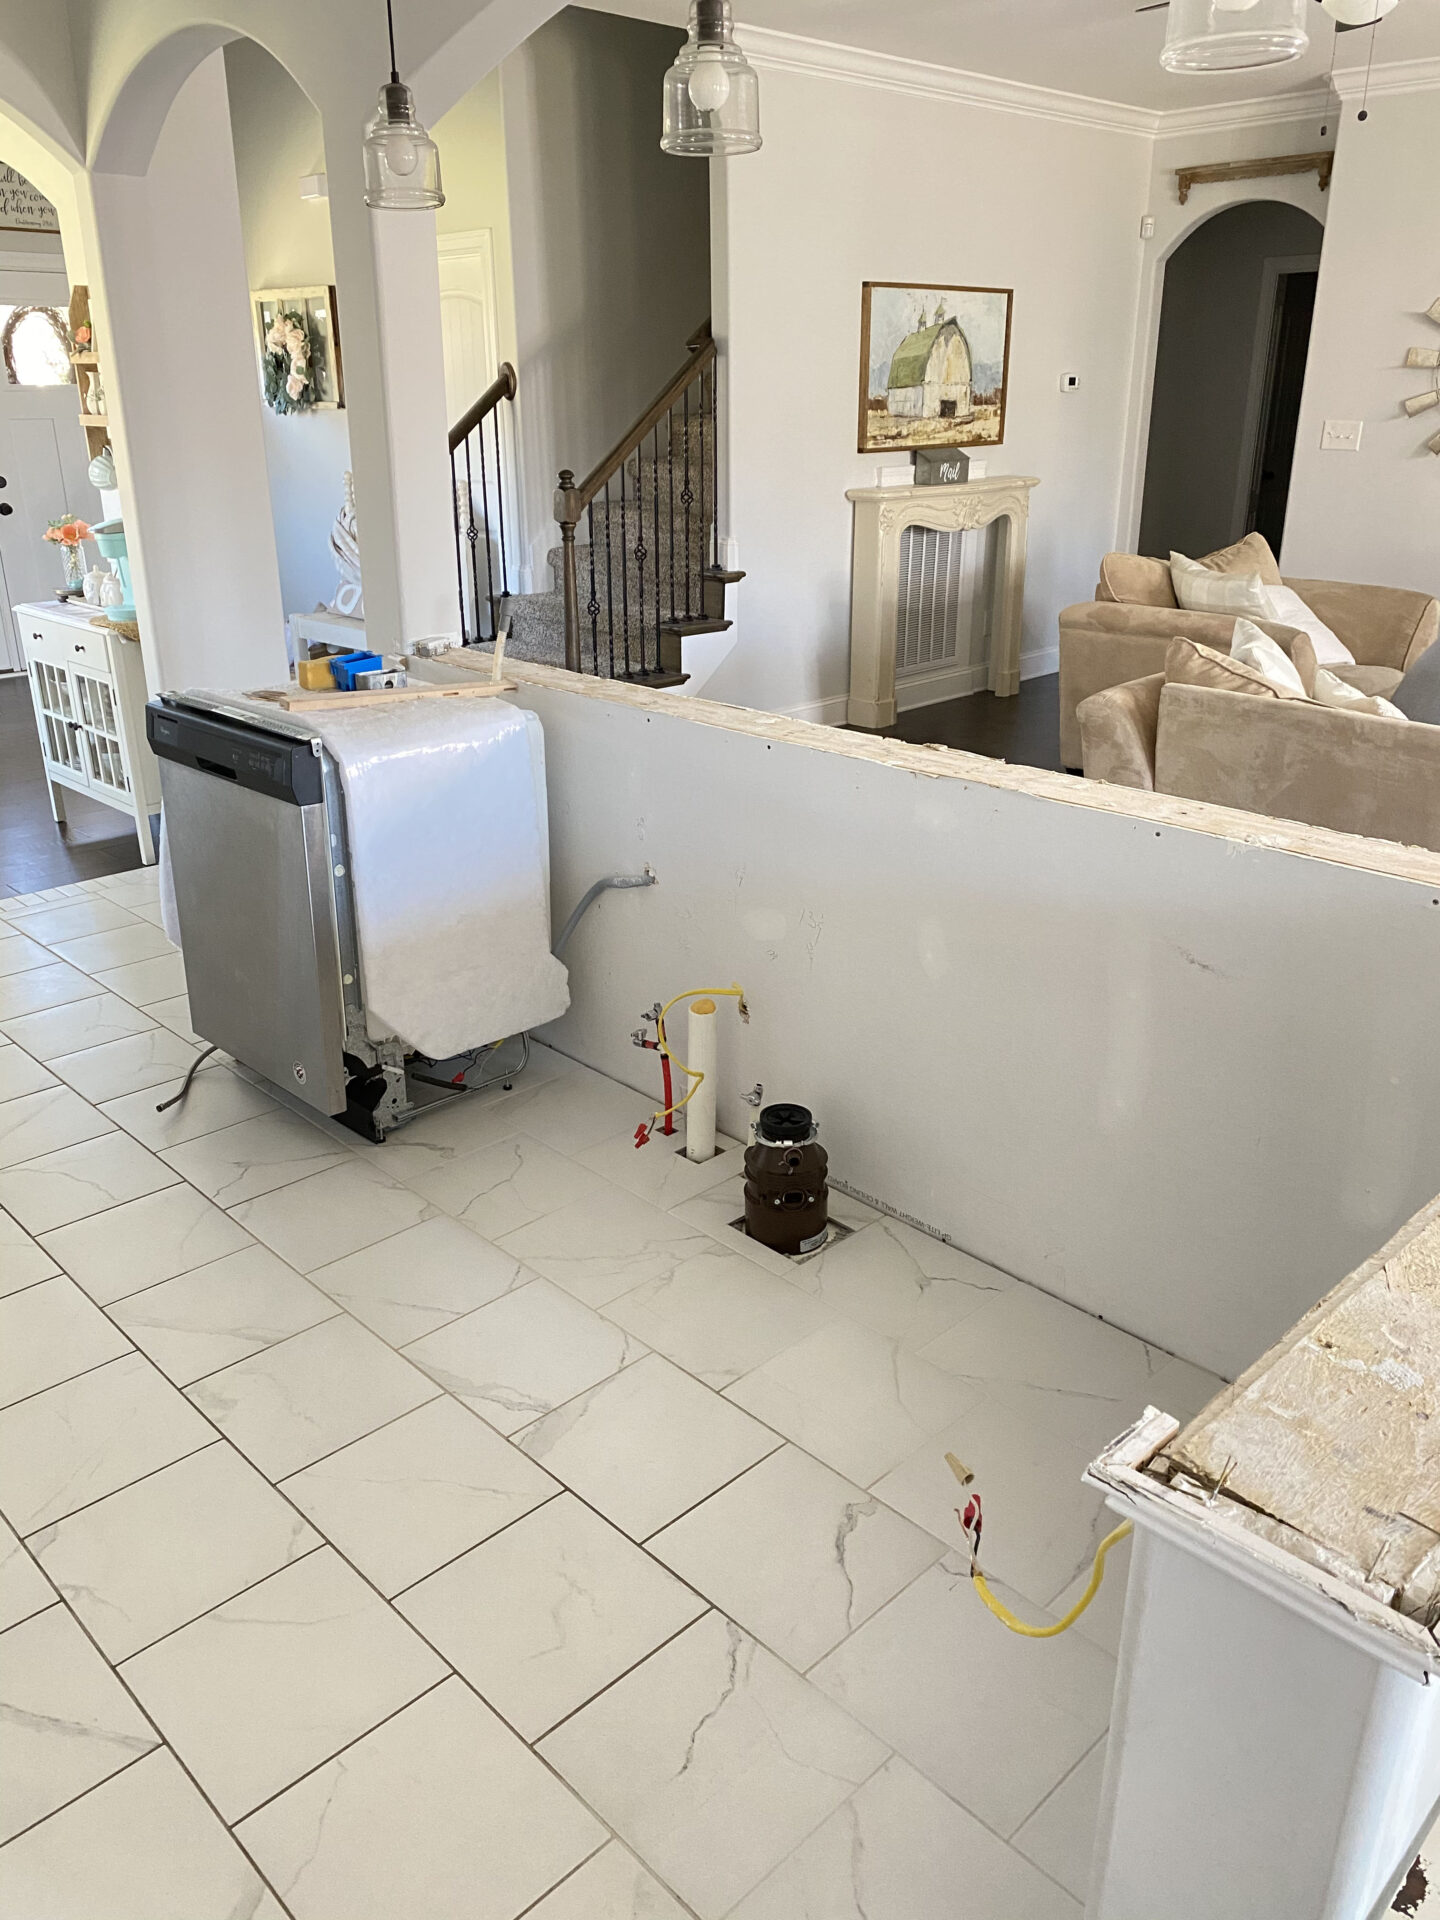
This is the half wall in our kitchen which works as our island. I was probably the most excited about this area because this is where our new farmhouse sink will go, as well as a couple of different cabinet layouts.
Cabinets Are Here!
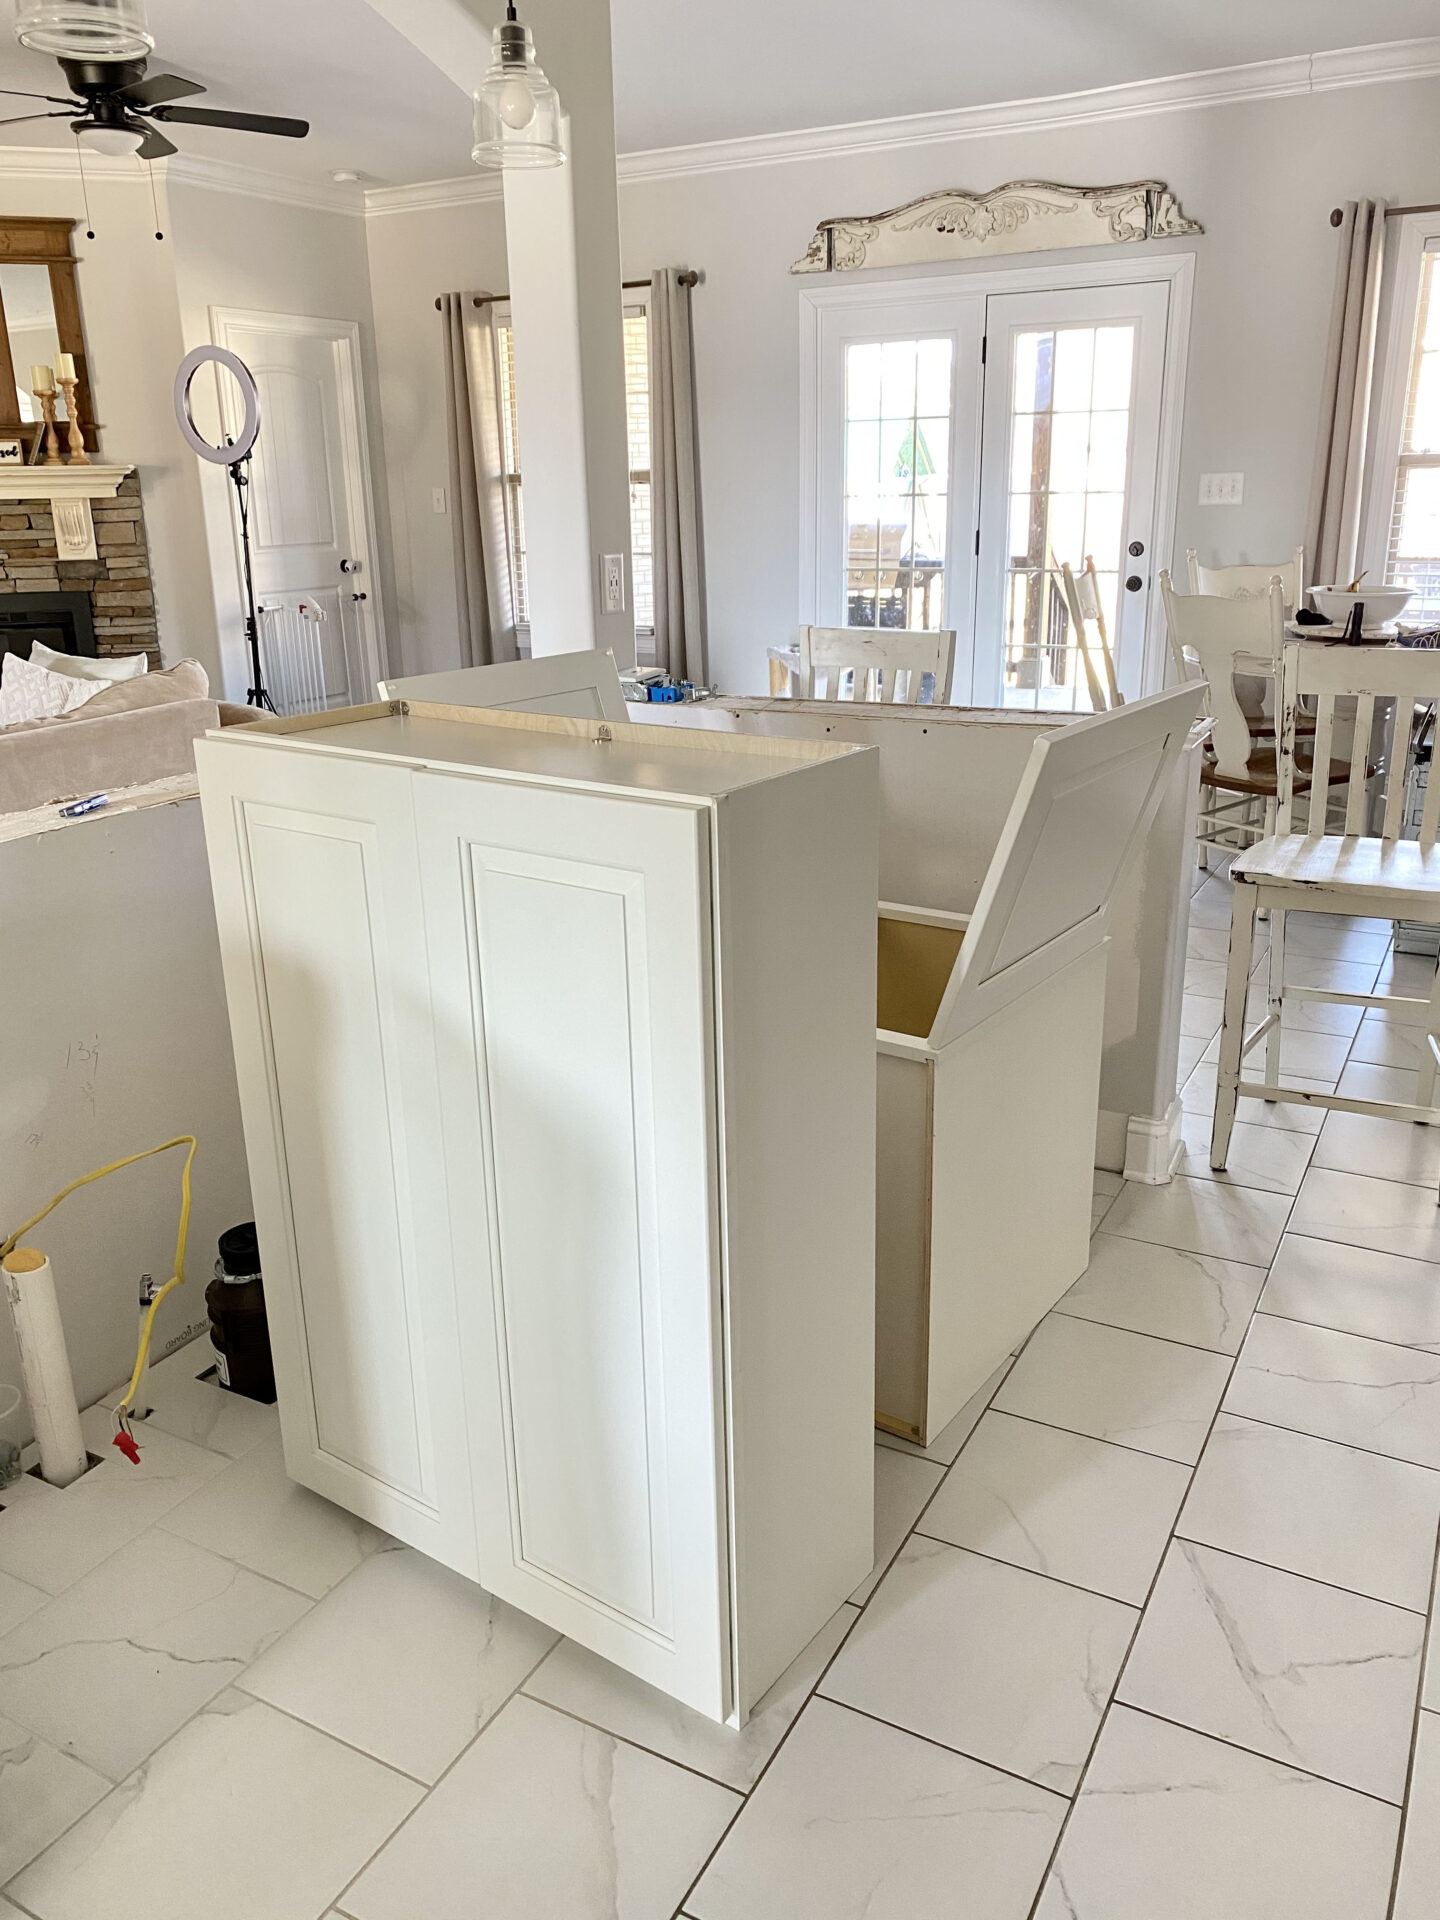
Our Yarmouth Raised Panel Cabinets are here! When they arrived I immediately fell in love. The quality is amazing because they are made out of real wood and have soft-close doors and drawers. I love that feature with cabinets! No more slamming doors, which is super important with a large family of boys lol!
The cabinets went up seamlessly! The Wilkes Cabinets crew worked a good part of the day to install them, making sure to listen whenever I had a question or an issue with where things were going. They got the wider sideboard up for the fridge wall and the cabinet set up perfectly too, which was one of the big things I wanted done with this reno. Now my cat can’t climb and race across the tops of the cabinets anymore lol!
Cabinet Installation
Please excuse the lighting on the next few photos, we had the electricity off in the kitchen during cabinet installation.
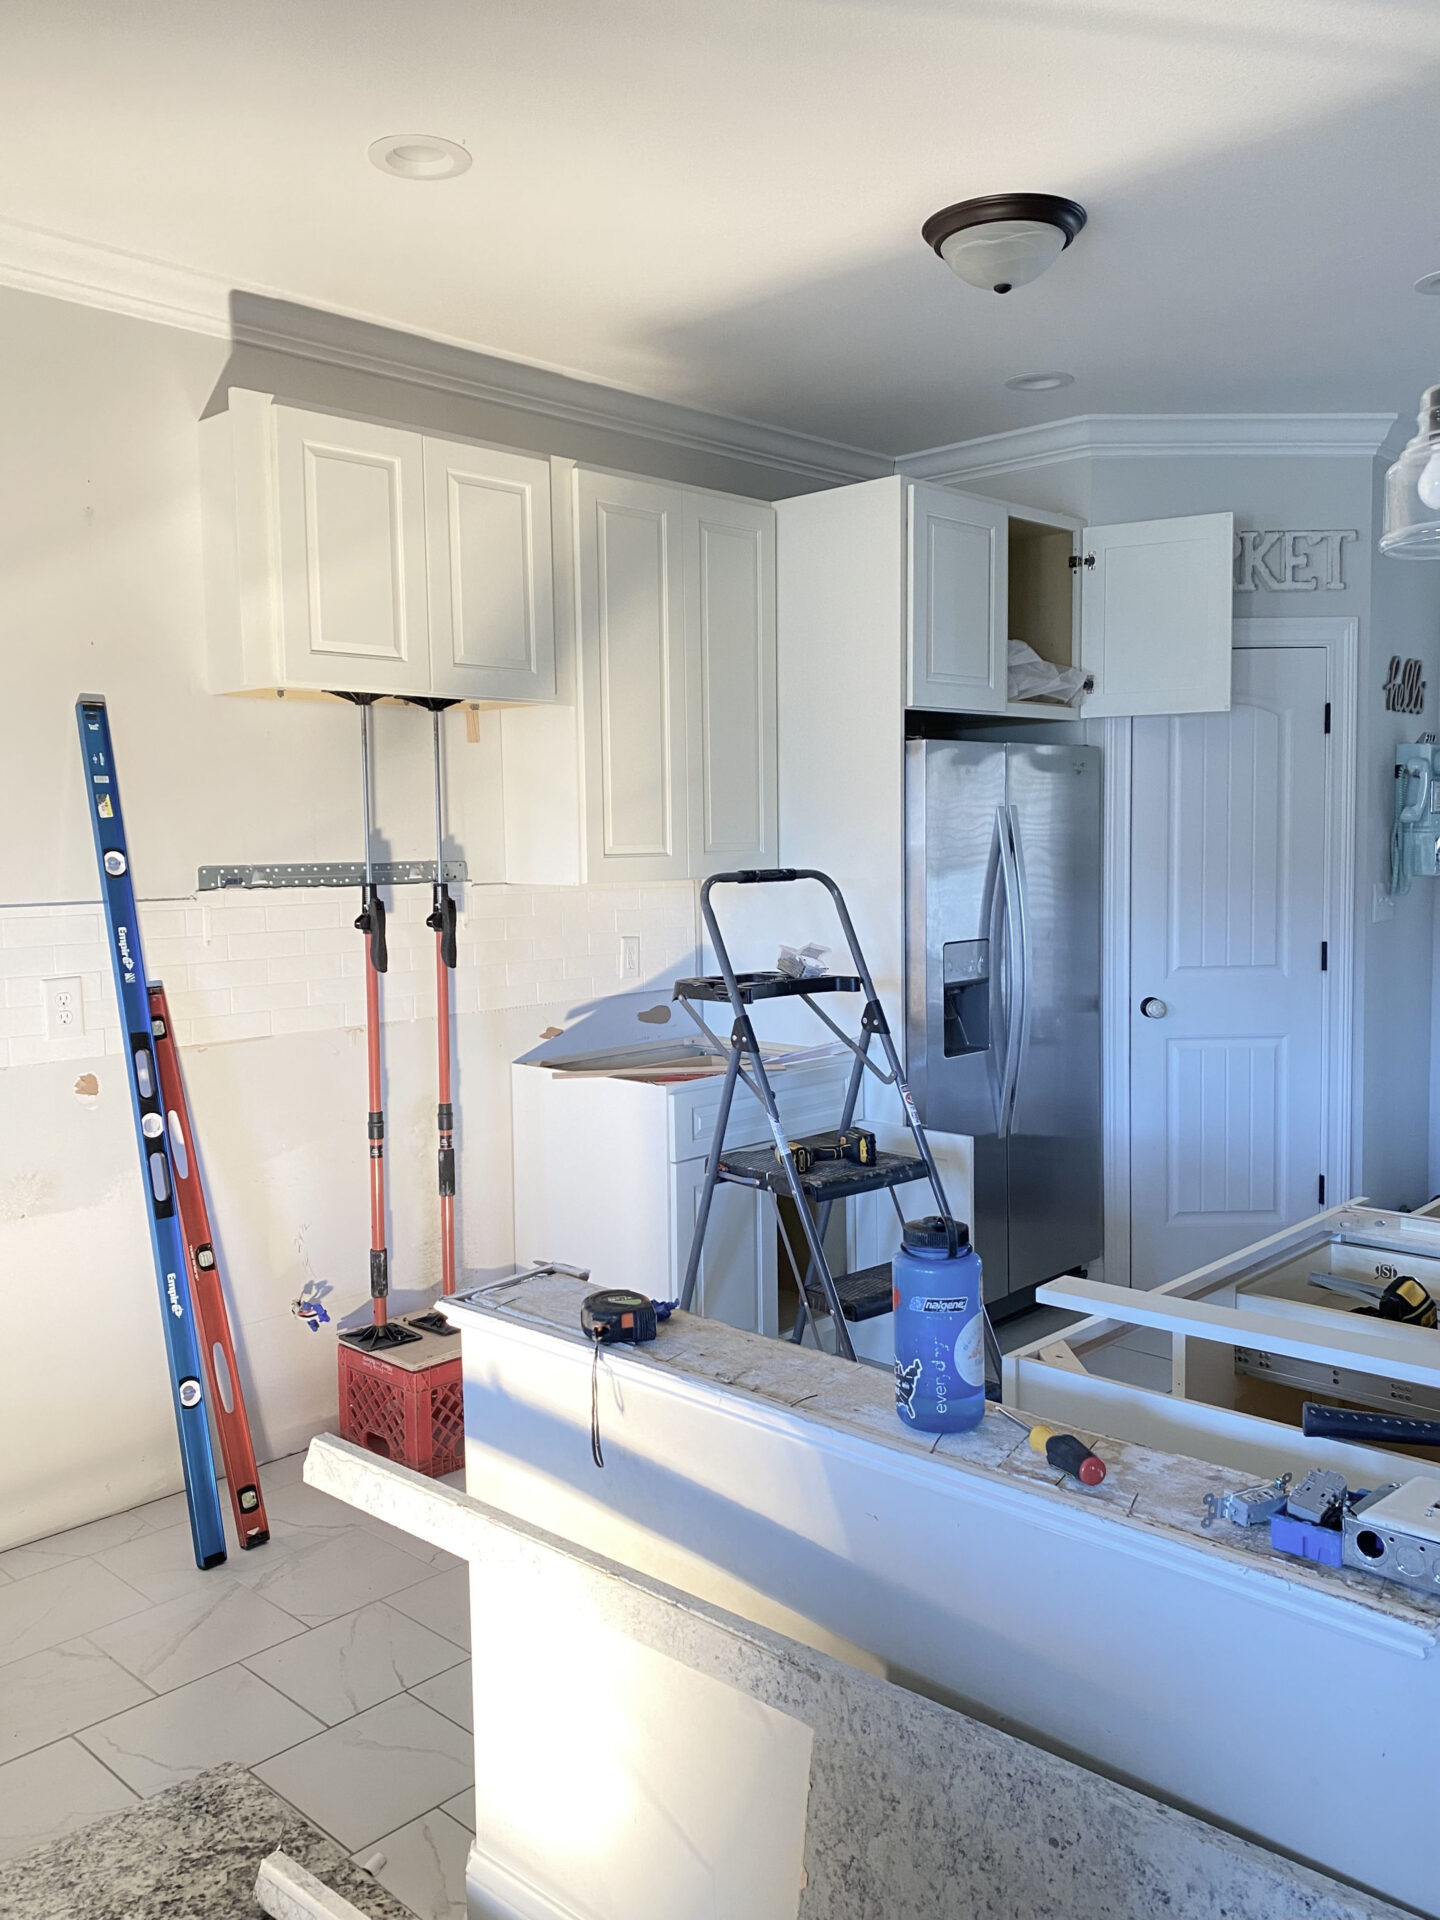
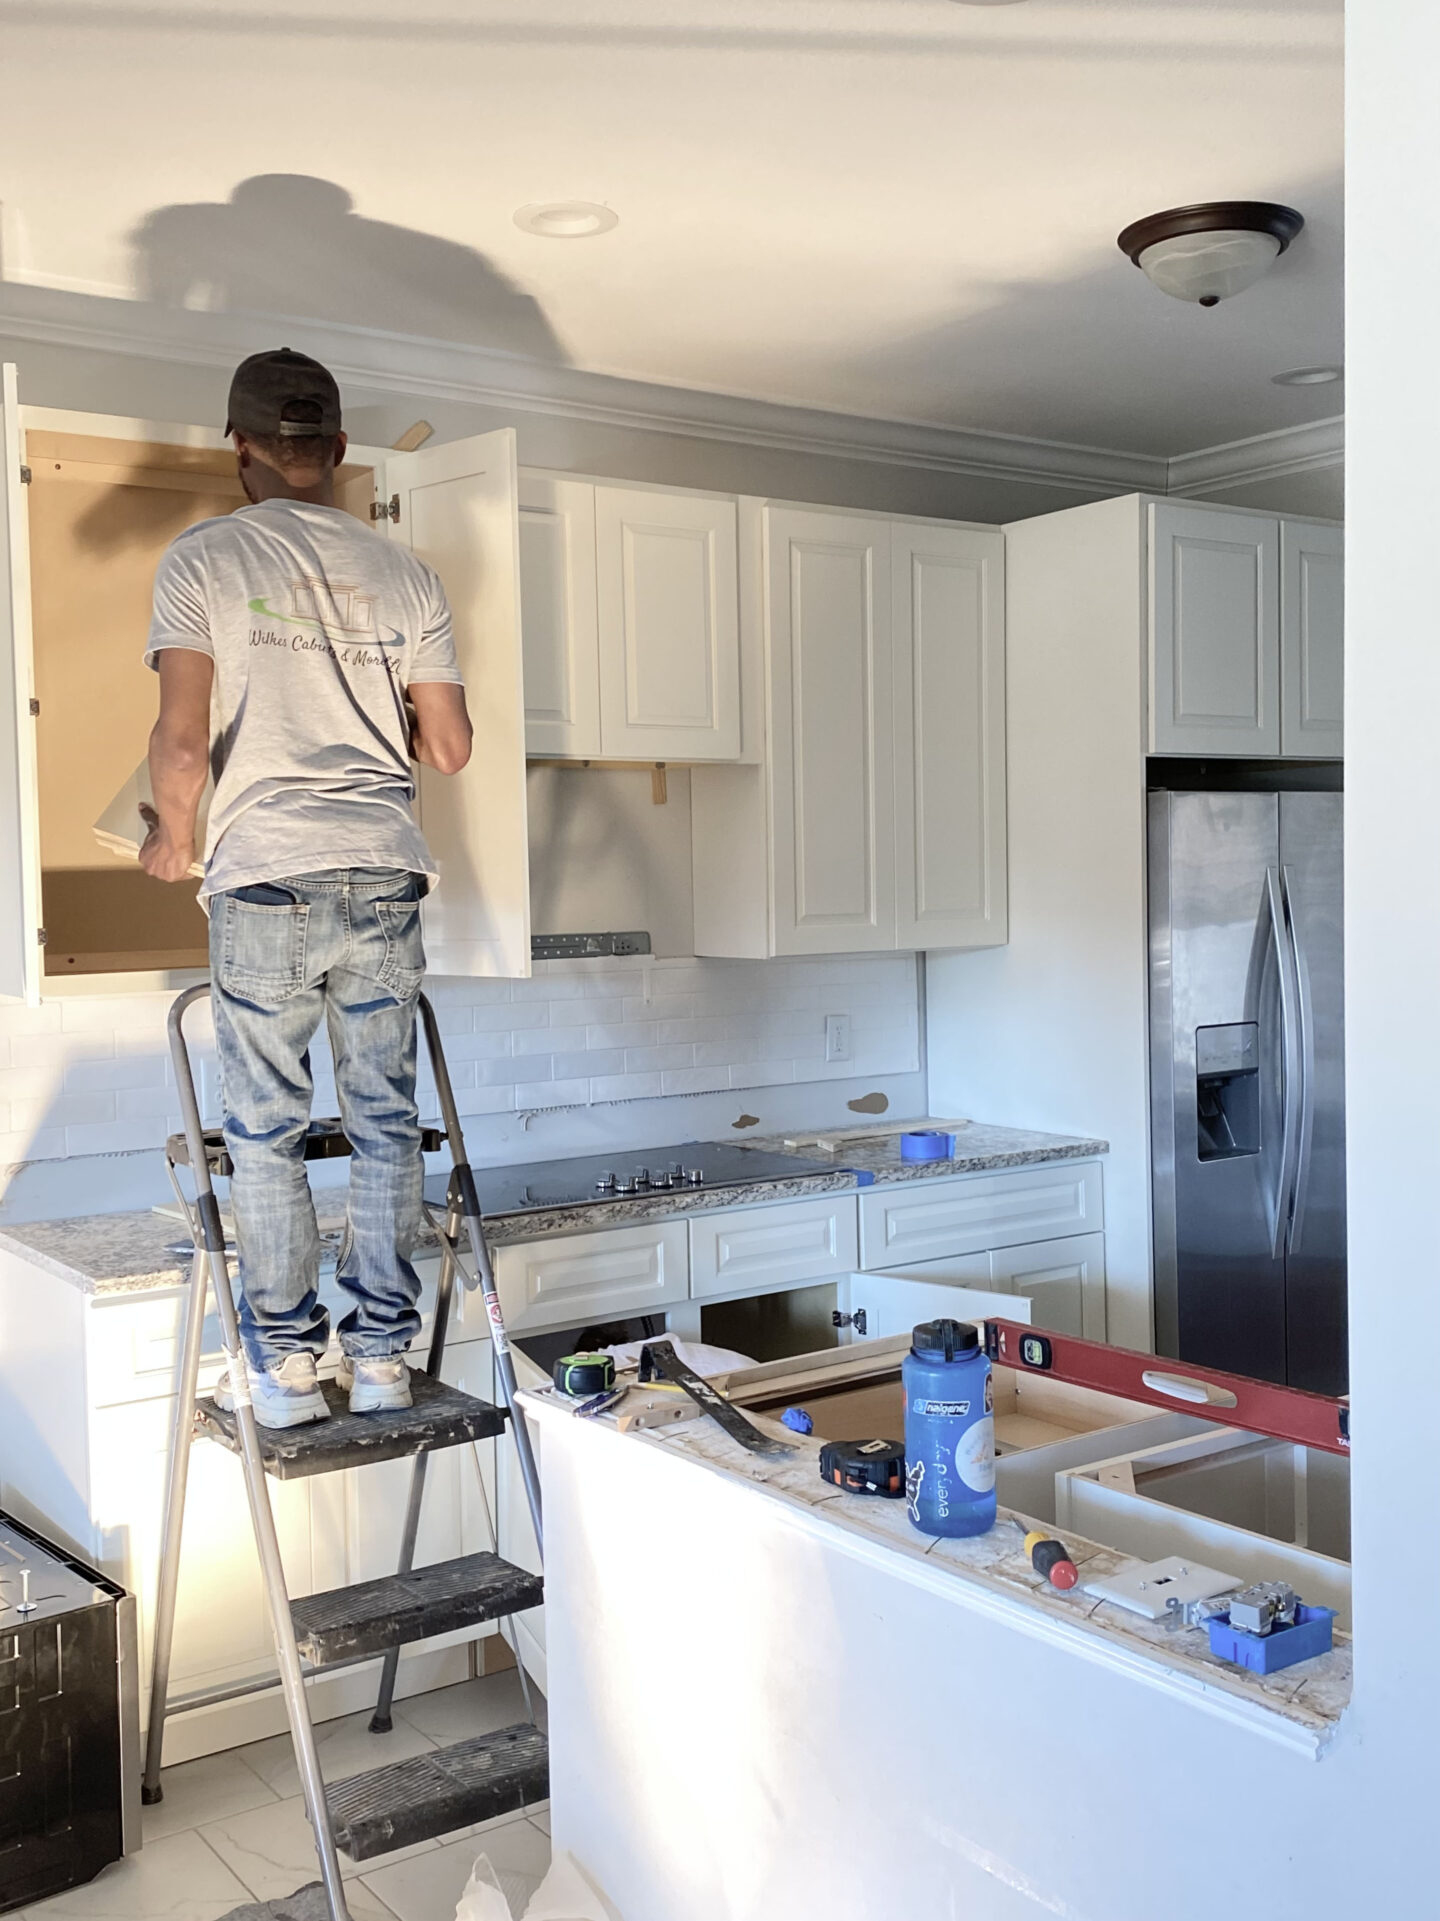
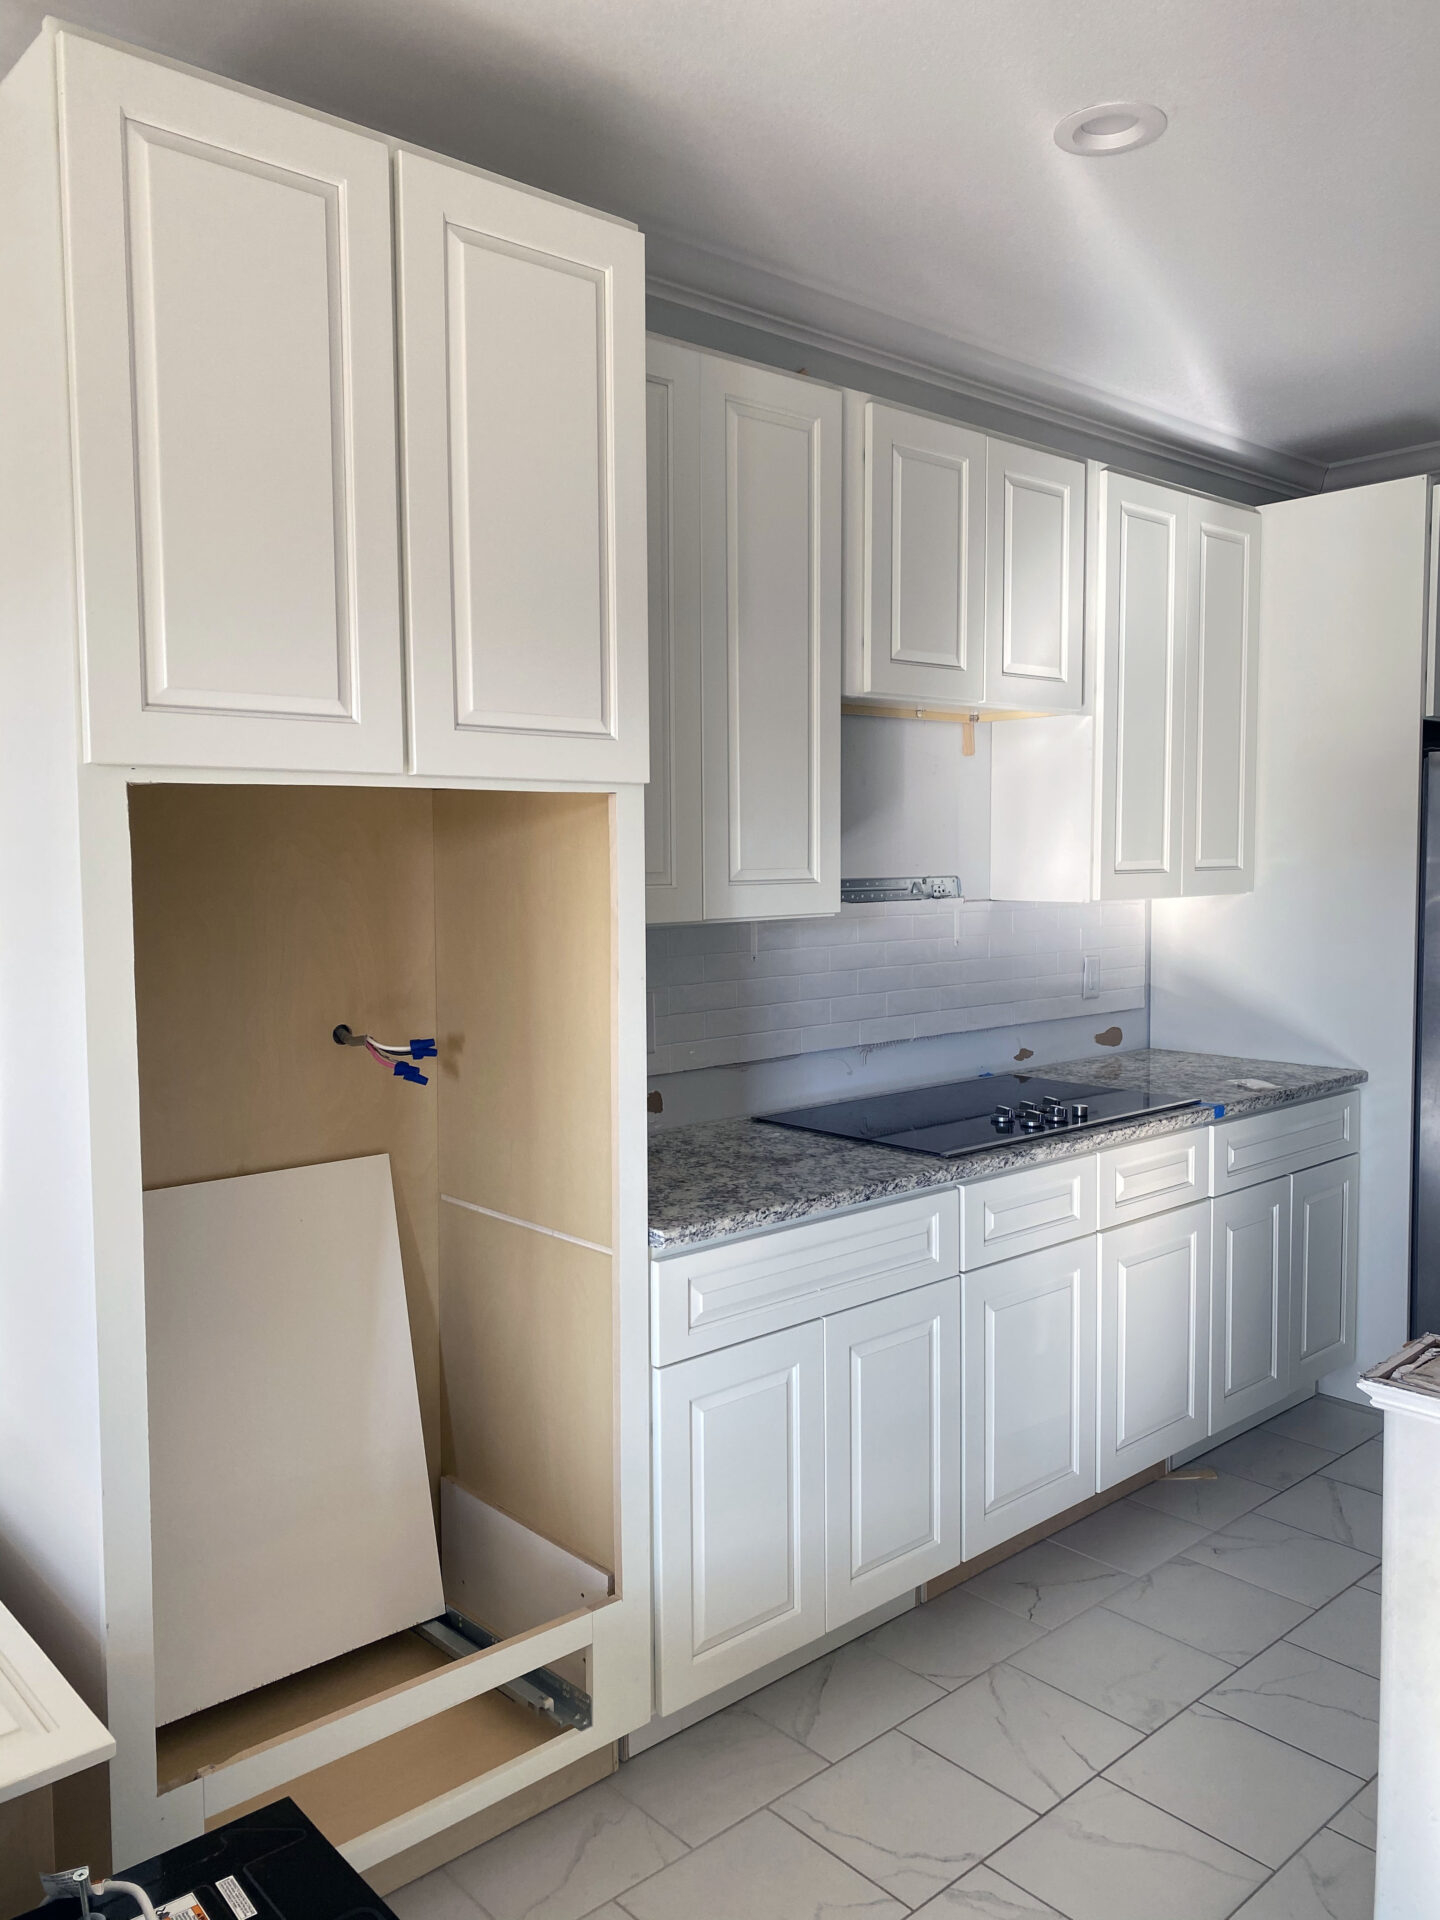
Wilkes Cabinets was so kind to put my granite back on for my cooktop! Without that, we would have been without a stove for 6 weeks while we waited for the new countertops.
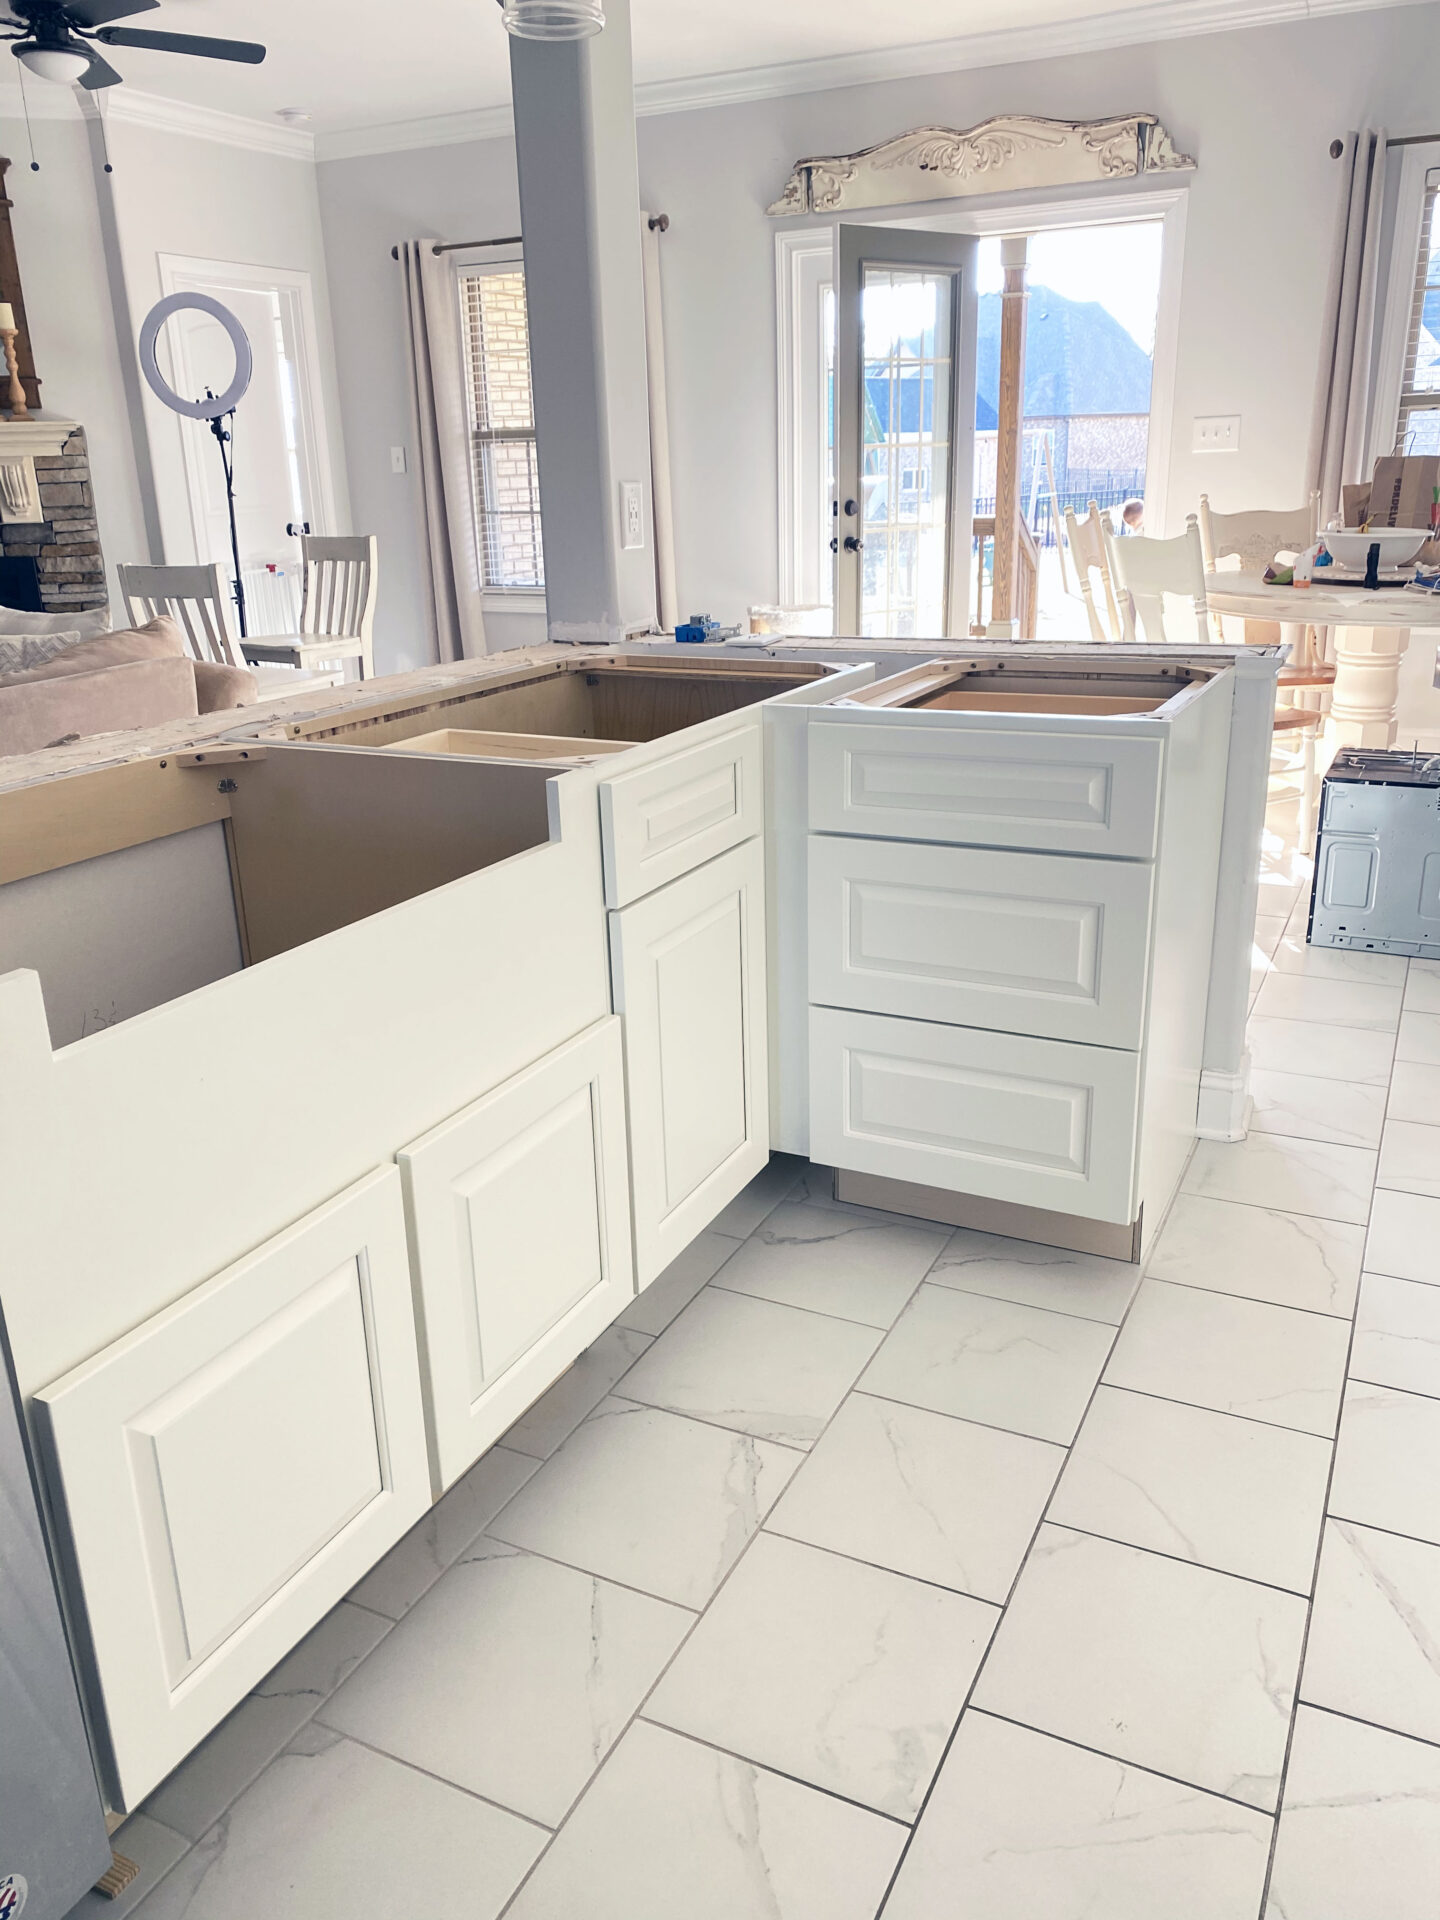
Placing the Sink
I think one of the most exciting parts of this renovation was getting our Kohler Cast Iron Enamel Farmhouse sink installed! It was nerve-wracking to watch the guys get it into place, but once it was there I was swooning! This sink is so much more amazing in person, big, deep, and so perfect for this kitchen. I love it.
The countertop company we were working with required the sink be “dry fitted” in place for when they came to create the template, so that is what Wilkes Cabinets & More is doing in the photo below.
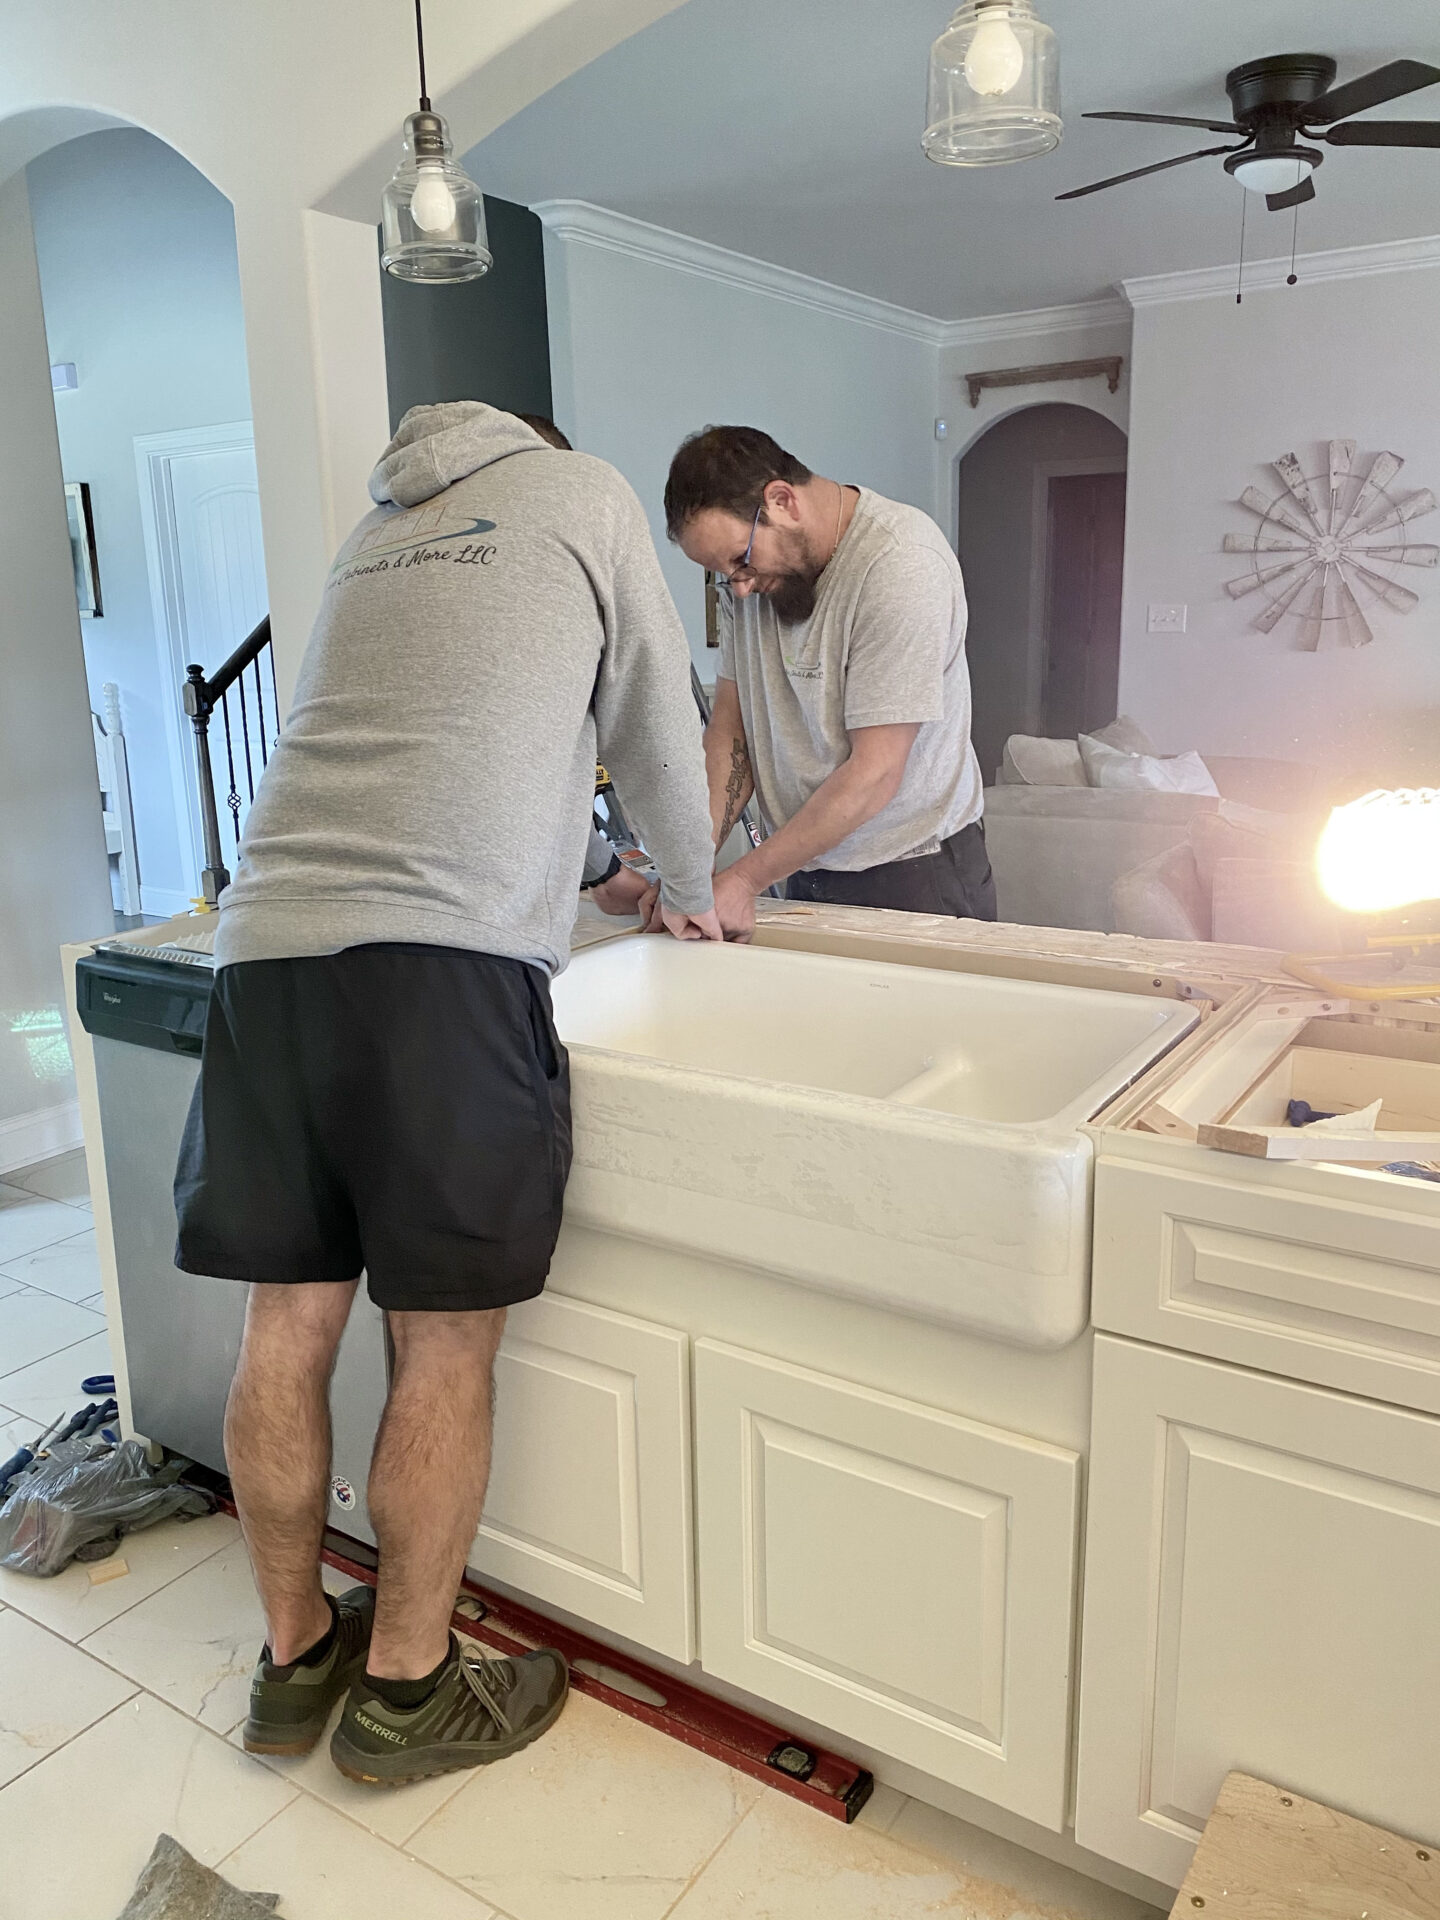
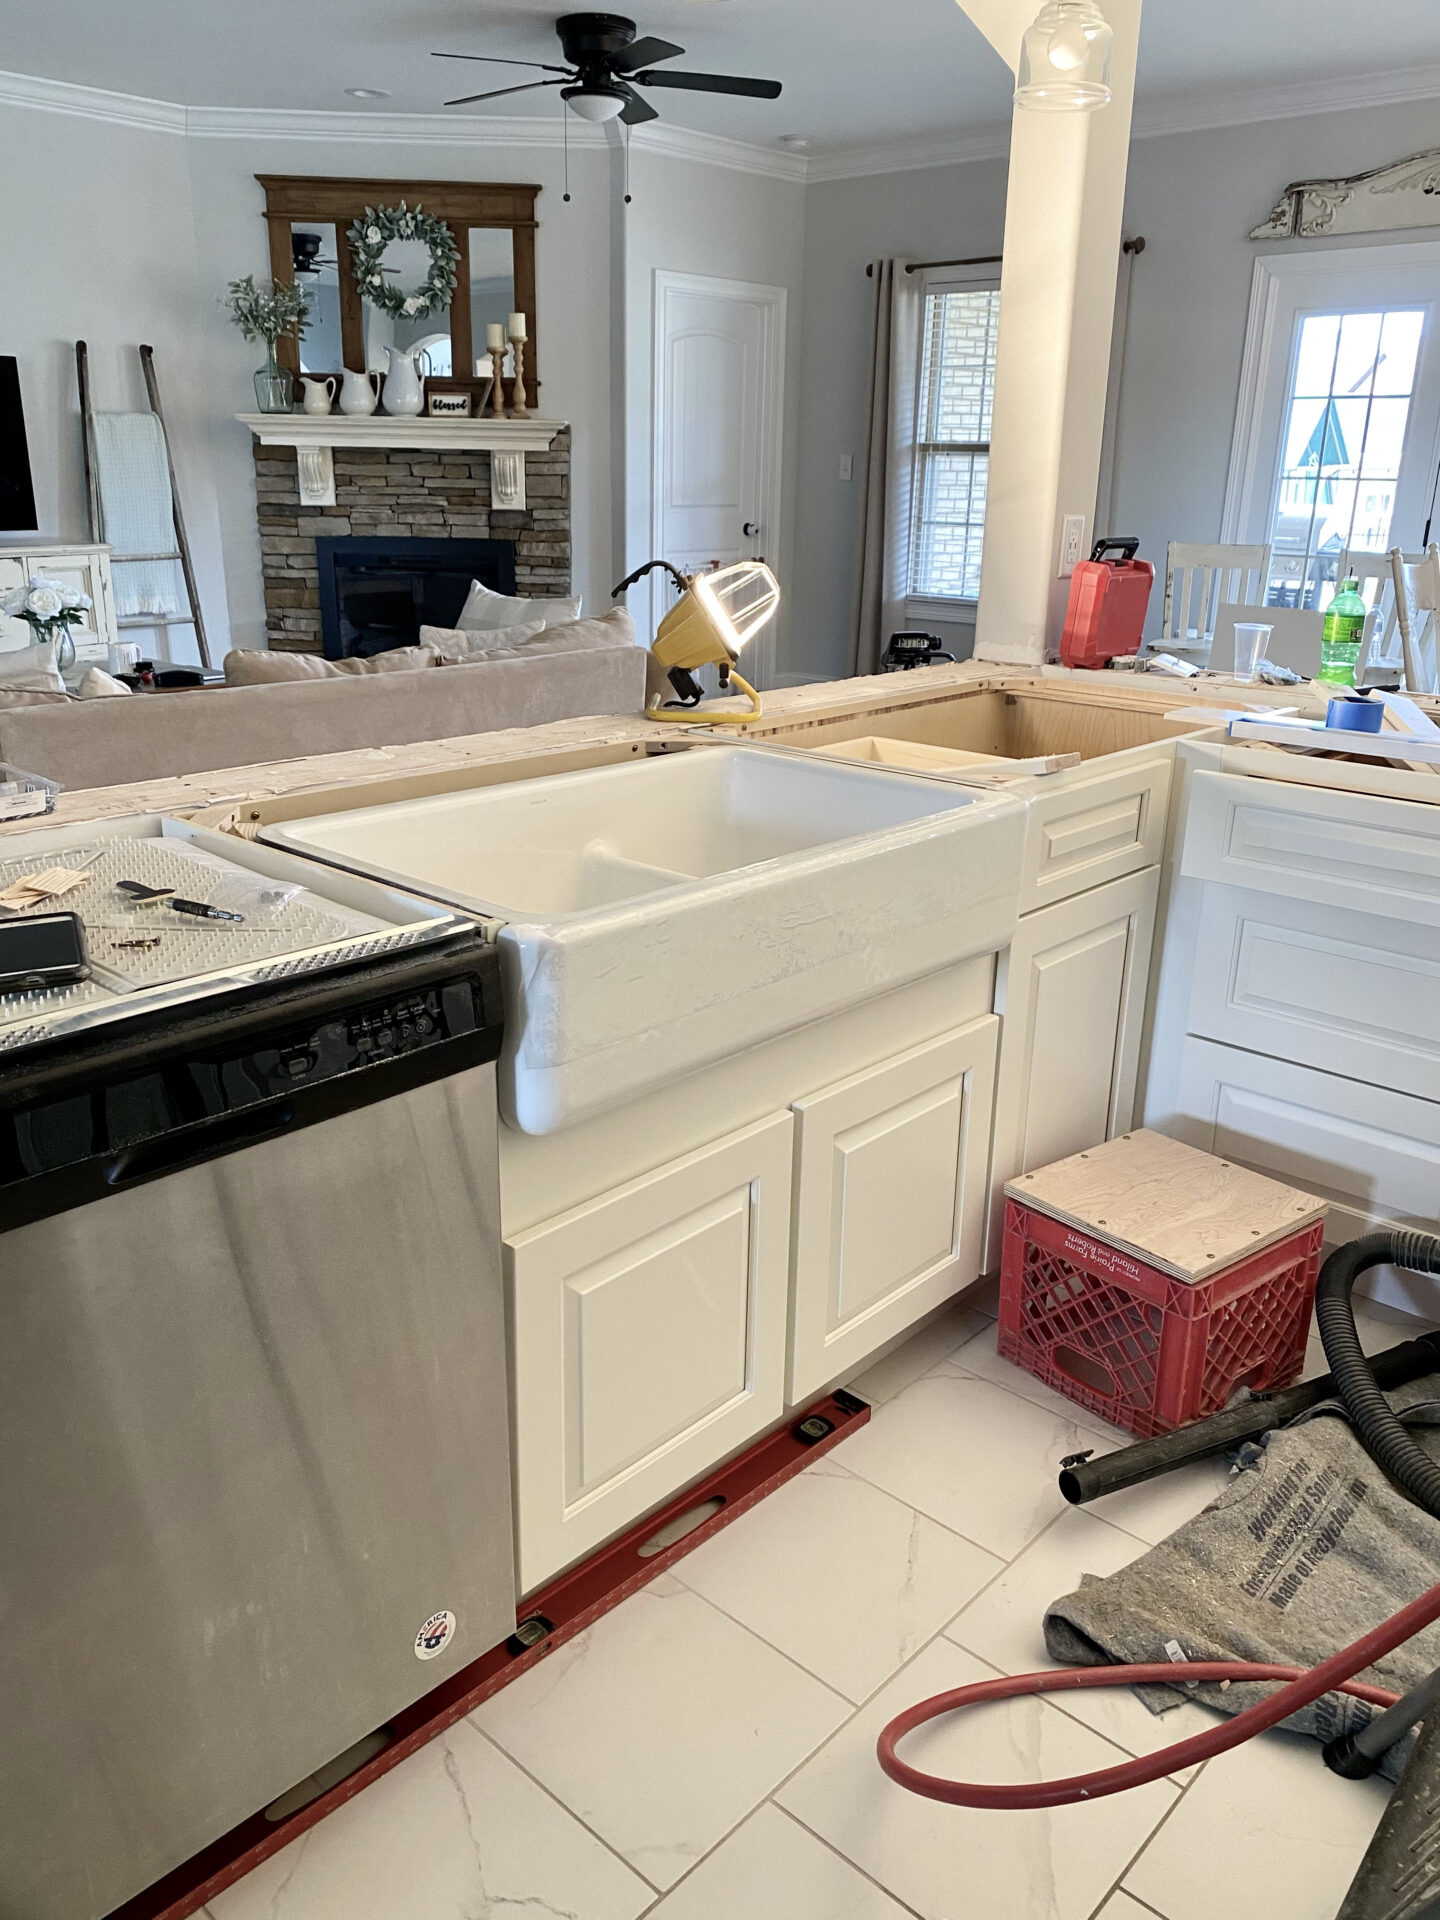
I do want to mention that each time Wilkes Cabinets & More came to work on the kitchen, they ALWAYS cleaned up behind themselves, and actually made very little mess and dust.
The Next Steps
Now that the cabinets are installed, and all of the appliances back in their places, the next step is getting the countertop templates made! The day after the cabinets were installed, the Template guy came to take measurements.
Stone World was very professional with the entire template and installation process. The only downside was that we had to wait 4-6 weeks after the measurements were taken to have the countertops installed. That meant no dishwasher and no sink for 6 weeks! Let me tell you, that was not easy. I washed multiple things in the bathtub during those weeks, and we ate countless frozen dinners lol!
A Small Setback
Originally, when we started this renovation, our intention was to keep the original subway tile backsplash up to save a little money. There ended up being an issue though. Even though the backsplash was intact, the new cabinets were not as thick as the old pressboard cabinets. There ended up being about an inch of space between the edge of the existing backsplash and the sideboards of the cabinets because of this.
We had two options: order some more tile and just bring out the ends to meet the edge of the sideboard…or just redo the backsplash. I ended up choosing to redo the backsplash in order for things to look more cohesive and to make sure all of the tile came from the same lot. Ordering tile from different lots can be disastrous and I wanted to avoid that if possible. I also decided to take the backsplash all the way down to the countertops and get rid of the side splash.
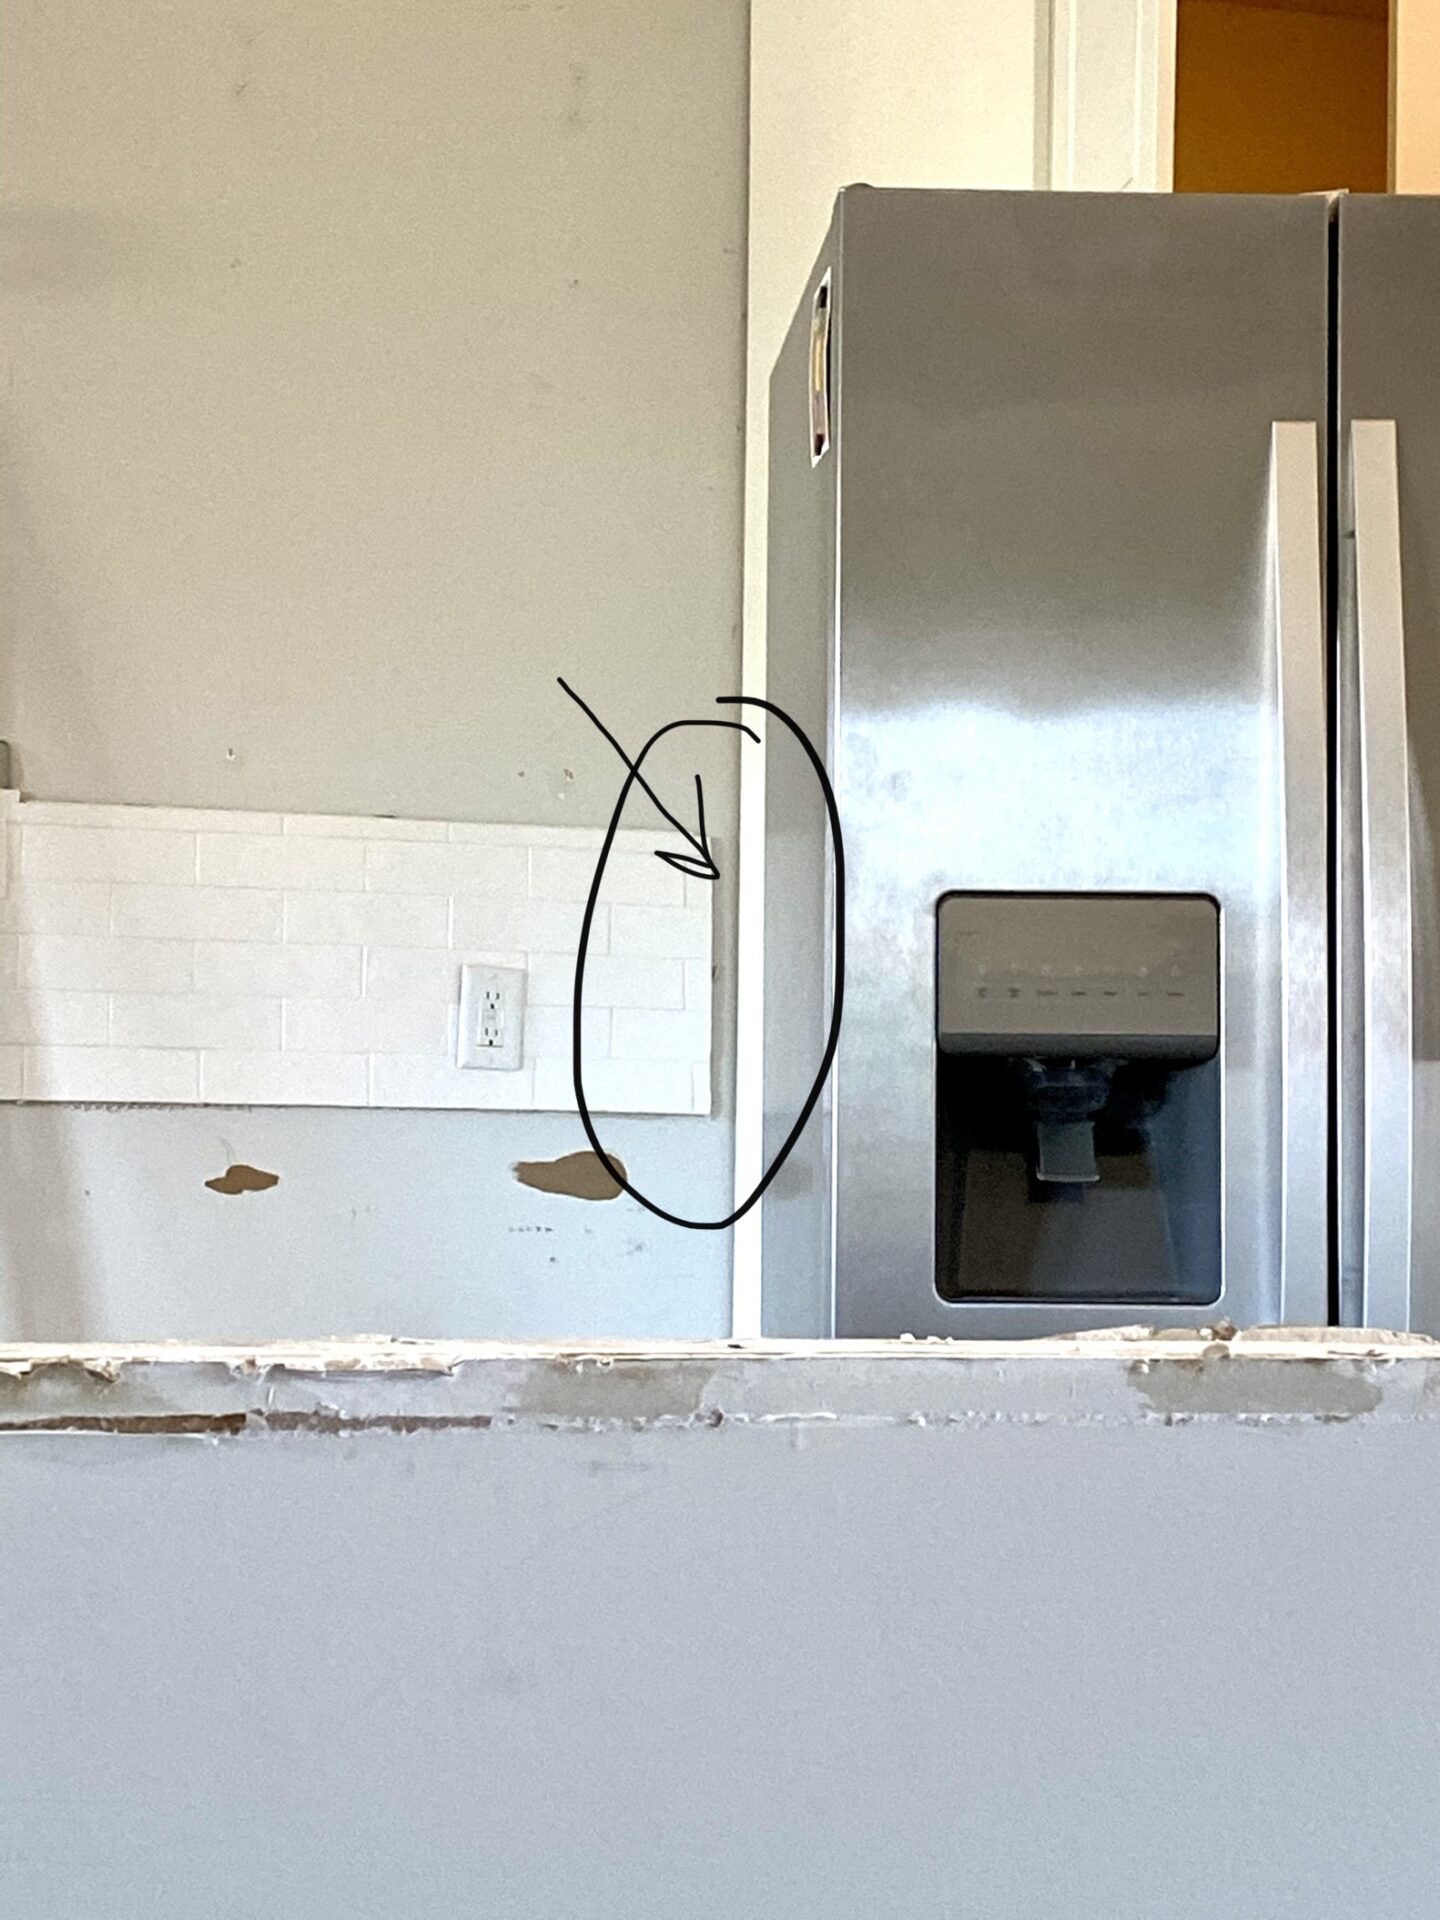
I loved my old backsplash because it was one of the only things I really got to pick that was my first choice when we first built the house. So I decided to choose the same backsplash for Our All White Kitchen Renovation!
The Backsplash we chose
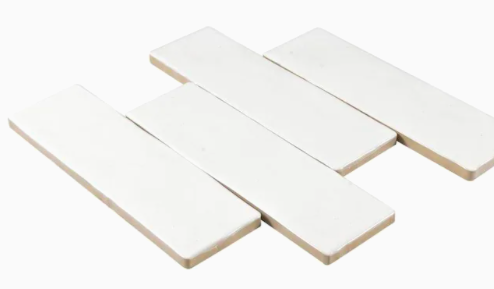
We chose the 3-8 Hand Crafted White Ceramic Tile, which you can find at Lowes! It’s a beautiful subway tile, which reminds me of a Rae Dunn mug with the texture they have.
Before the countertop Template could be done, we needed to remove the old backsplash and put up fresh drywall.
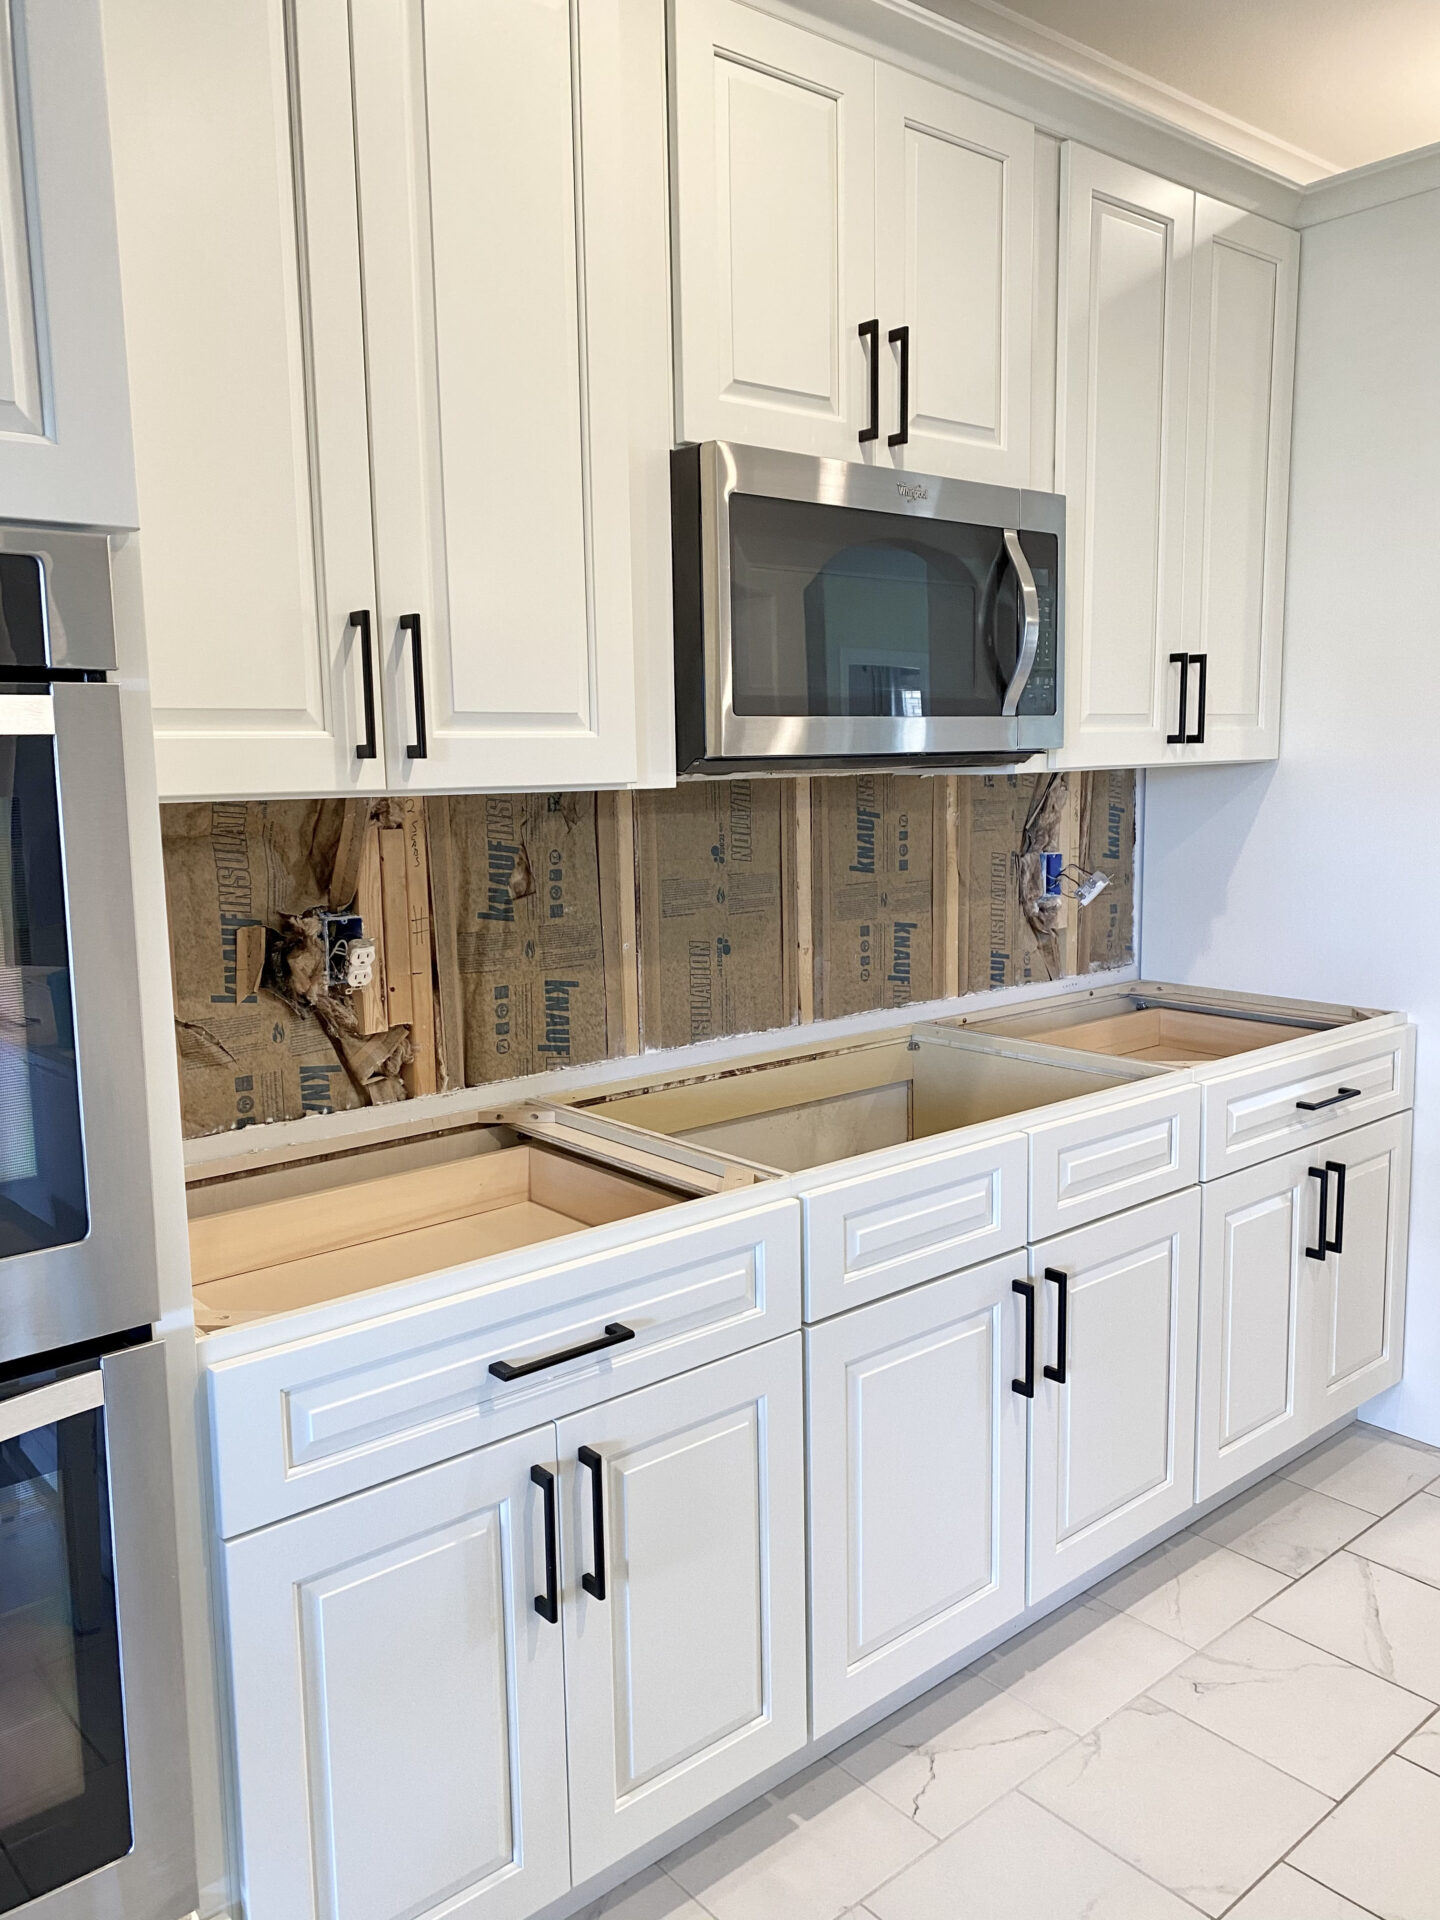
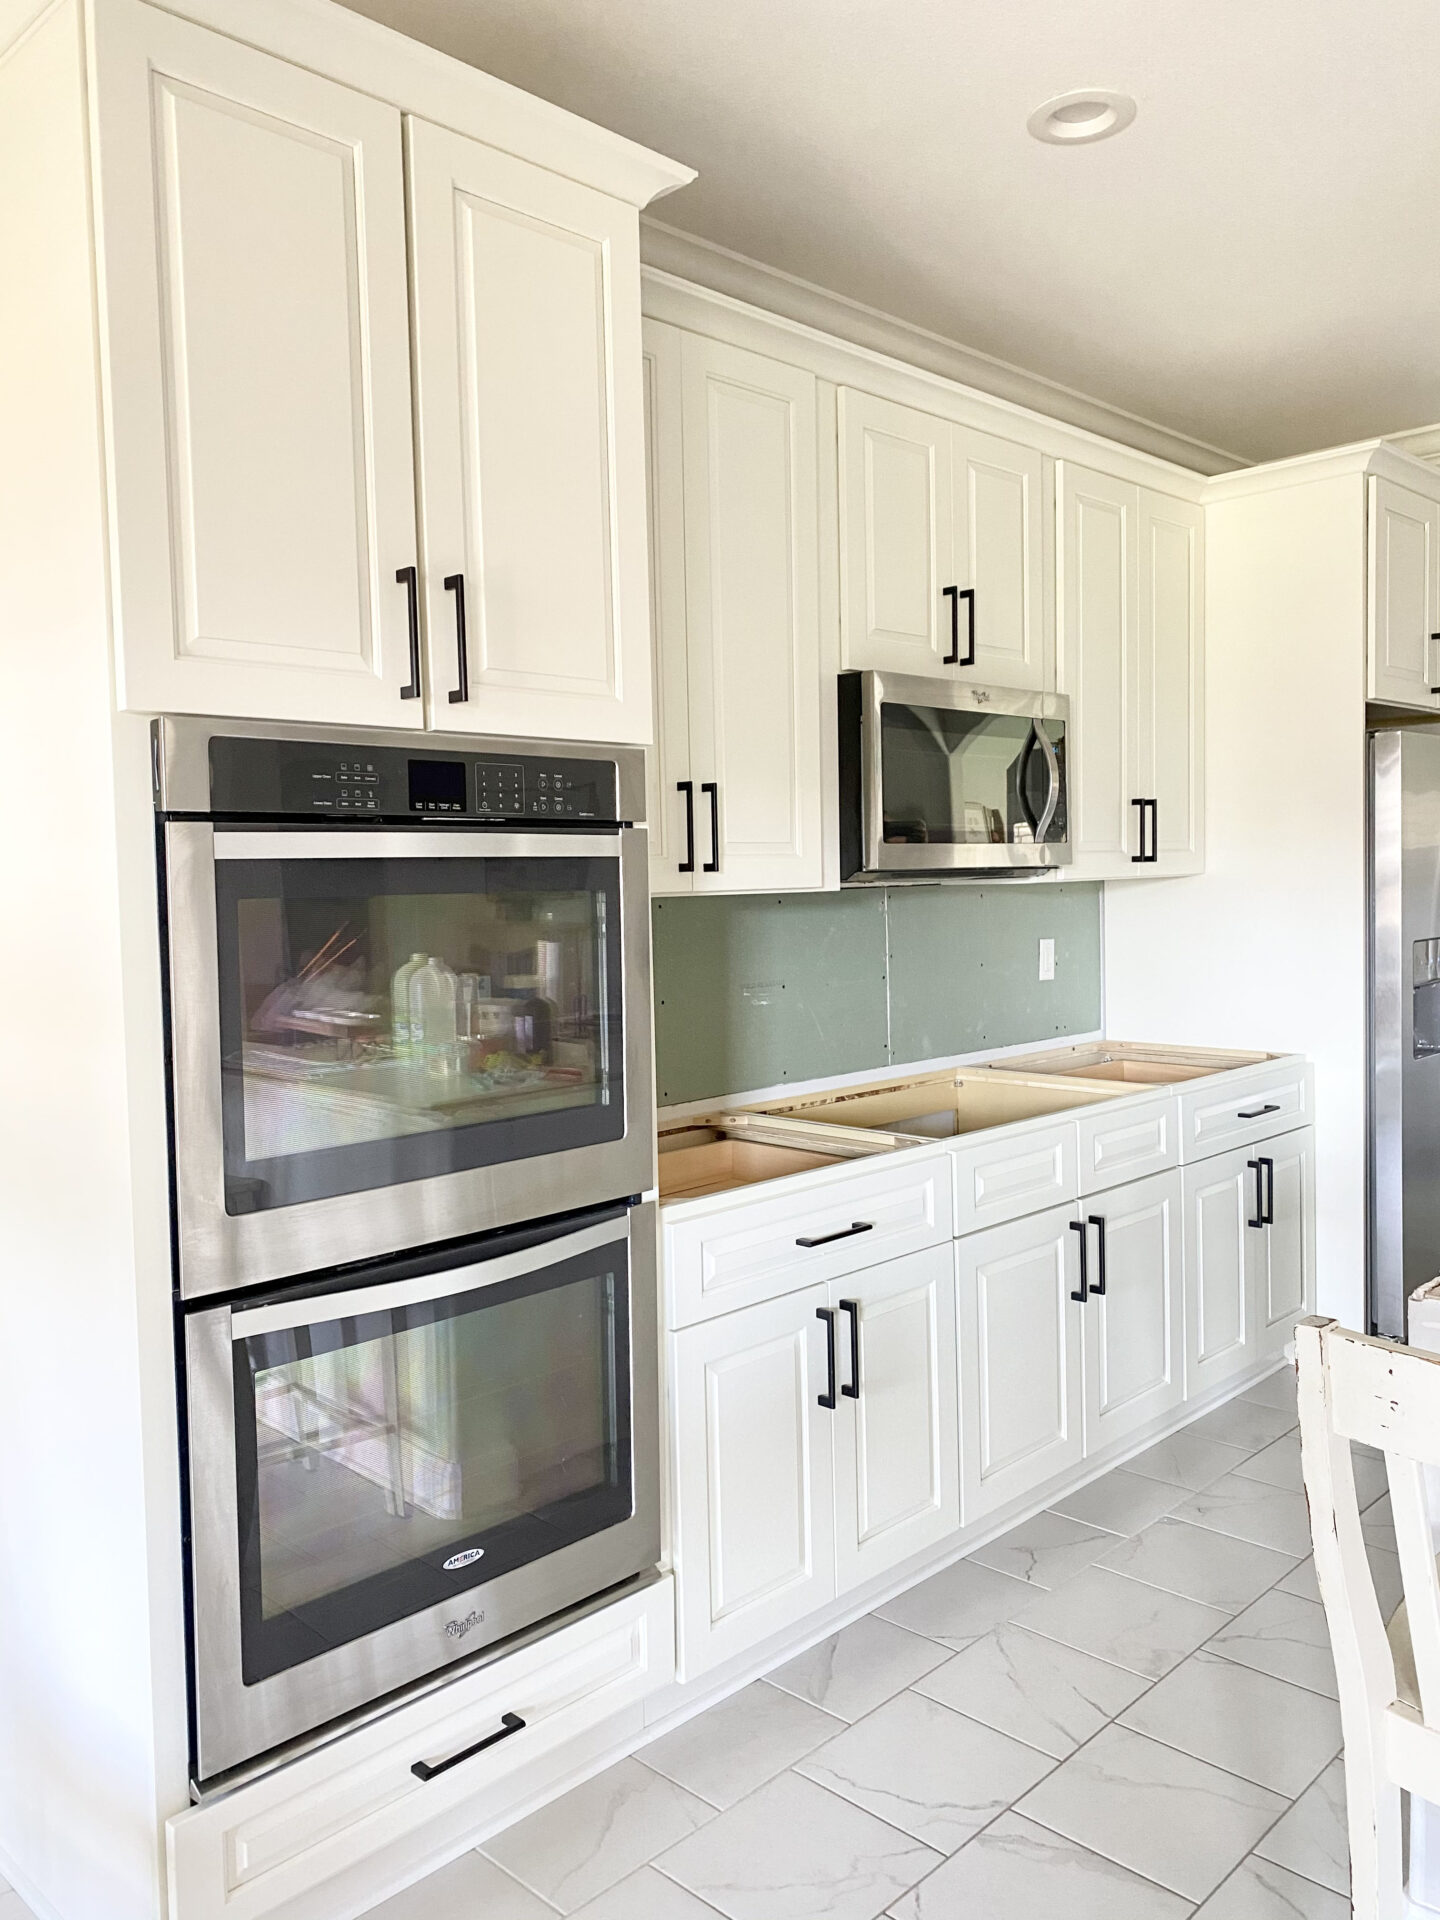
Now that the drywall is up, we can finally get our countertops templates done, and get the countertops installed!
Countertop Installation Day
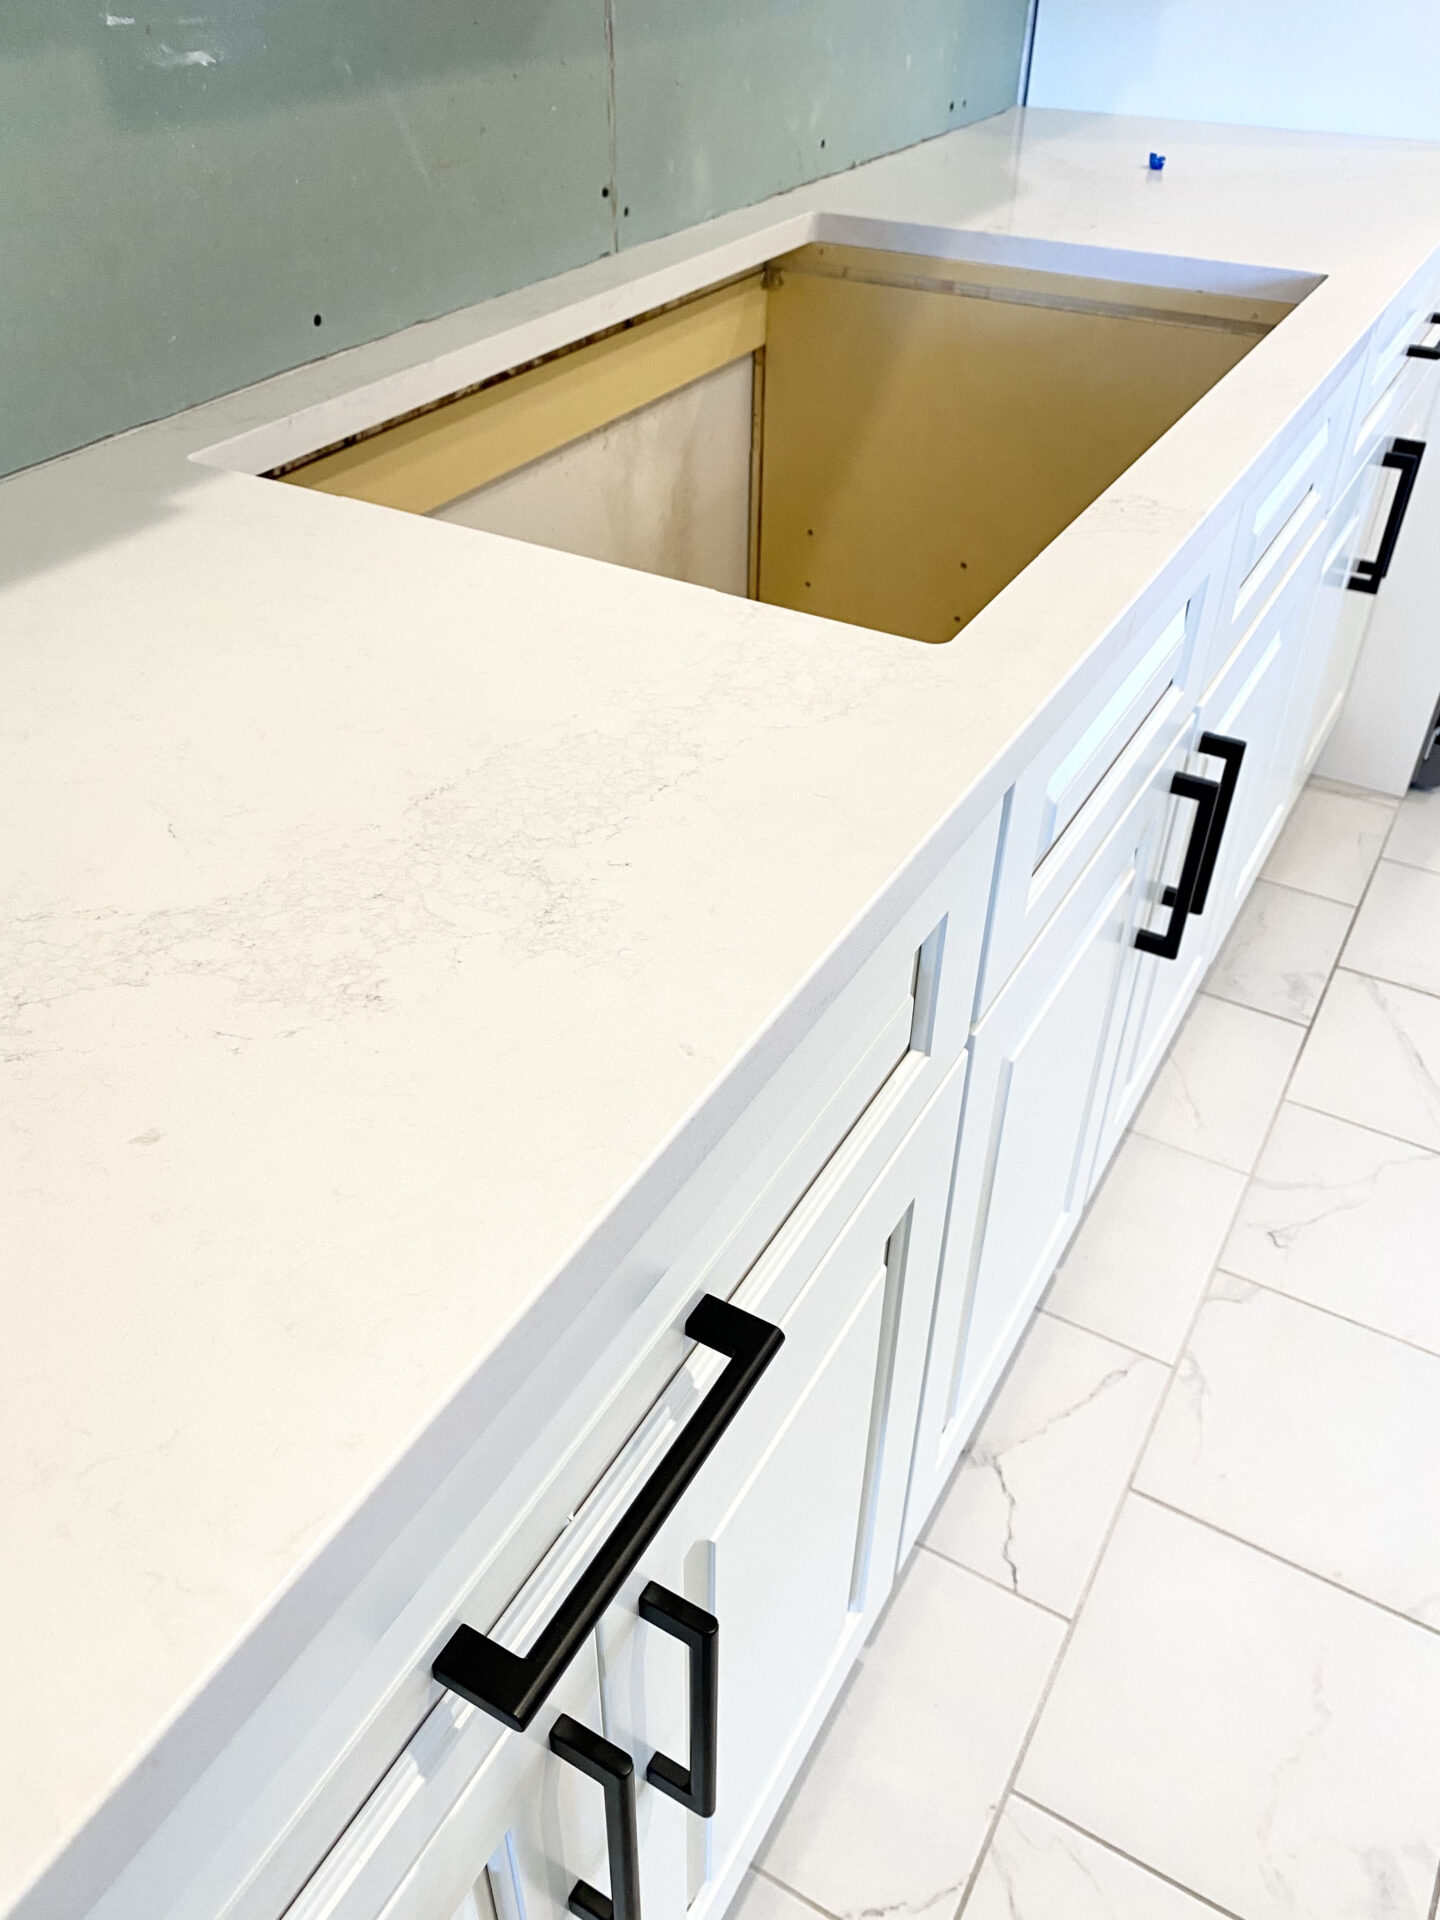
The countertop slabs came in three different pieces. The slab for the cooktop came in one piece, and the island slabs came in two pieces. When they arrived I was so excited! They were stunning in person.
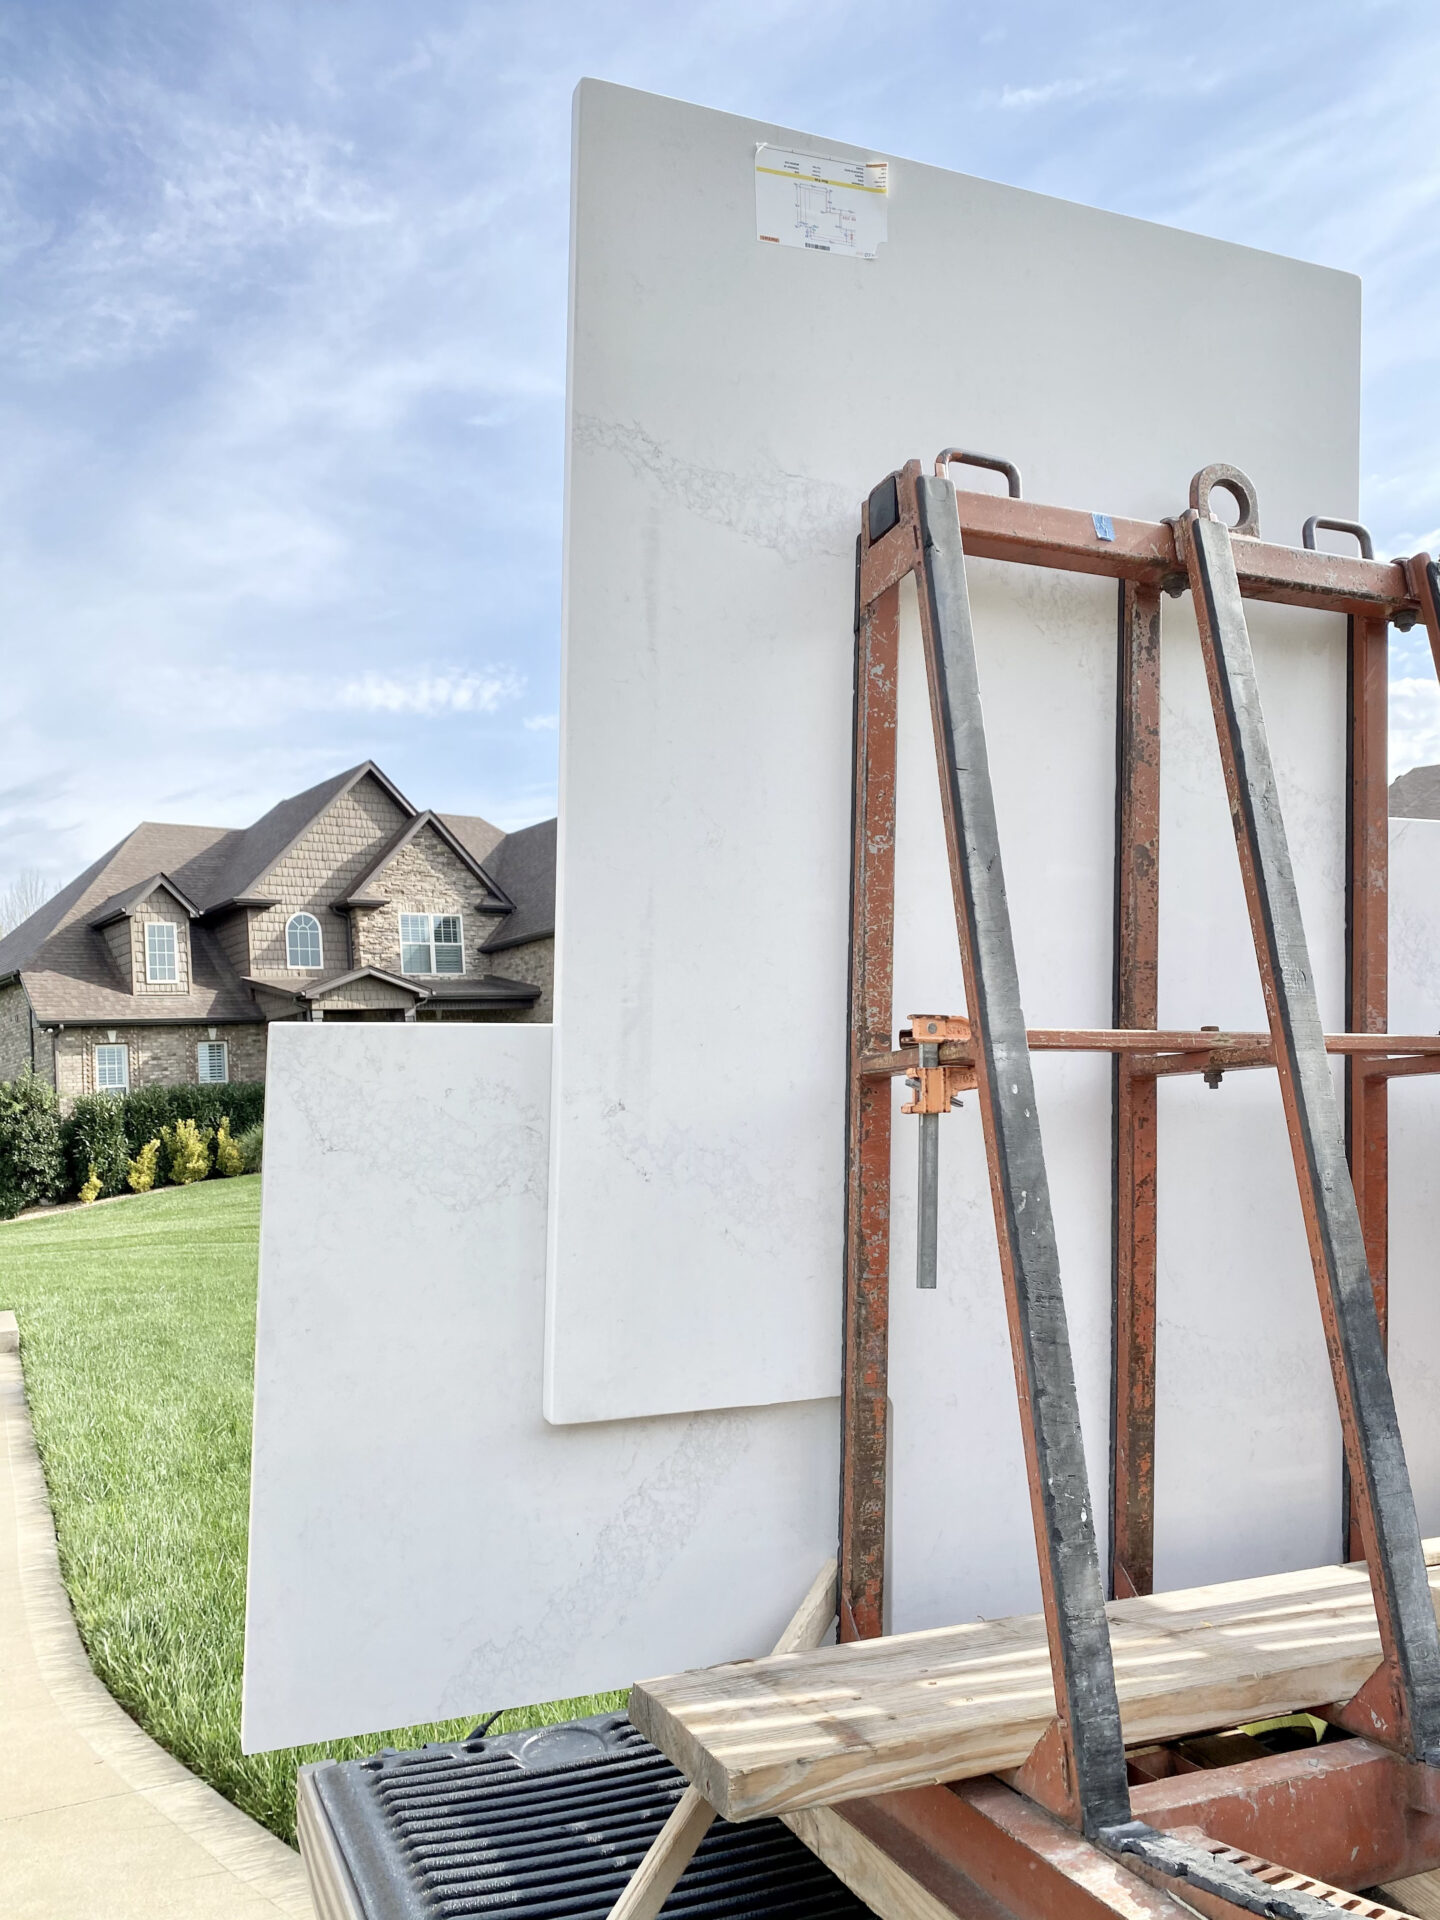
It took two strong men to haul each piece into the house, but I feel like one more would have been even better. These pieces were huge and super heavy, but the two of them managed!
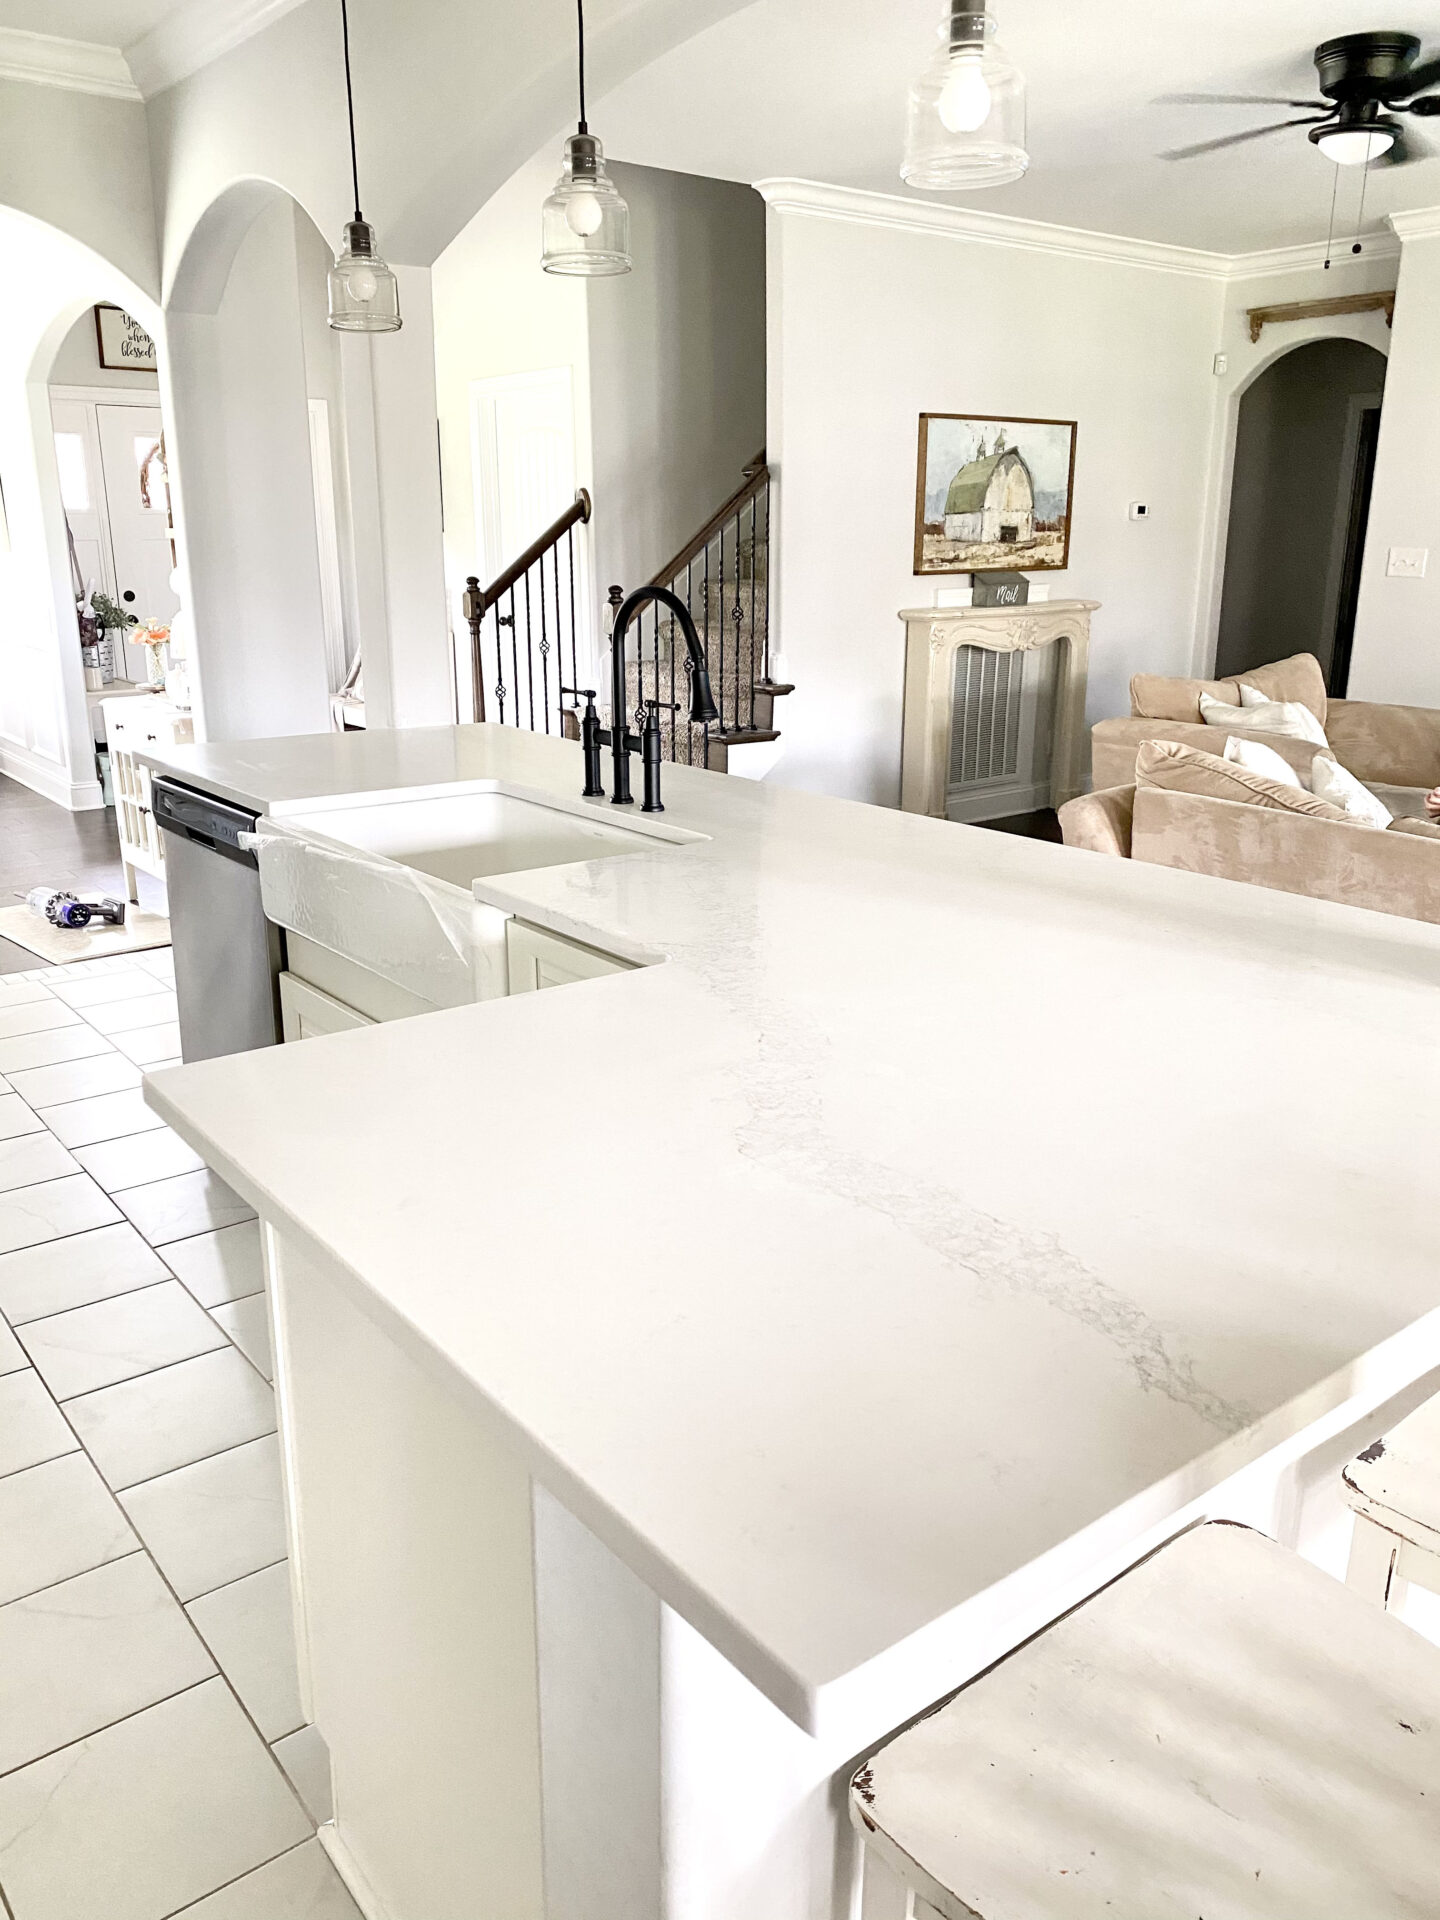
The countertops went on seamlessly! The men got them fused, glued, and caulked. They dry-fitted my new faucet onto the countertops and that’s when everything really started to look like it was nearly finished! It was a super exciting day!
Backsplash Day
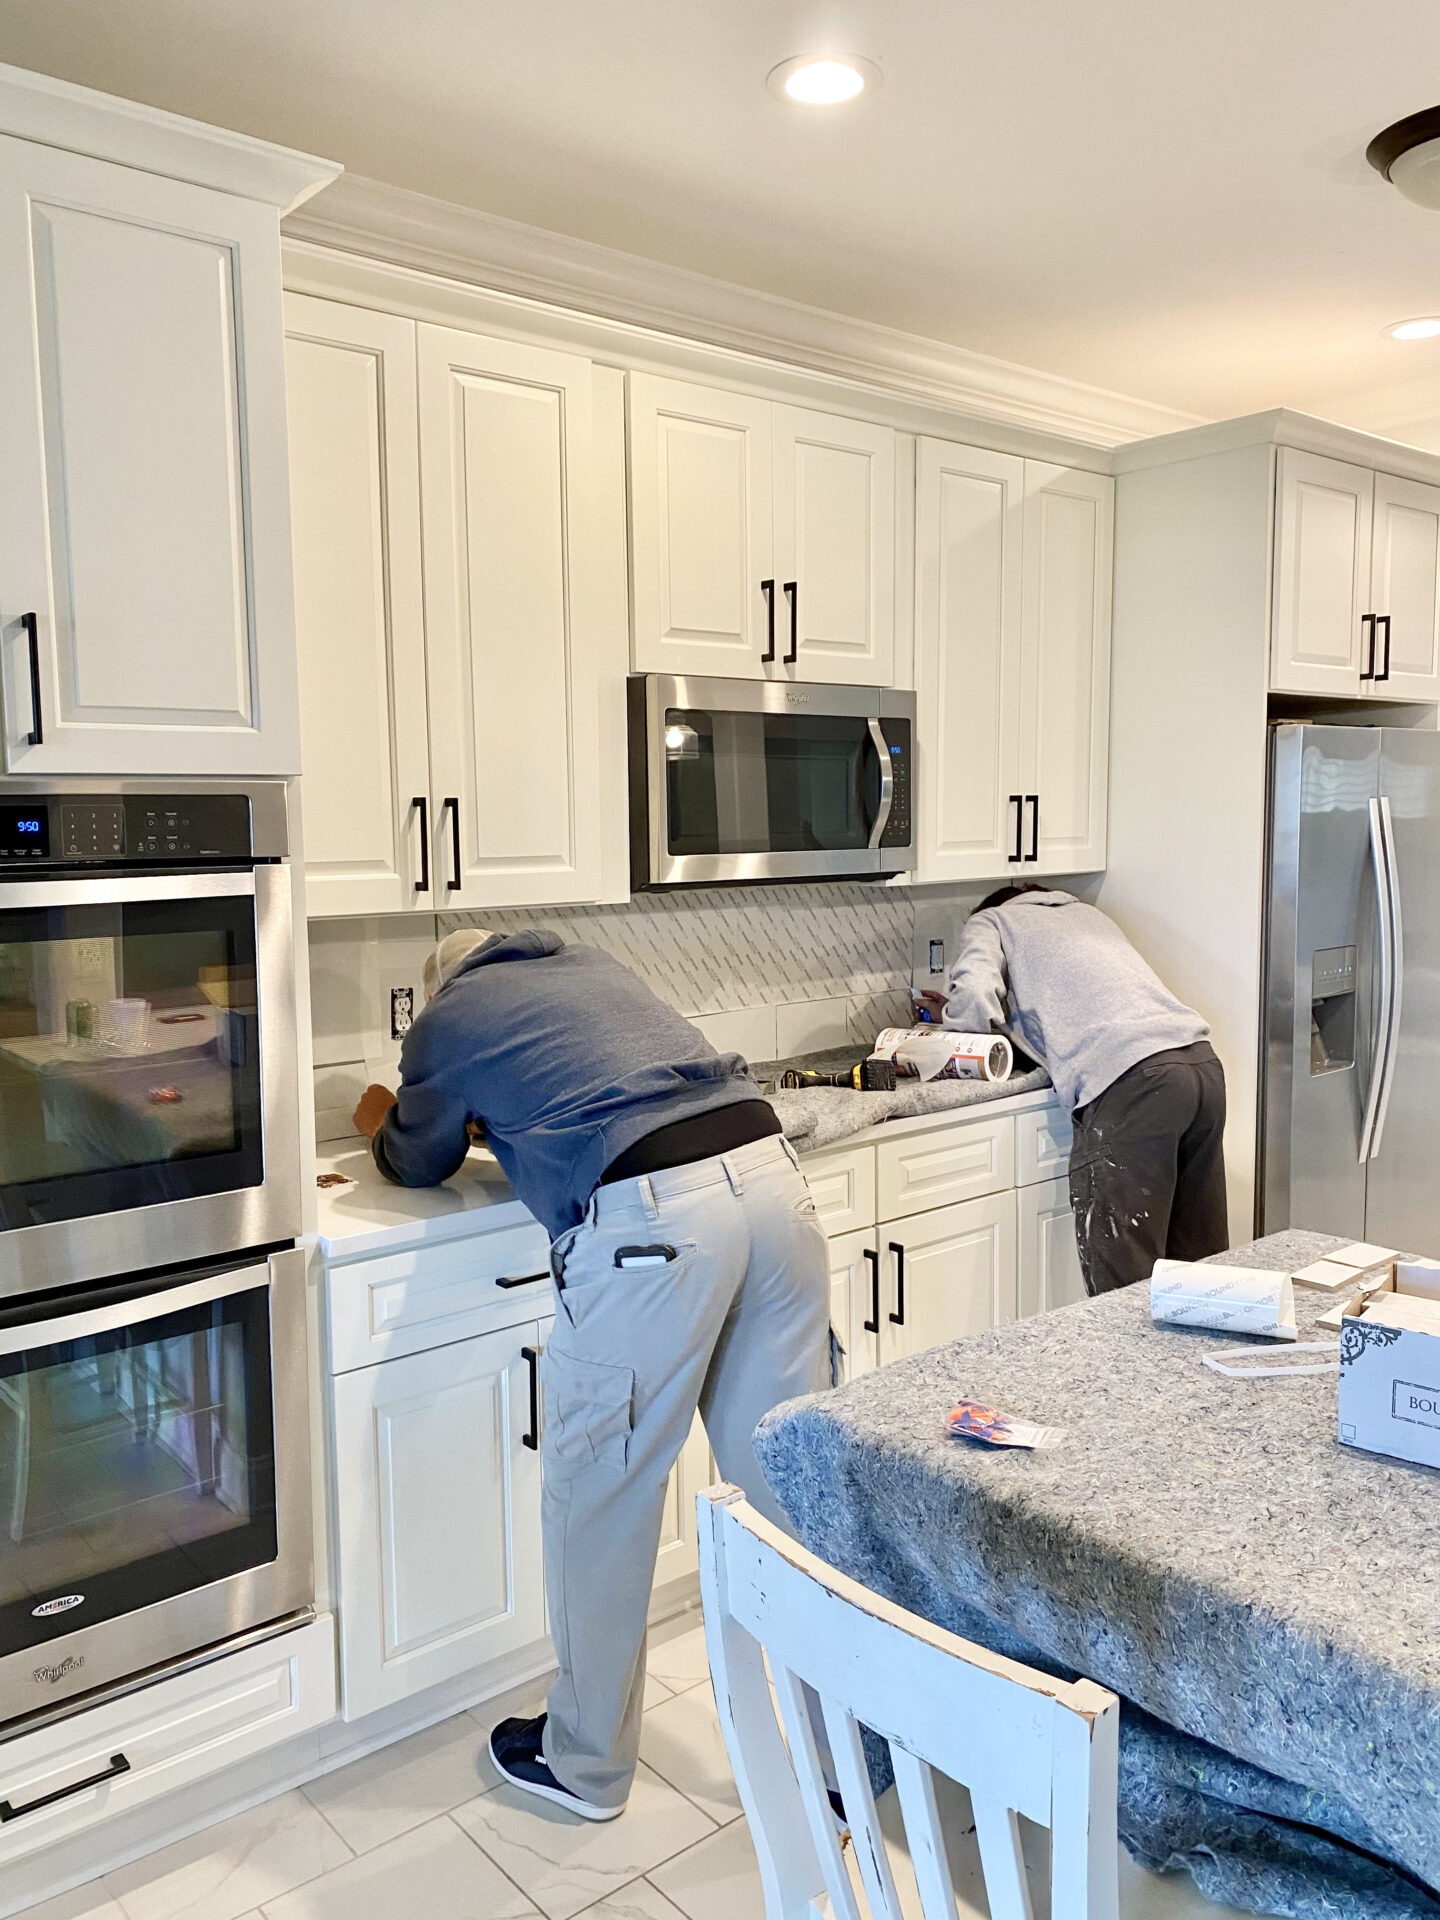
The next step step in Our All White Kitchen Renovation was to get the backsplash in! I couldn’t wait to see this go up. Especially because we had gotten rid of the sidesplash and were bringing the backsplash all the way down to the counter.
Wilkes Cabinets & More LLC did our backsplash for us and they did an excellent job! They do a lot more than cabinetry, so it was great to be able to use them for both projects.
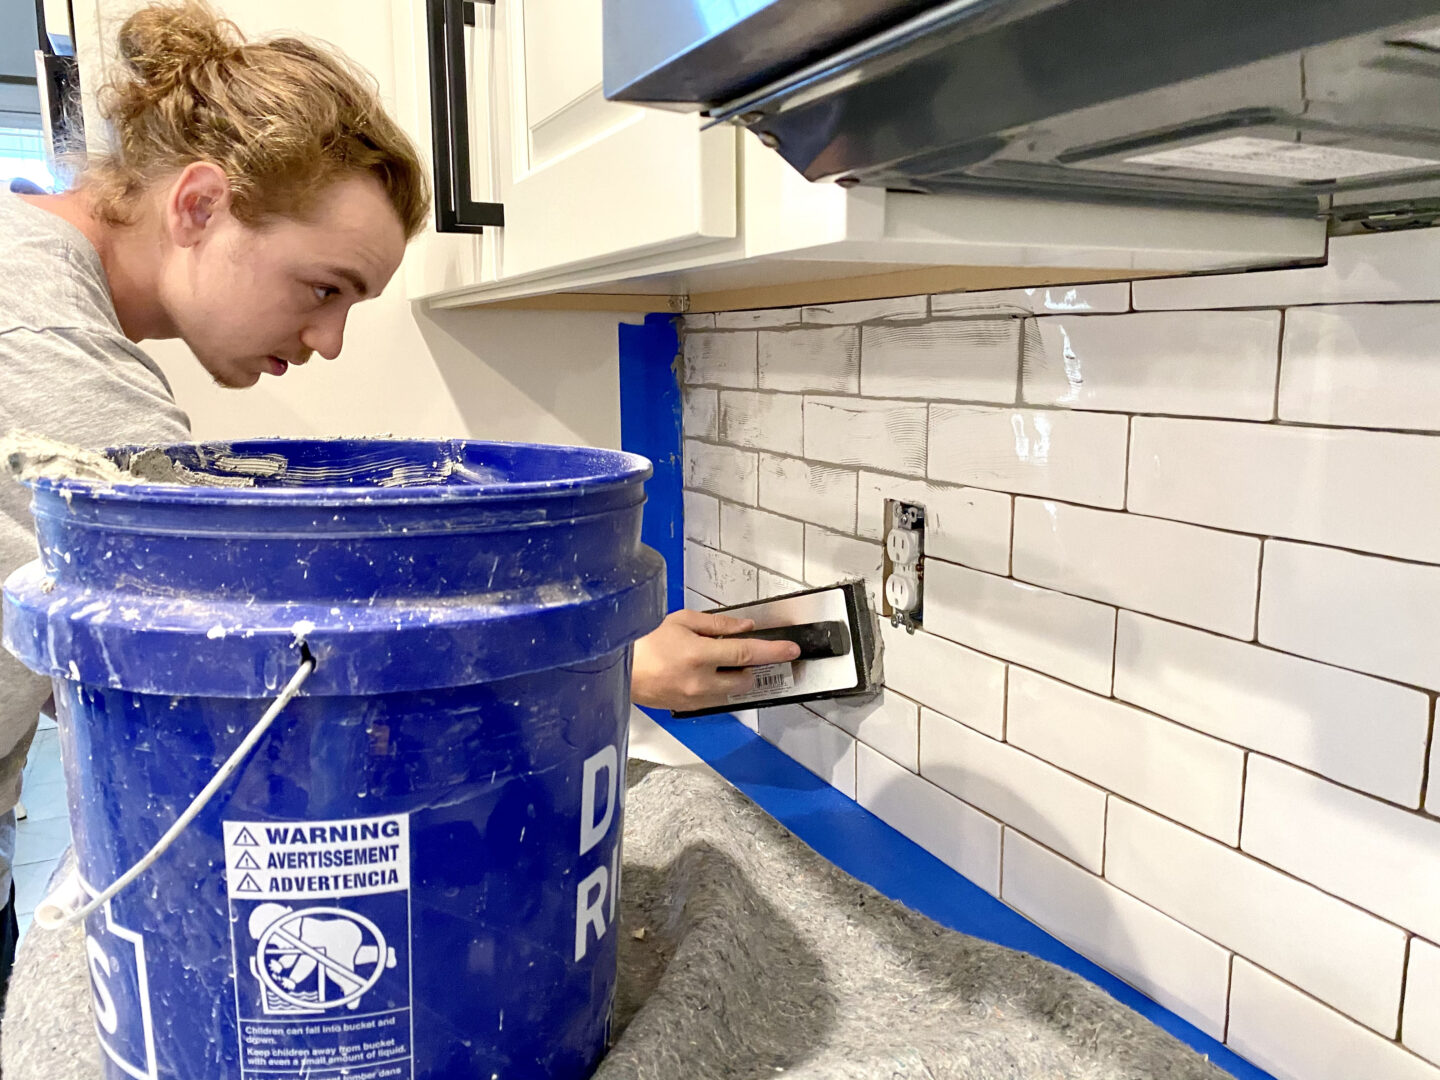
The grout color we chose this time around is called Frost from Mapei. This color is a light, taupey-grey and I just love it! It makes the tile pop a little more! The tile we had up before had white grout, so I loved this change.
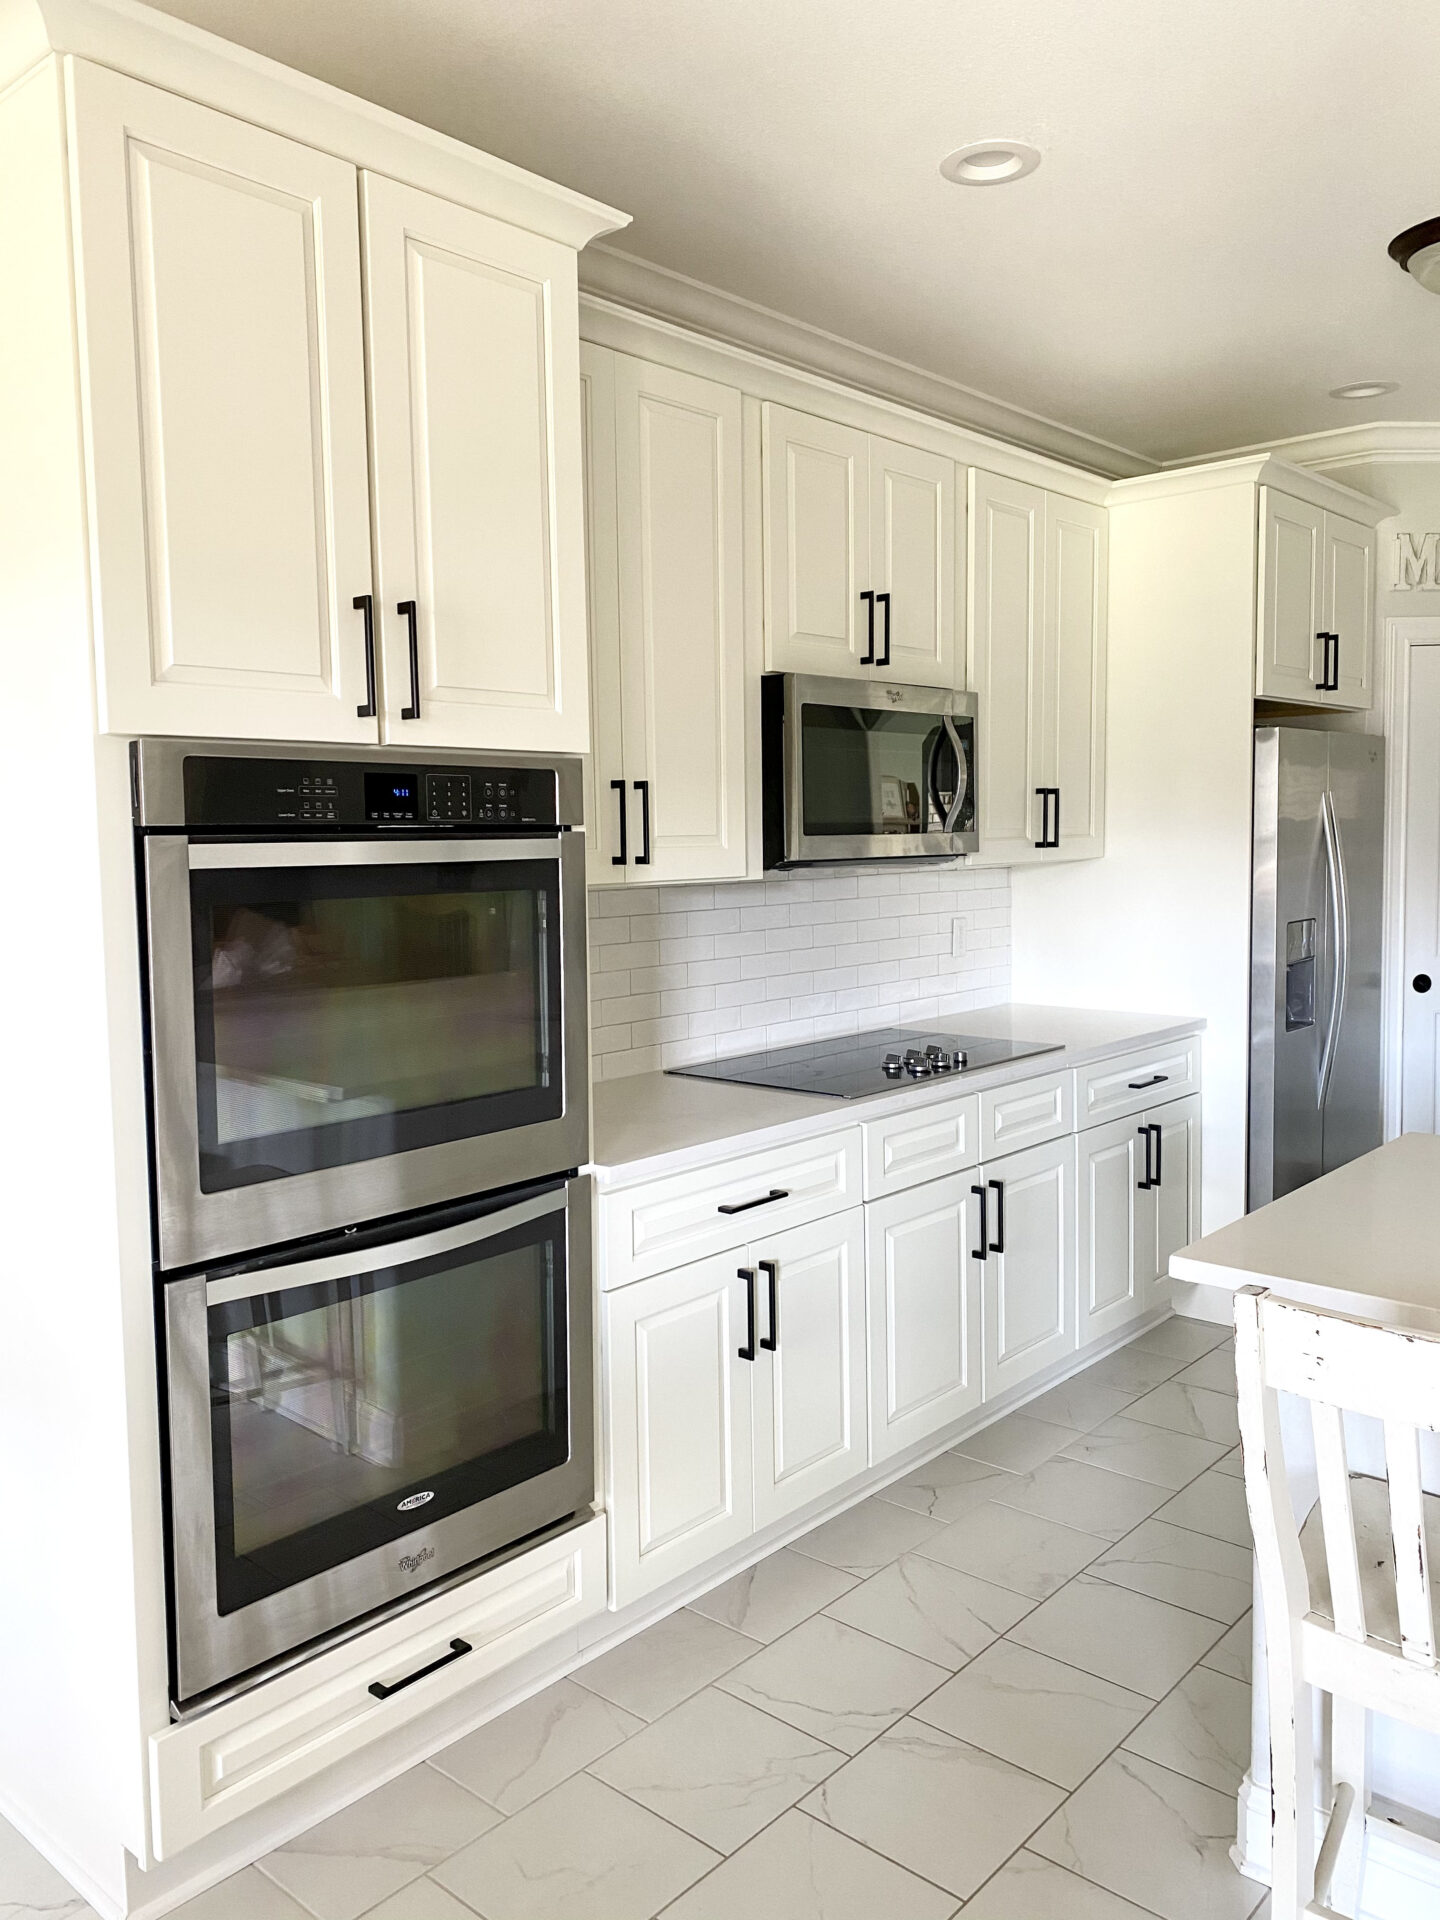
The day the backsplash went up, Wilkes Cabinets & More also fully installed my new faucet, hooked the dishwasher and cooktop back up! I felt like everything was finally coming together just right. What a feeling to finally have your sink and dishwasher back, oh my goodness lol! If you ever go through a Kitchen Renovation like this, you will know exactly what I mean.
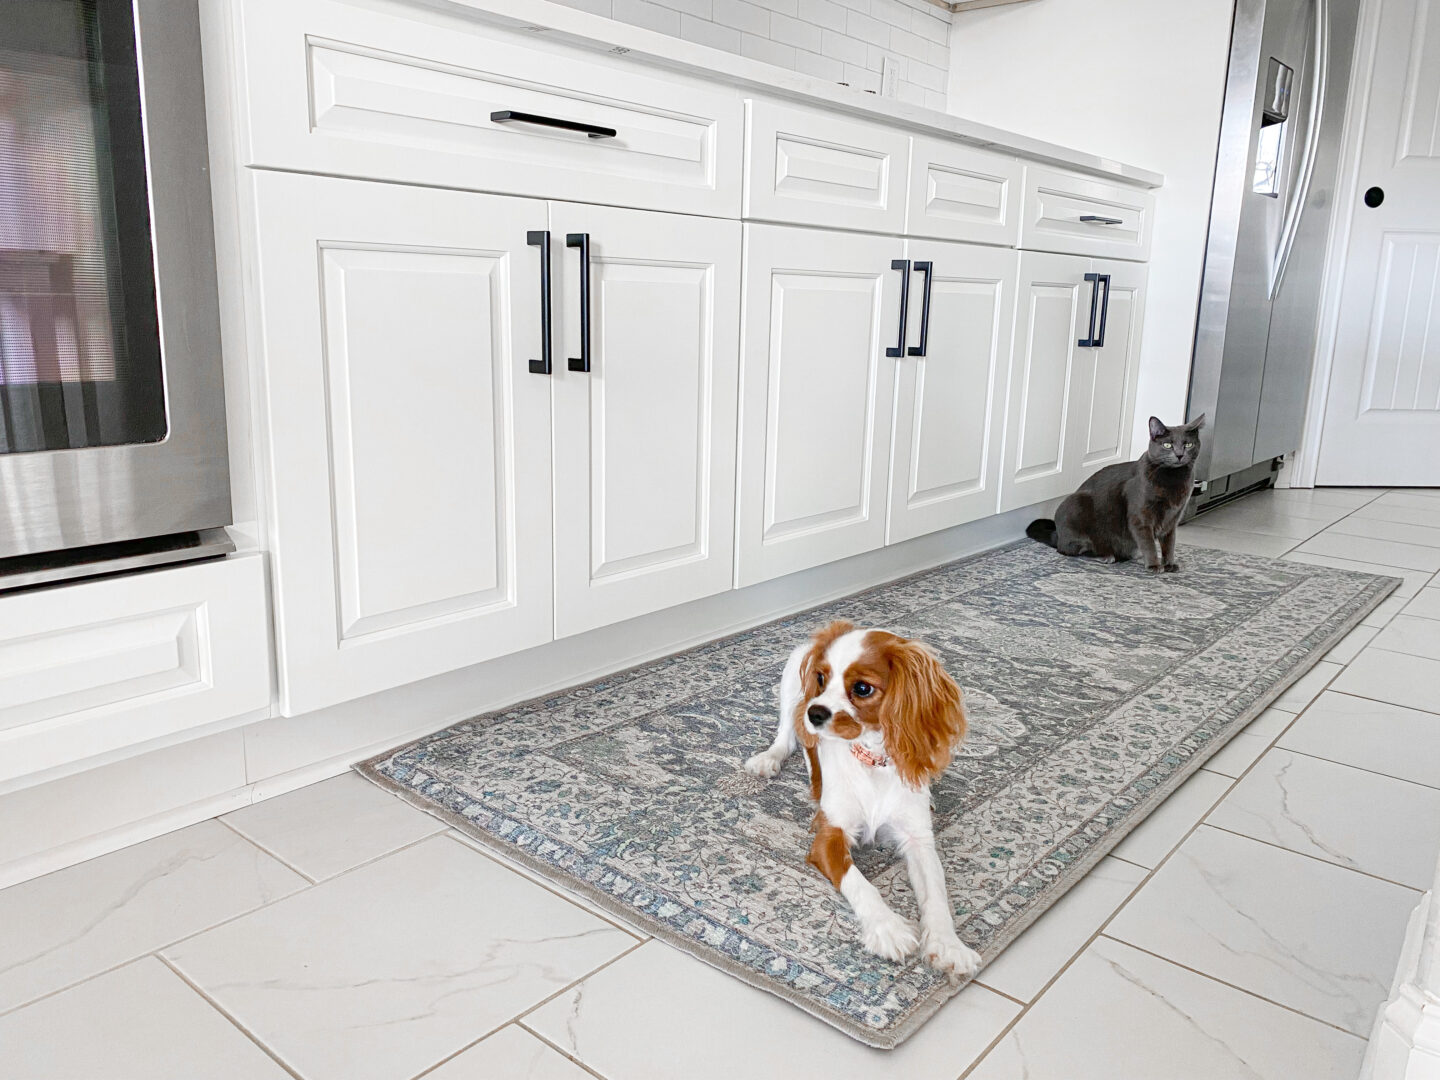
There were two things left that I really wanted to purchase for this space, and the first is a Ruggable rug! I thought about buying two, but that would have definitely been overkill. The one I ordered is the Sima Abalone Rug in the 2.5 X 7′ size. It is just the right size and color for my Kitchen and I could not be happier. Especially with it being machine washable!
Want to know more about Ruggable Rugs? Watch my Unboxing & Review below!
The second thing I wanted to update was actually a lighting fixture, which believe it or not, I installed on my own! The lighting fixture I purchased is the Knollwood 12″ 2-Light Flush Mount fixture from their Home Decorators Collection.
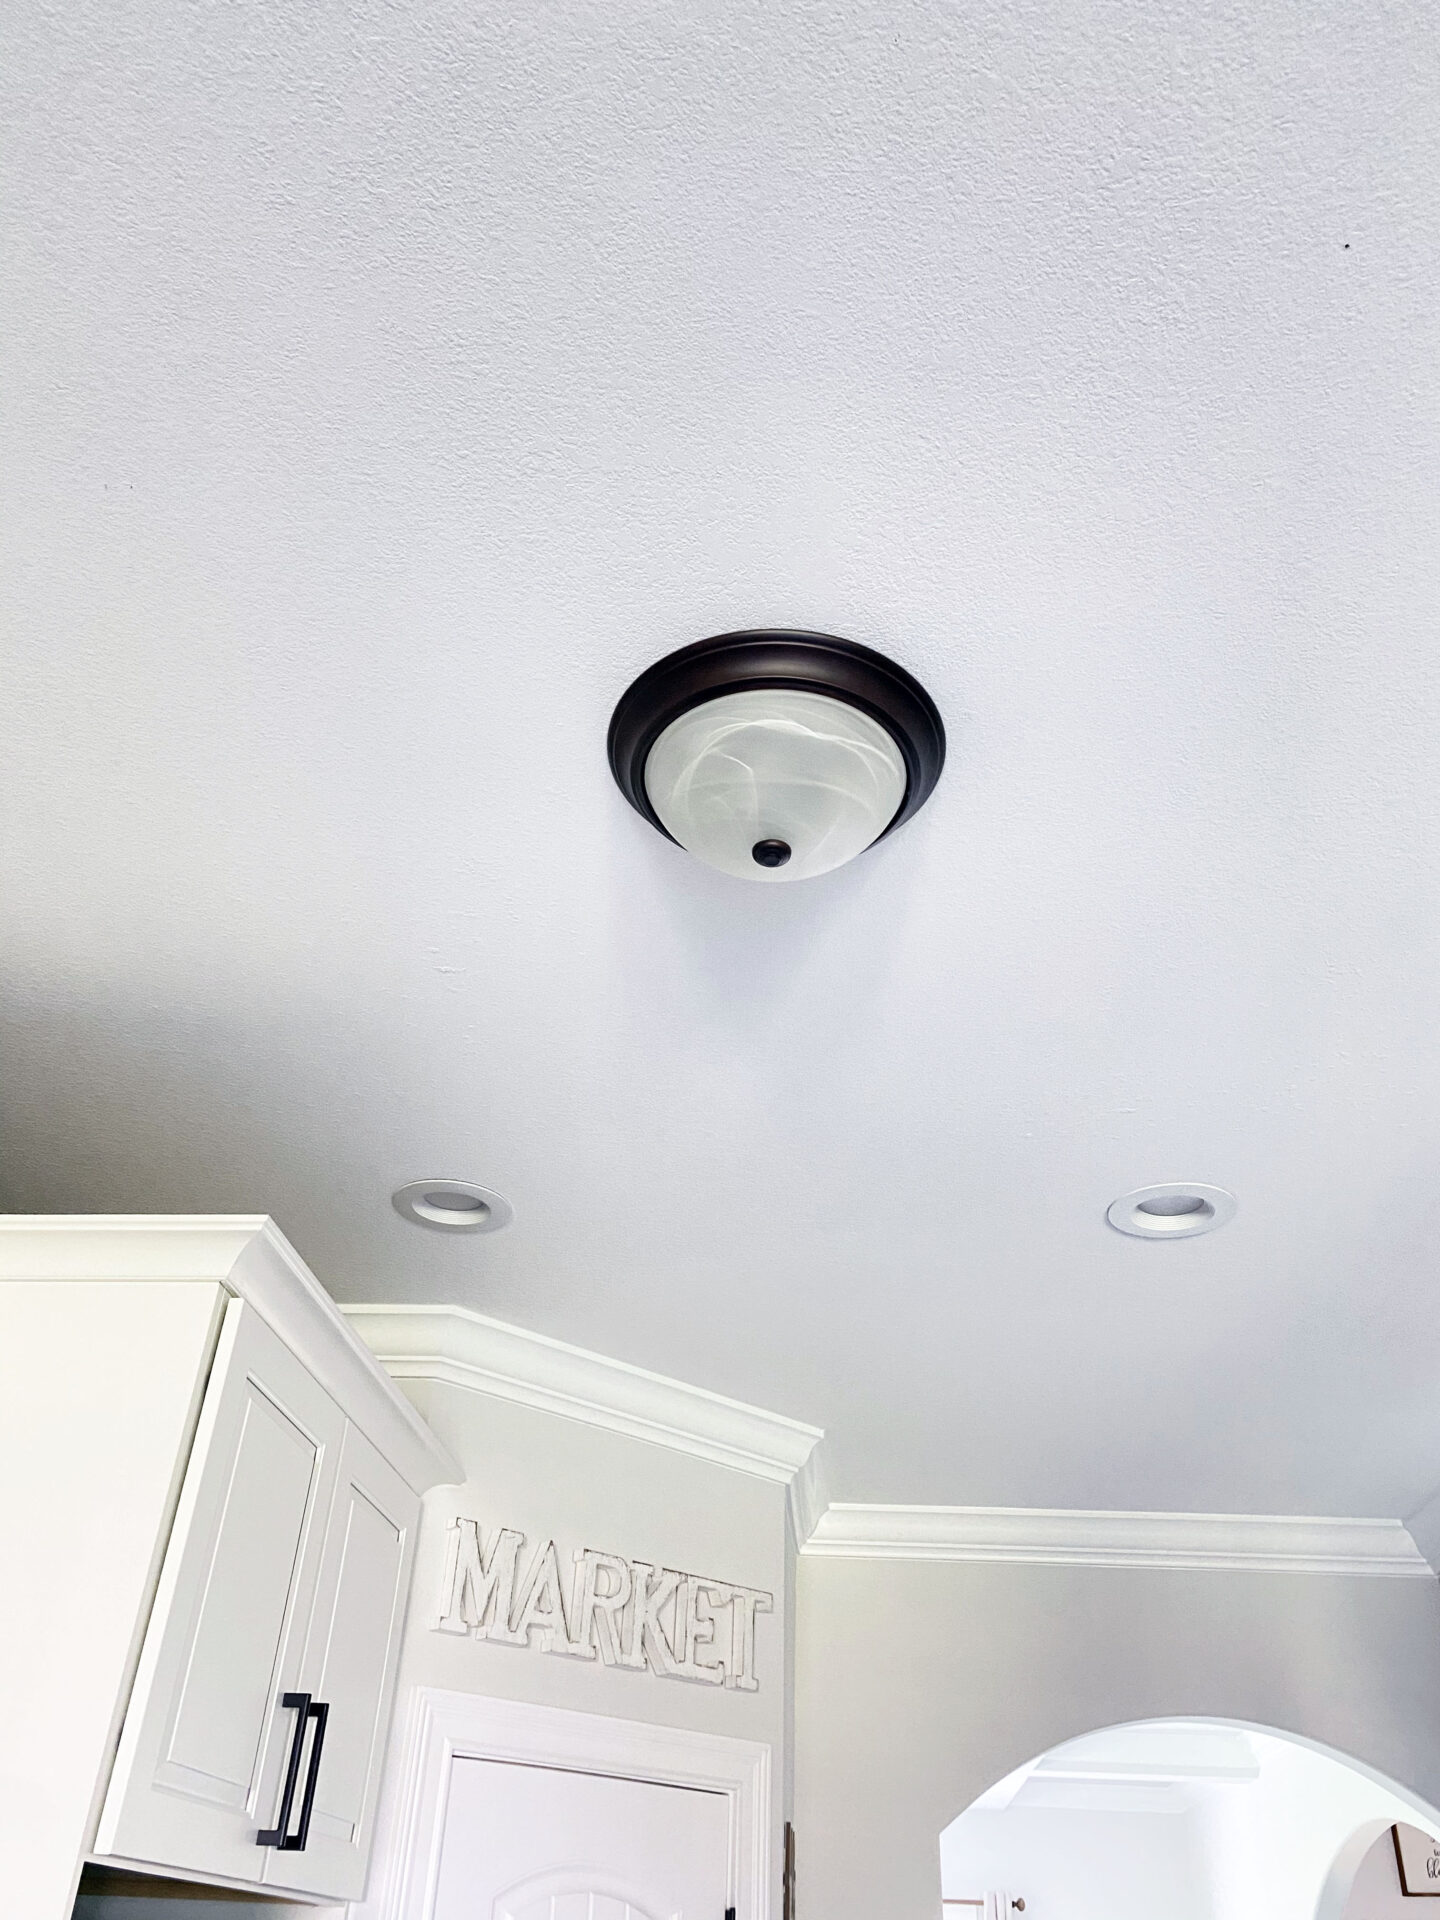
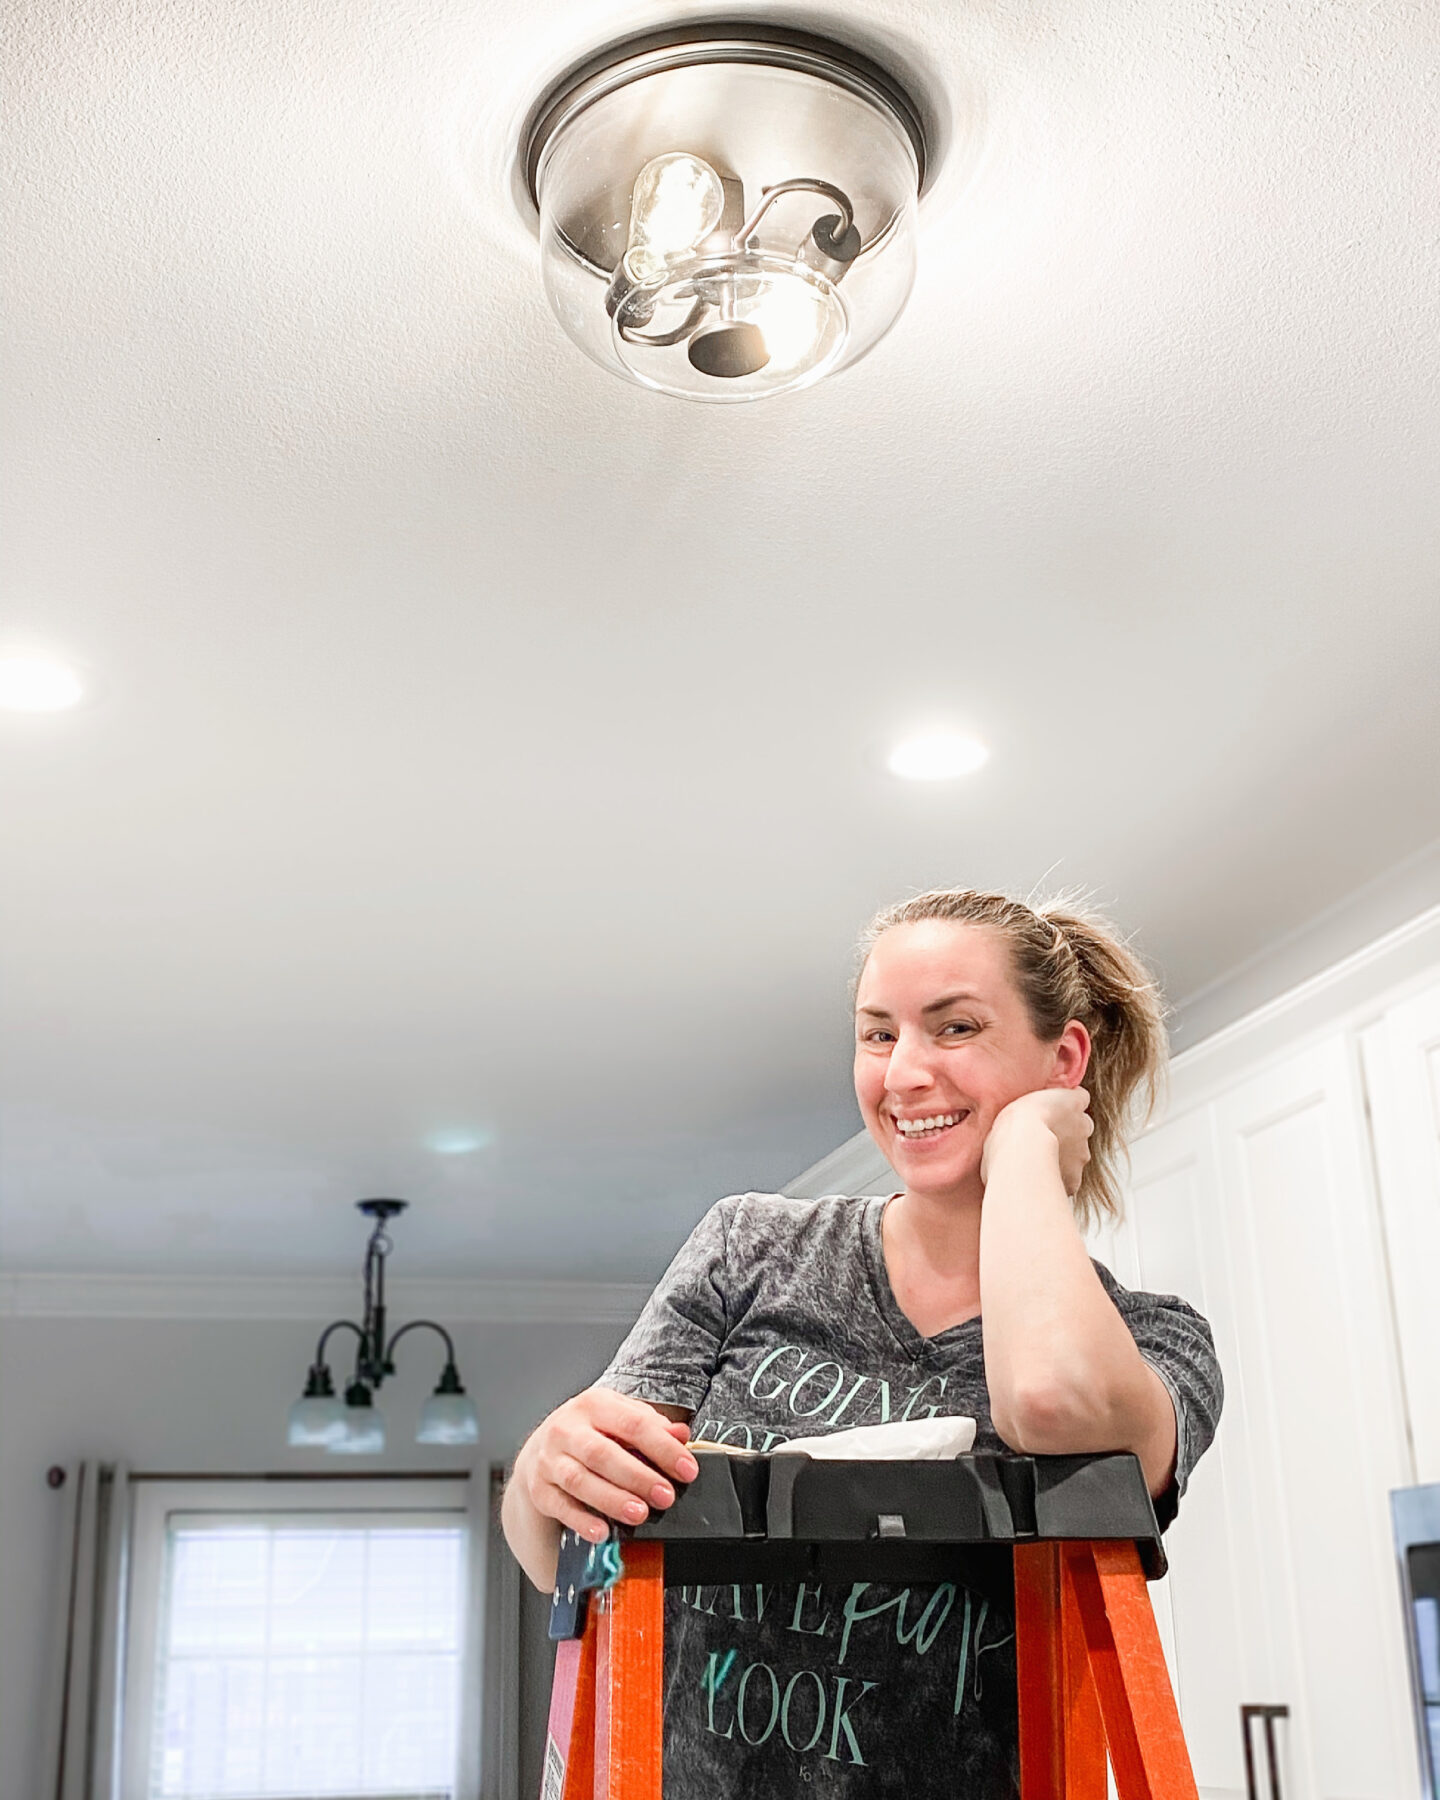
The difference is night and day between these two light fixtures! I absolutely love the new one, especially with those old-time looking bulbs. In fact, I loved the new bulbs so much, I actually ordered even more on Amazon and replaced all our old bulbs on the pendant light fixtures as well!
The Reveal!
Ready for my reveal?! I know I am! I have been so excited waiting to share Our All White Kitchen Renovation with you guys! Please Comment down below to let me know what you think! I’ll be sharing links to particular decor items with each photo below if you want to get a similar look.
Overall, I am in love with how my Kitchen turned out! It is light, bright, and airy. Minimalistic, Farmhouse, Modern…I feel like there are many words to describe this space! It feels like it is officially matched to the rest of our home, and I can’t wait to spend many more years here enjoying it. I’d love to know what your favorite part of this renovation is!
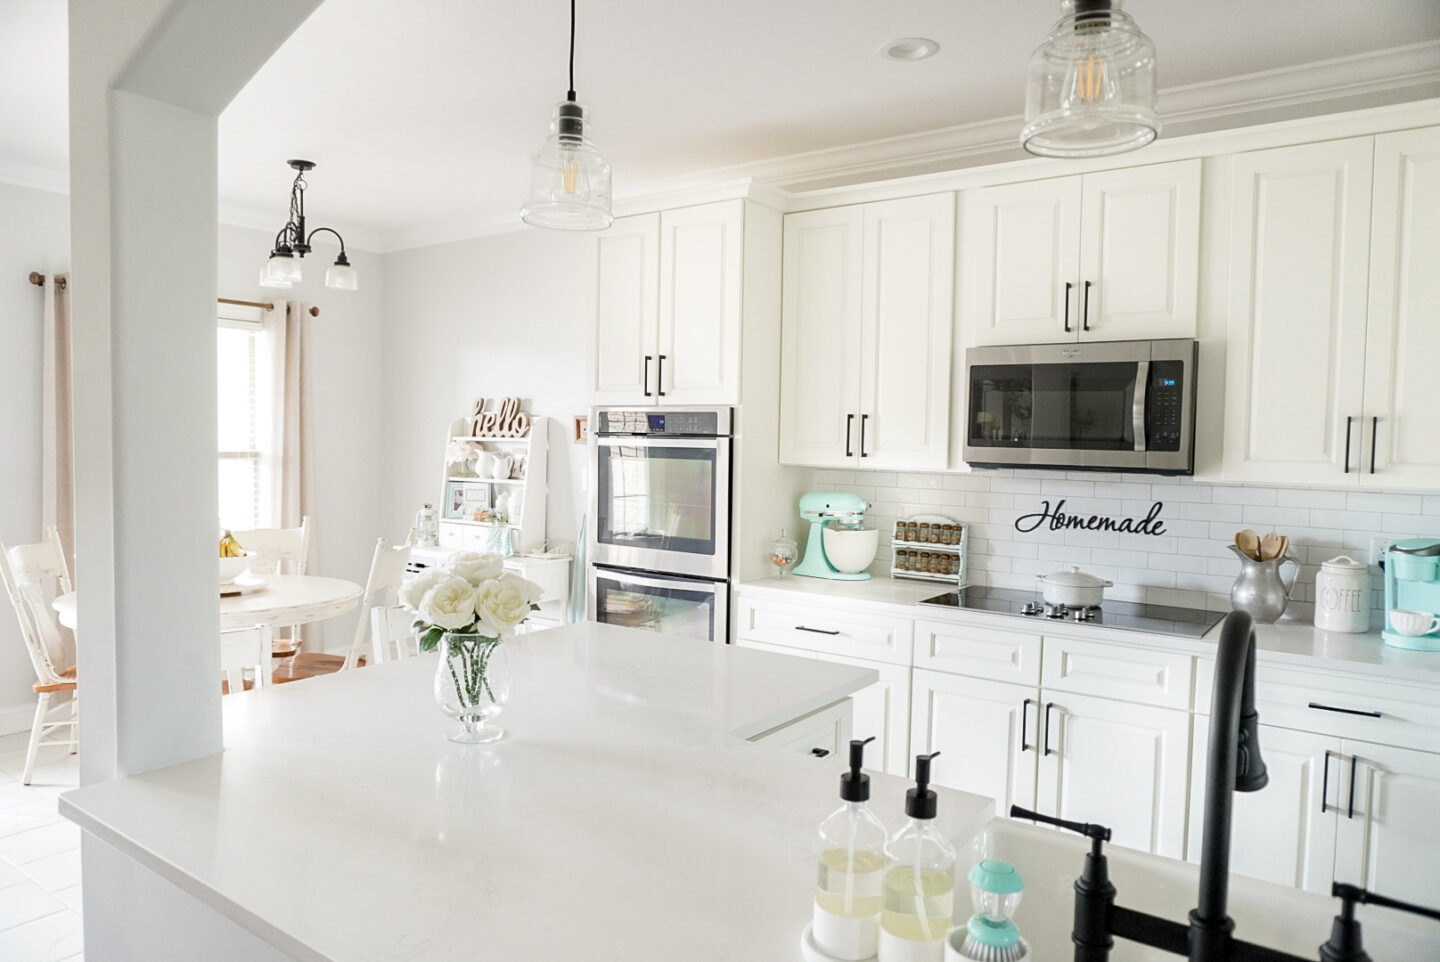
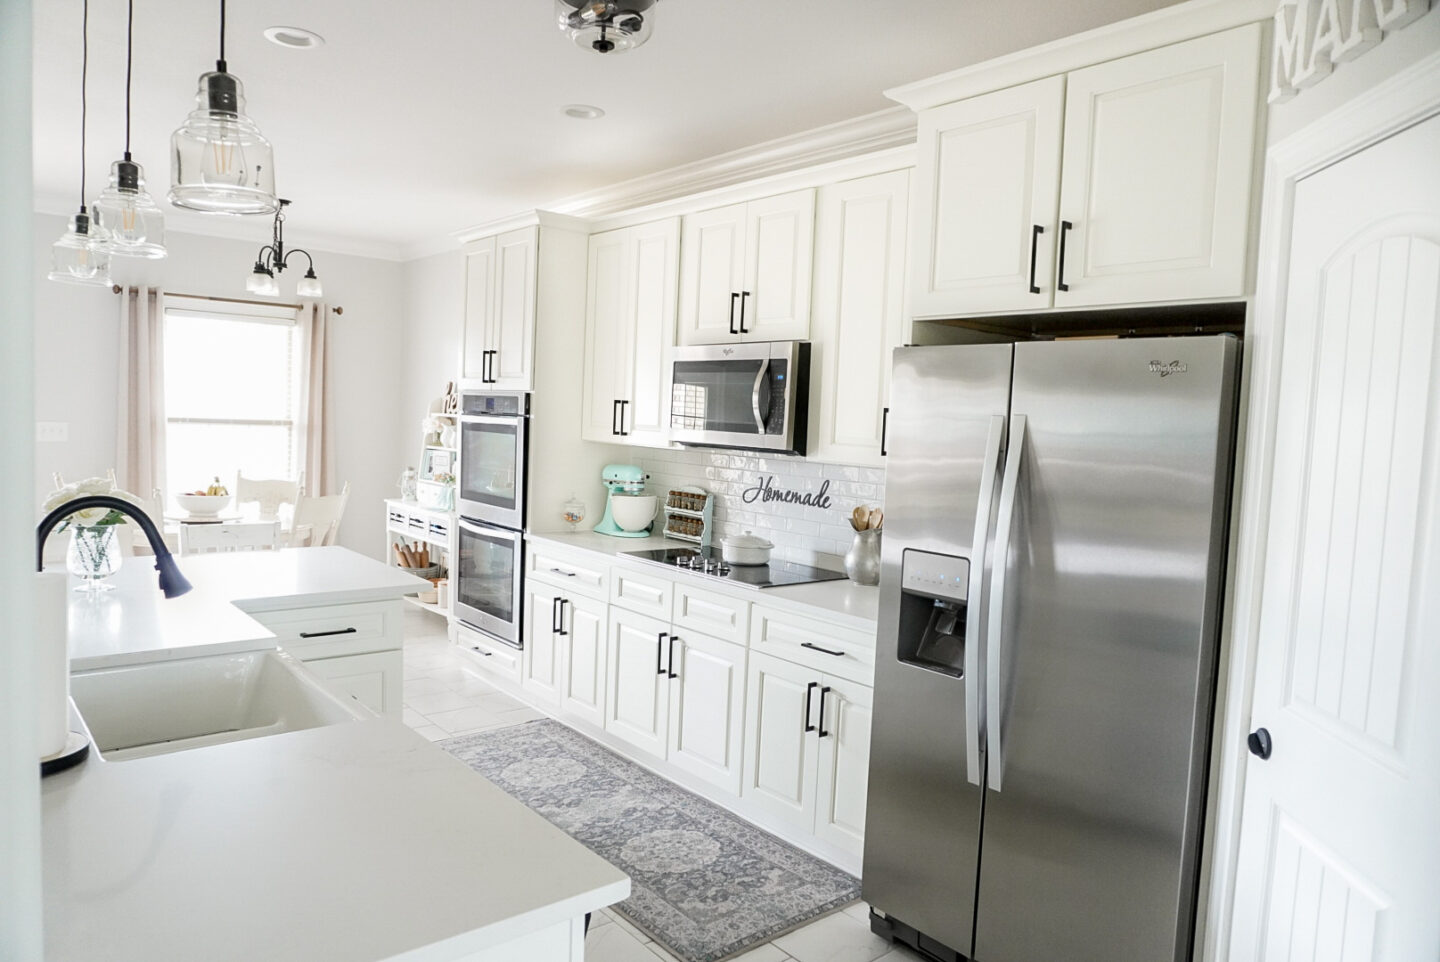
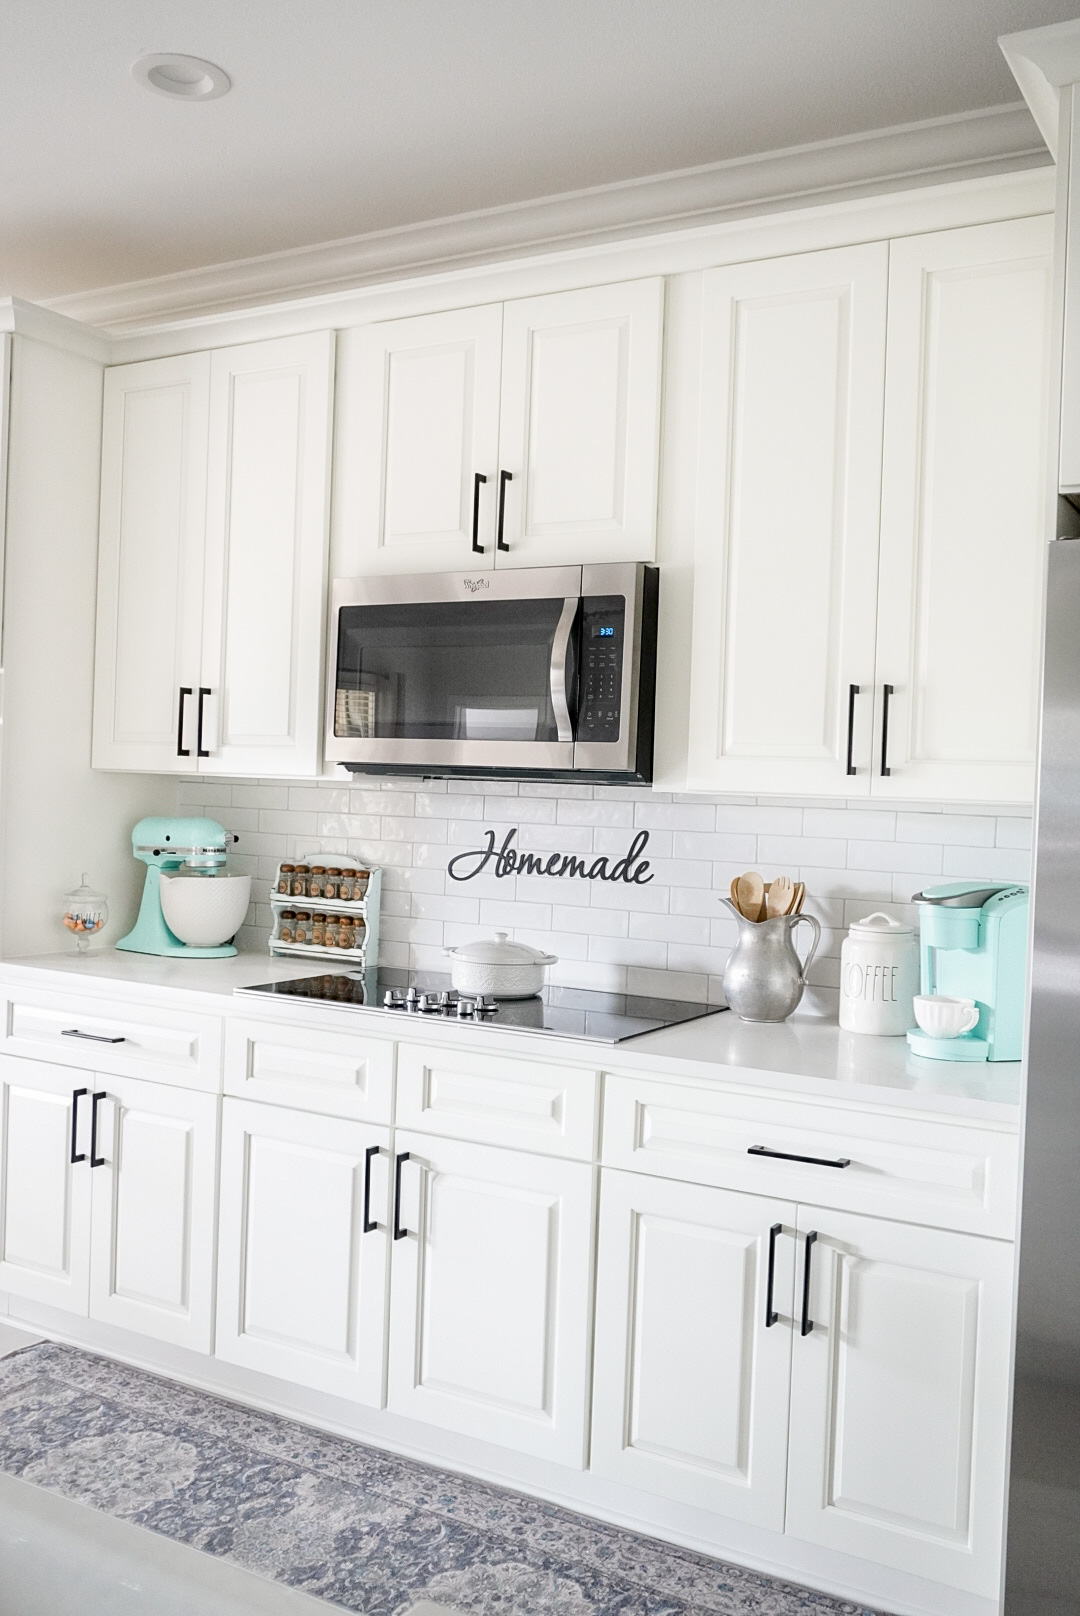
I get this question a lot about my KitchenAid Stand Mixer, but this is the color Ice Blue and it is absolutely gorgeous! It can be paired with so many of their ceramic bowls so that you can get a more custom look! You can check out all of my current bowl collection over at KITCHENAID HOBNAIL BOWL UNBOXING, REVIEW, & MY CURRENT BOWL COLLECTION!
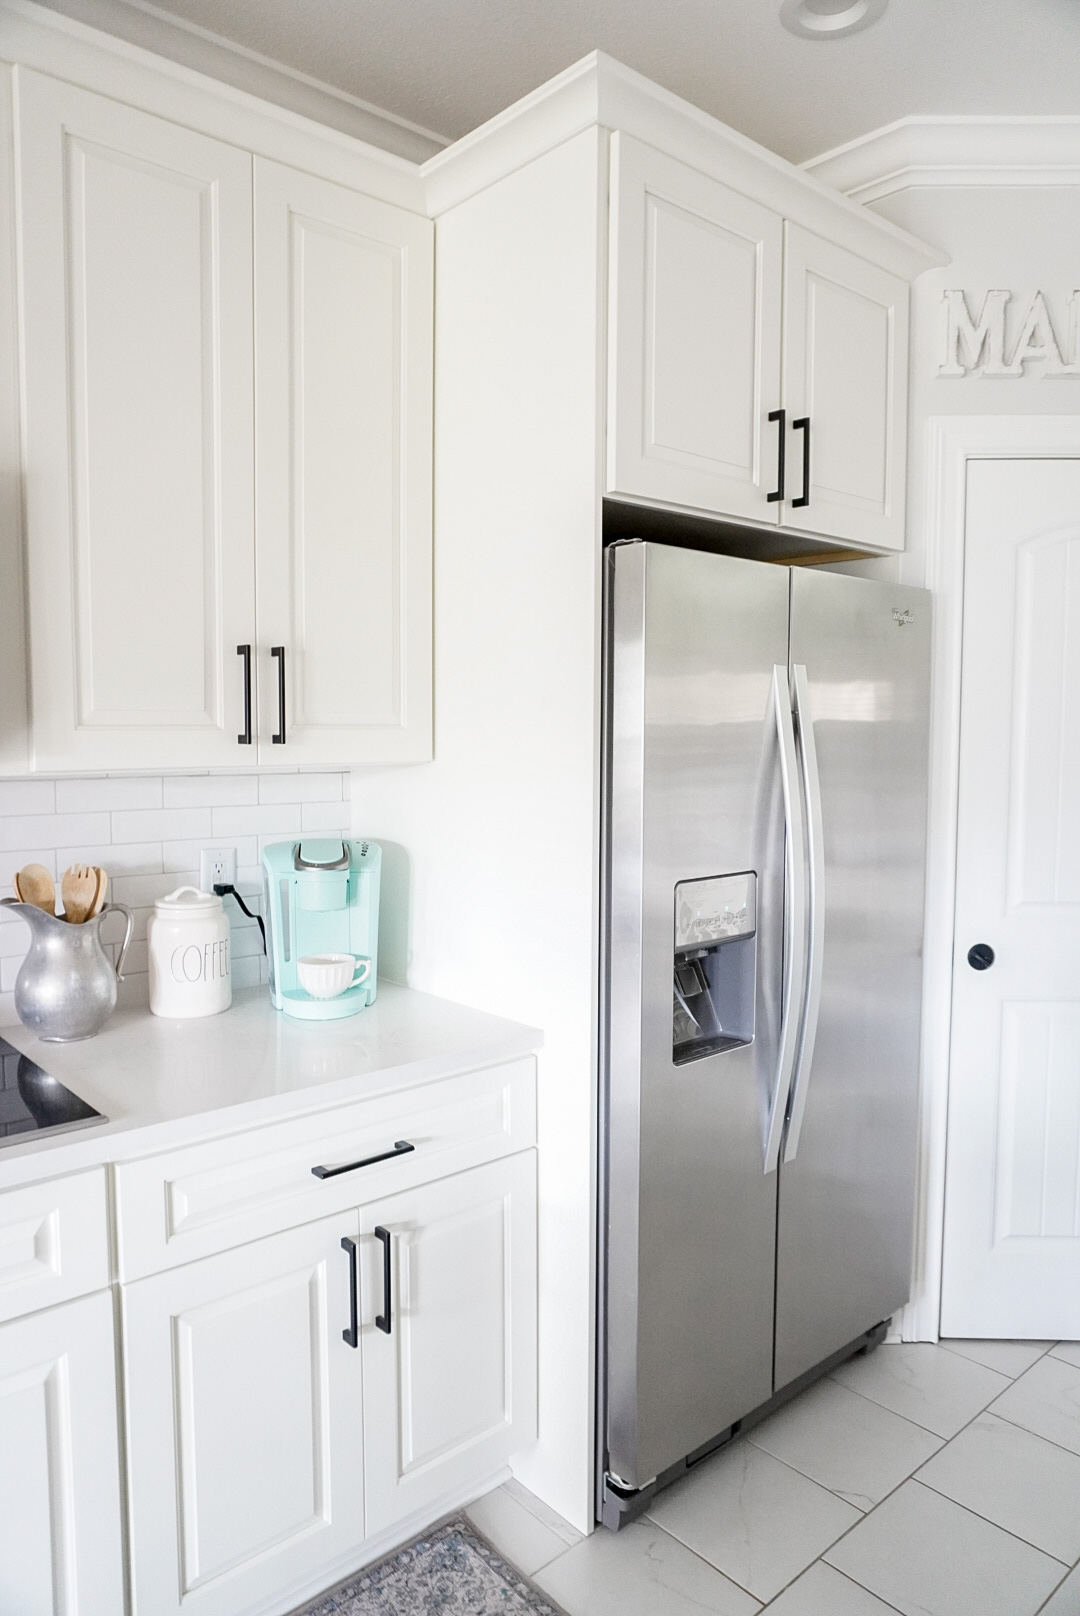
My Keurig Coffee Maker is in the color Oasis, which is a perfect match for my Ice Blue KitchenAid Mixer! I love decorating with Aqua in my Kitchen. It really just makes me happy. Do you have a color that makes you happy just by looking at it?
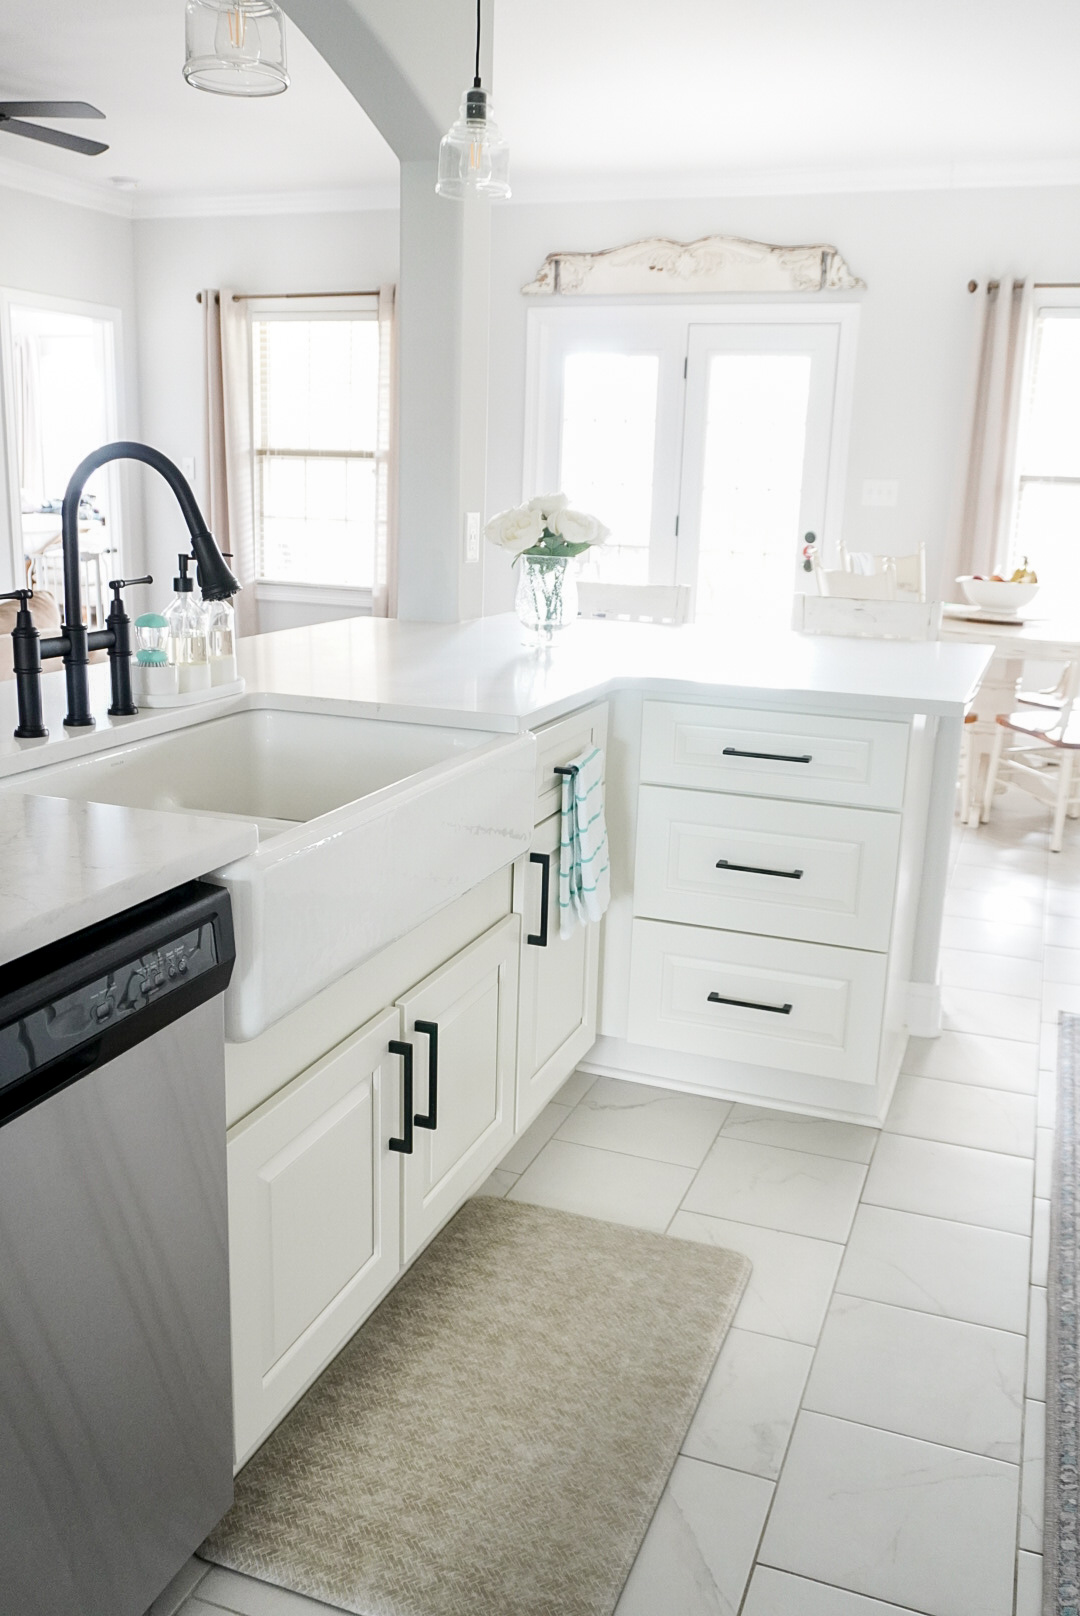
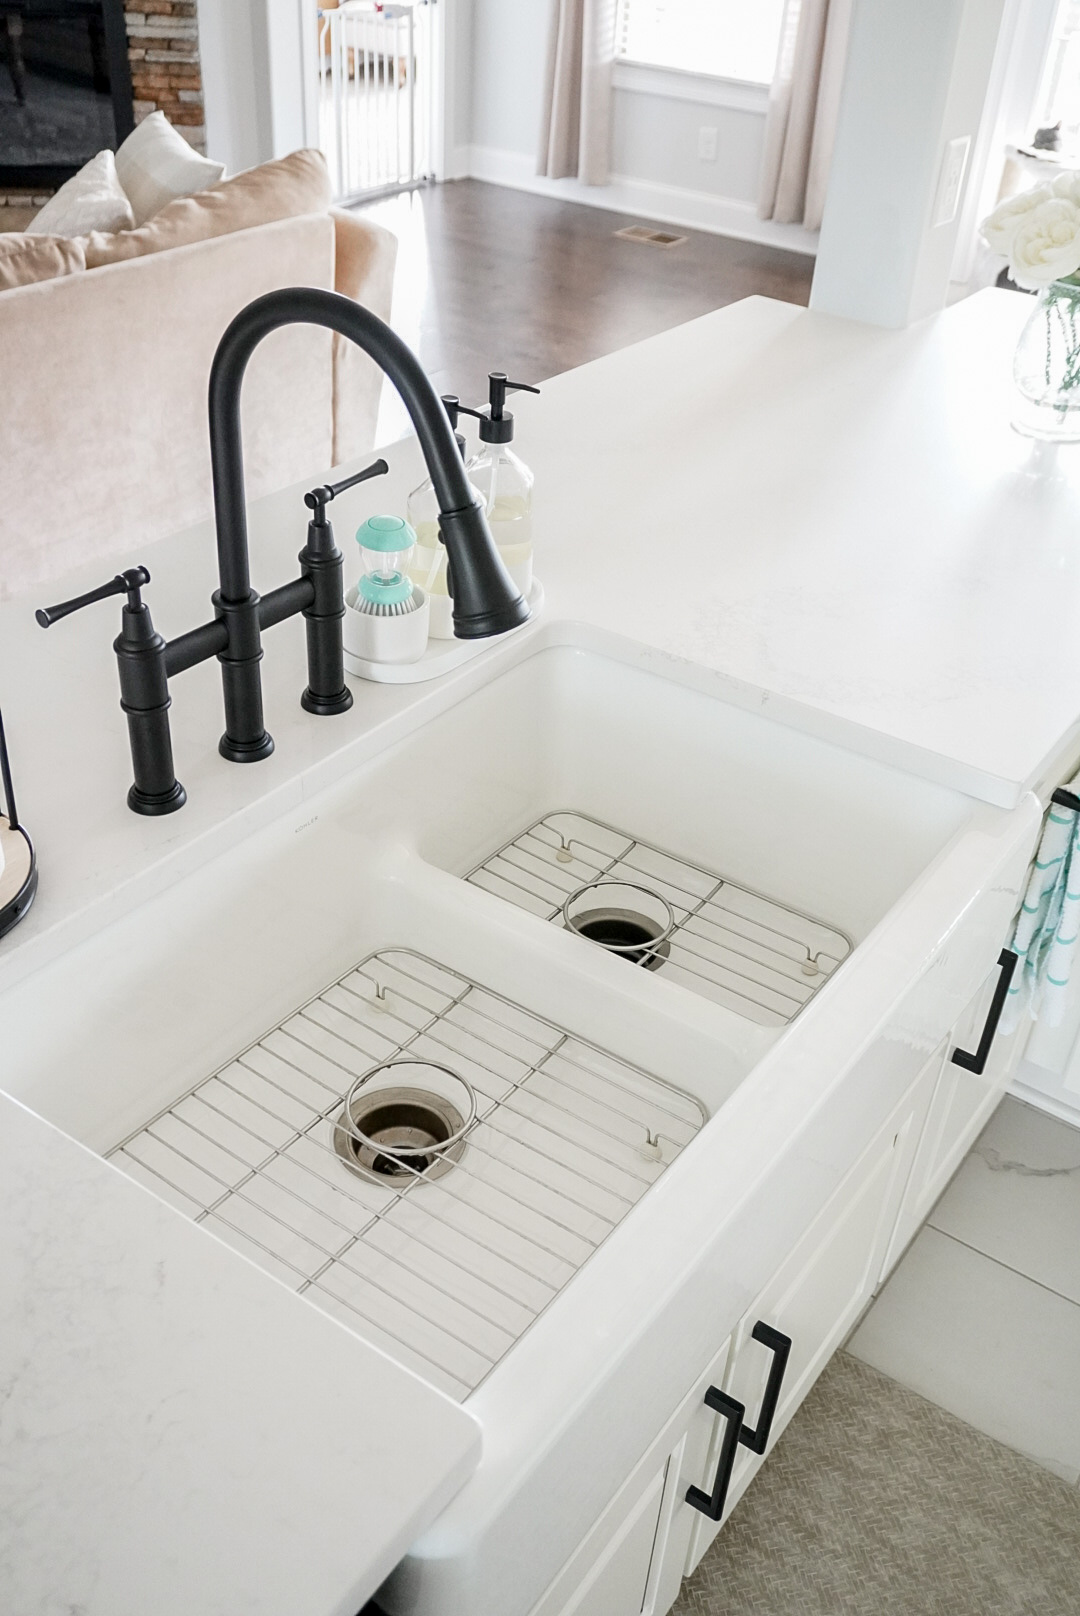
I did have to purchase my drains and my metal sink bowl racks separately from the sink, as those are not included when you purchase your sink. I highly recommend buying these metal protectors for your sink if you get one though! They have definitely saved my sink from scratches and scuffs for sure.
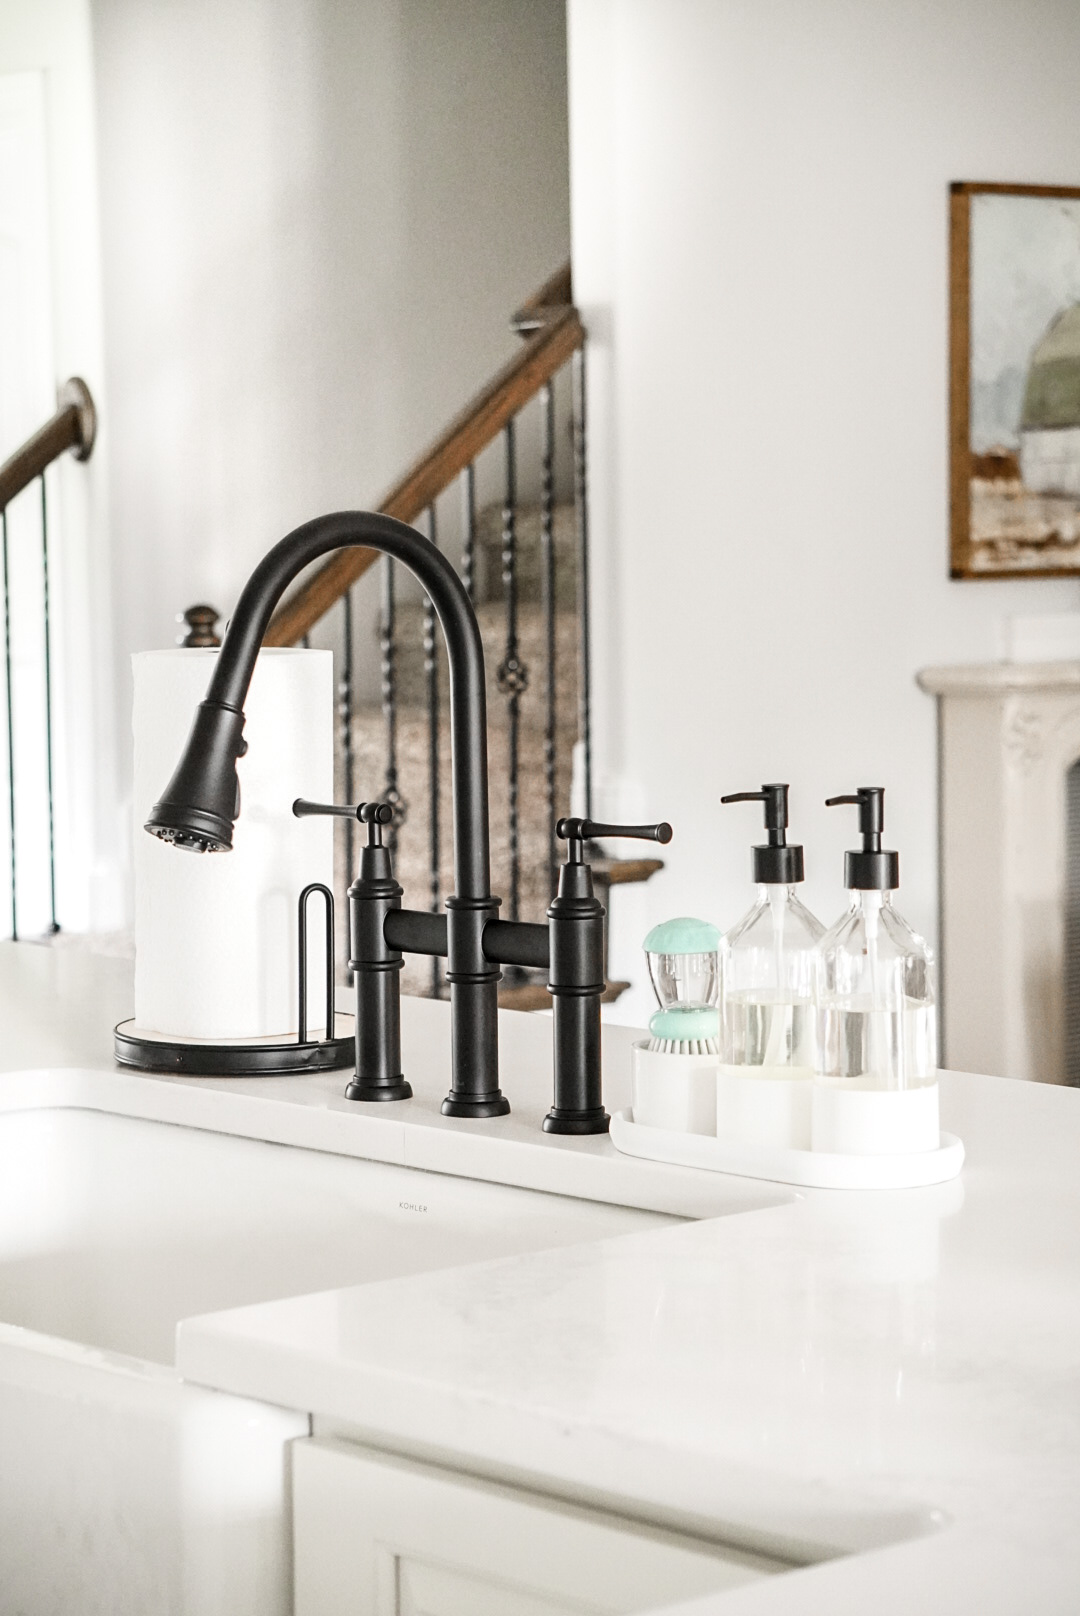
I am so in love with my new Kraüs Kitchen Faucet you guys! This faucet has three different settings for water pressure: Light Pressure with a full stream, Spray Pressure for quickly cleaning things off, and then you have High Pressure which is just insane! You can get grease off instantly with it! I can’t recommend this faucet enough. It’s gorgeous, and extremely functional. Perfect for a farmhouse sink!
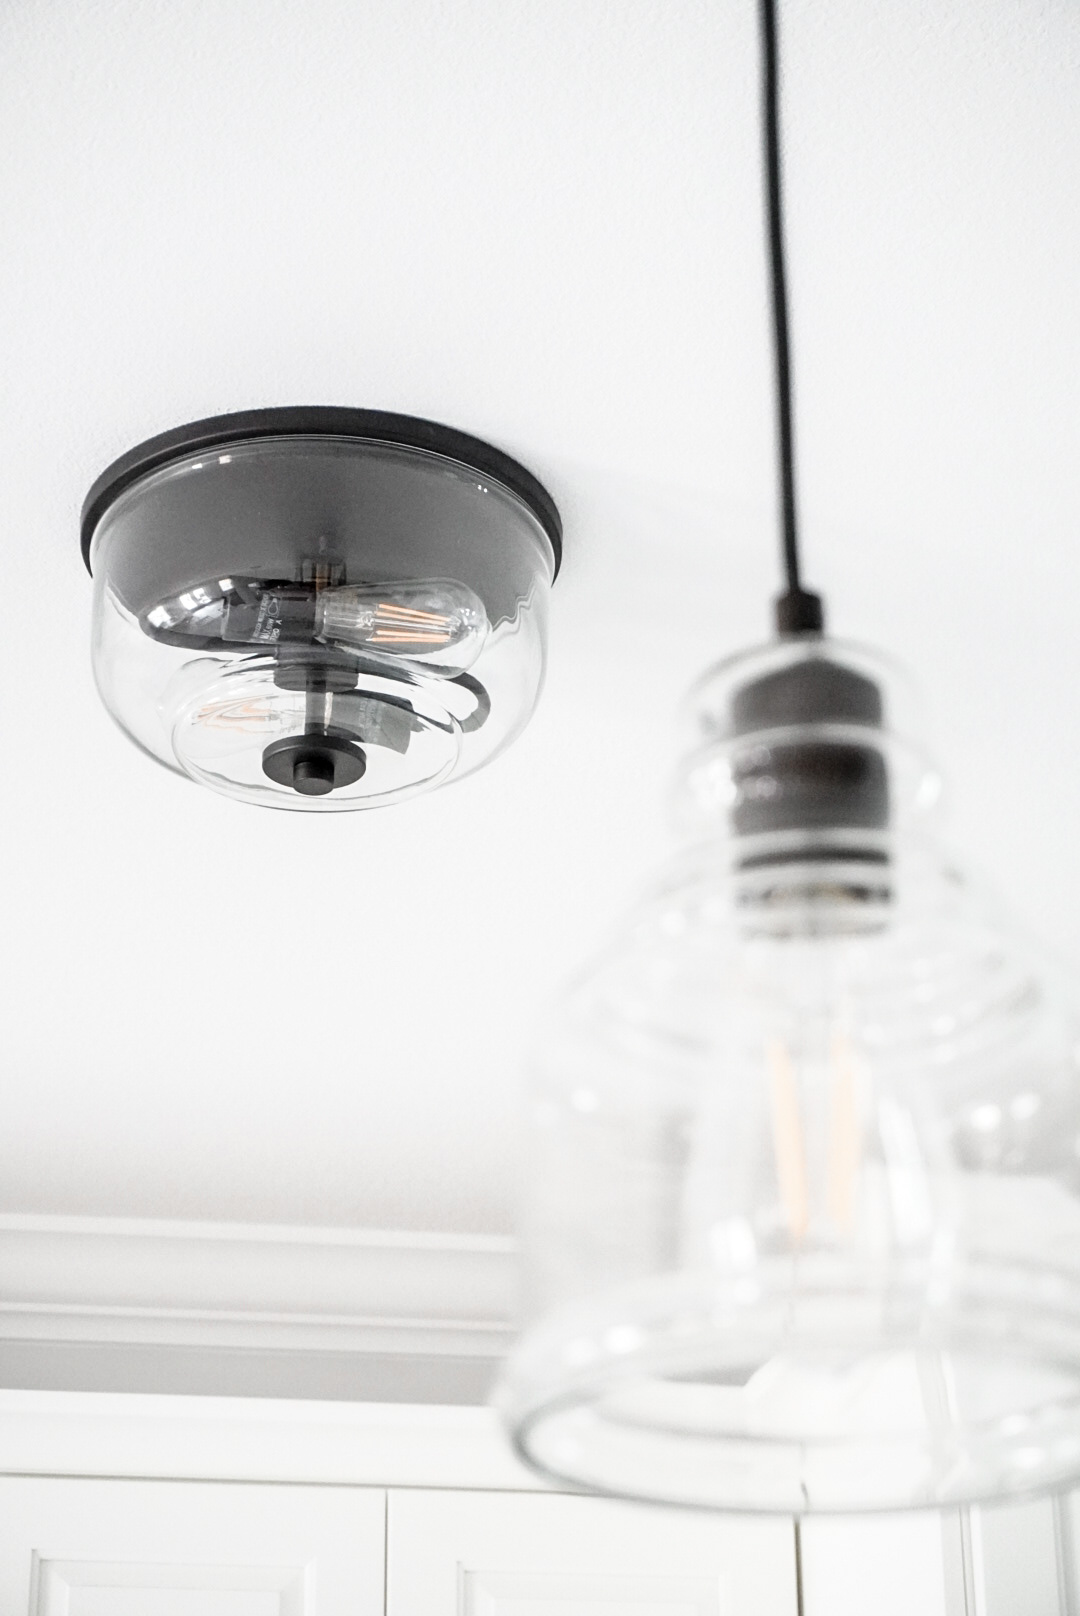
My new light fixture gives off a great amount of light, it’s stylish, and I love the clear glass which exposes the old-time light bulbs! It’s a perfect match for my pendant light fixtures.
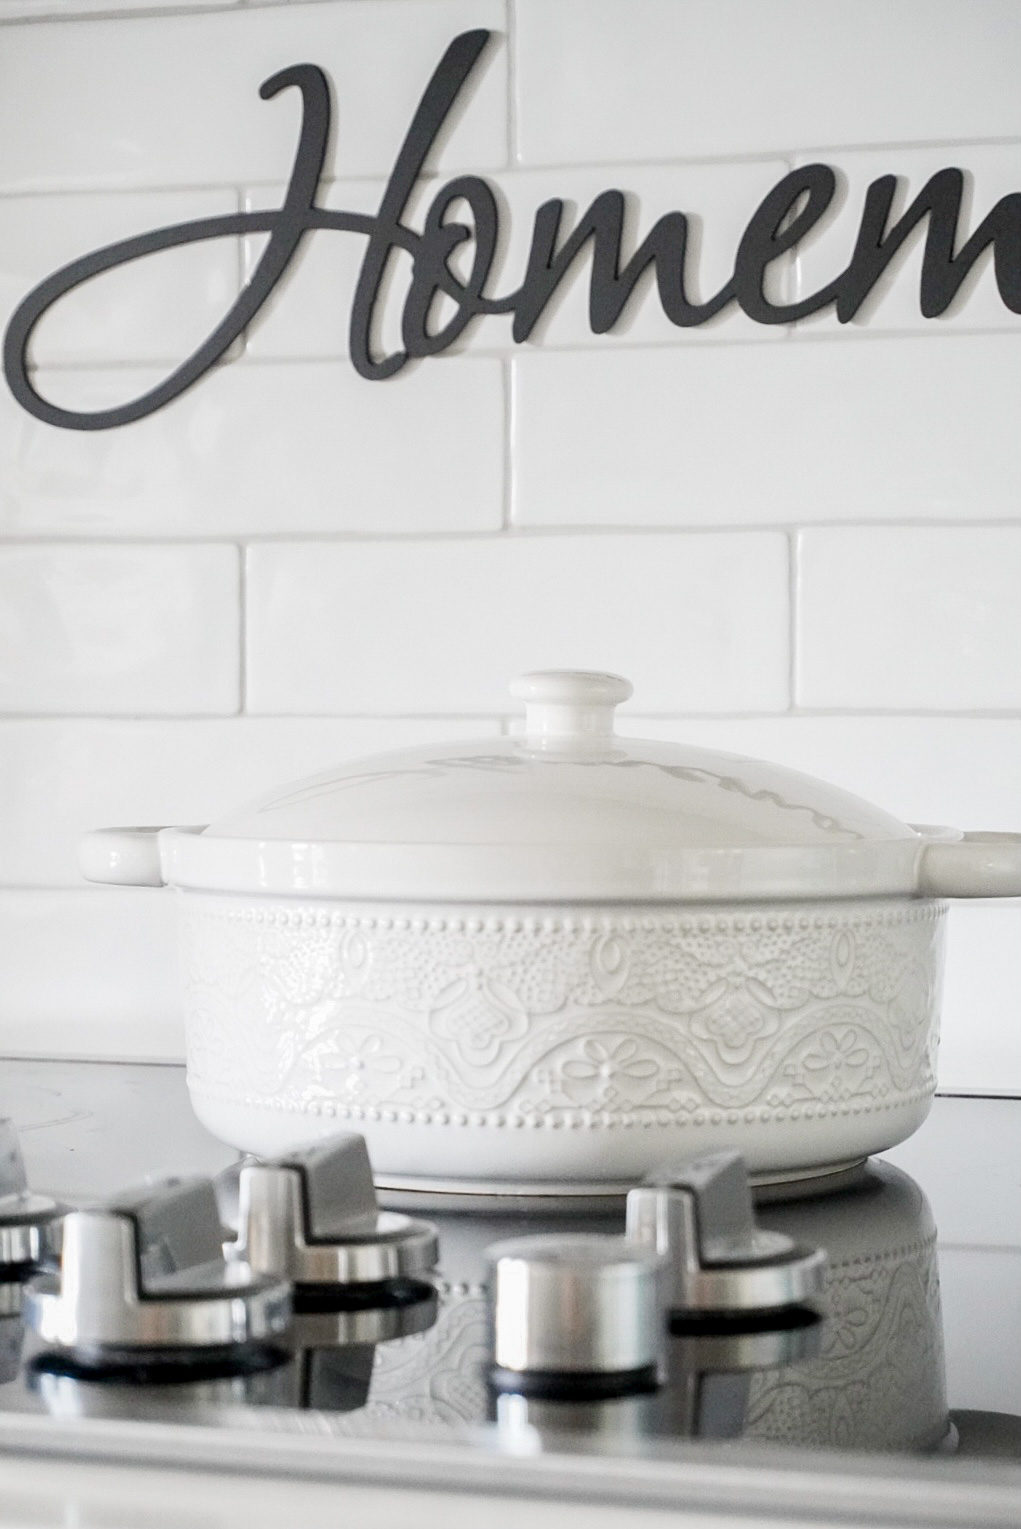
I loved adding on little touches here and there that were totally different from my previous decor. A couple of these changes included this beautiful Casserole Dish my Mom gifted me, as well as this awesome metal “Homemade” sign I purchased on Amazon! These two things helped add more simplicity to this space, which I love.
If you loved this blog post and our All White Kitchen Renovation, let me know below in the comments and share the below pin to Pinterest! Thank you so much for reading all the way through to the end. I hope you will join me for my next Blog Post coming soon!


I love it! This is the the kitchen that was meant to be here. The cabinet color is perfect not pure white and still has some warmth.
Author
Thank you so much!! I totally agree ?